How To Change A Car Ac Filter
Let's talk about something crucial for your driving comfort and even your car's longevity: the cabin air filter, often mistakenly called the AC filter. Changing it isn’t just about breathing fresher air; it’s about keeping your HVAC (Heating, Ventilation, and Air Conditioning) system working efficiently. Many DIYers overlook this simple maintenance task, but neglecting it can lead to reduced airflow, musty odors, and even strain on your AC compressor. This guide will walk you through the process, assuming you've got some wrenching experience and aren't afraid to get your hands a little dirty.
Background: Your Car's HVAC System
Before diving into the replacement process, it’s helpful to understand the basics of your car's HVAC system. The system's primary function is to regulate the temperature and airflow inside the cabin. Think of it as a closed-loop system. Outside air is drawn into the vehicle, either through the cowl vent at the base of the windshield (in fresh air mode) or recirculated from within the cabin (in recirculation mode). This air then passes through the evaporator core, which cools the air using refrigerant. The refrigerant, typically R-134a or the newer R-1234yf, undergoes a phase change from liquid to gas, absorbing heat in the process. This cooled air is then directed into the cabin through a series of ducts and vents.
The heater core, located near the evaporator, provides heat. Hot engine coolant is circulated through the heater core, transferring heat to the air passing through it. By mixing cooled and heated air, the system can achieve the desired temperature. The blower motor is responsible for forcing air through the system. It's a small electric motor with a fan attached, and its speed is controlled by the fan speed setting in your car.
The cabin air filter sits somewhere along this airflow path, typically between the outside air intake and the evaporator core. Its job is to remove particulate matter, pollen, dust, and other contaminants from the air before it enters the cabin and the HVAC system components.
Technical Breakdown: Cabin Air Filter Replacement
Here’s a step-by-step guide to replacing your cabin air filter. Remember, the exact location of the filter housing varies depending on your vehicle make and model. Consult your owner's manual or a service manual for specific instructions.
1. Preparation & Safety
First, gather your tools and supplies. You'll typically need:
- A new cabin air filter (be sure to get the correct one for your car!)
- A screwdriver (usually Phillips head or flathead, or both)
- A socket set (possibly for removing trim panels)
- A flashlight or work light
- Gloves (optional, but recommended)
- A vacuum cleaner (optional, for cleaning the filter housing)
Safety First: Always turn off the engine and remove the key from the ignition before starting any work on your car. If the filter housing is located near the battery, consider disconnecting the negative battery terminal to prevent accidental shorts.
2. Locating the Filter Housing
This is often the trickiest part. Common locations include:
- Behind the glove box: This is the most common location. You'll typically need to empty the glove box and then release some retaining clips or screws to allow it to swing down or be removed entirely.
- Under the dashboard (passenger side): Sometimes, the filter housing is located behind a panel under the dashboard. You may need to remove some screws or clips to access it.
- Under the hood: In some vehicles, the filter is located in a housing near the cowl vent, under the hood.
Refer to your vehicle's service manual for the precise location and removal instructions. Search online forums specific to your vehicle make and model for tips and tricks shared by other owners.
3. Accessing the Filter
Once you've located the filter housing, carefully remove any screws, clips, or panels that are blocking access. The filter housing itself will usually have a cover secured by clips or screws. Be gentle when removing these to avoid breaking them.
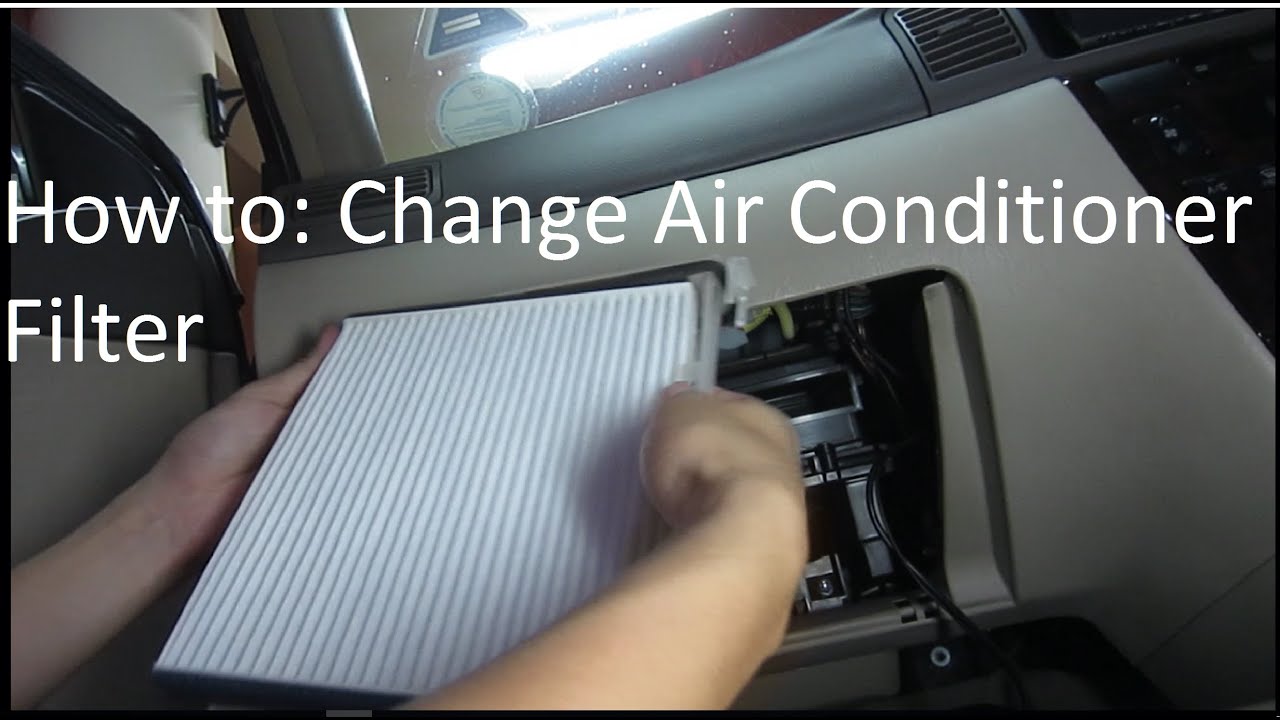
4. Removing the Old Filter
With the filter housing open, you should see the old cabin air filter. Note the orientation of the filter before removing it. Typically, there will be an arrow on the filter indicating the direction of airflow. You'll want to install the new filter with the arrow pointing in the same direction.
Carefully remove the old filter. Be prepared for a cloud of dust and debris! Avoid shaking the filter inside the car. Dispose of the old filter properly.
5. Cleaning the Filter Housing
Now's a good time to clean the filter housing. Use a vacuum cleaner to remove any loose dirt, leaves, or other debris that may have accumulated inside. A clean housing will help prevent contaminants from reaching the new filter prematurely.
6. Installing the New Filter
Install the new cabin air filter, making sure the airflow arrow is pointing in the correct direction. Ensure the filter is properly seated in the housing.
7. Reassembling the Filter Housing
Replace the filter housing cover and secure it with the clips or screws you removed earlier. Make sure the cover is properly sealed to prevent air leaks.
8. Reinstalling the Glove Box/Panels
Reinstall the glove box or any panels you removed to access the filter housing. Ensure everything is securely fastened.
9. Final Check
Start the engine and turn on the HVAC system. Check that the airflow is strong and that there are no unusual noises. If you notice any issues, double-check that the filter is installed correctly and that all the housing components are properly sealed.
Common Issues and Maintenance Concerns
- Incorrect Filter Size: Always double-check that you're using the correct cabin air filter for your vehicle. An incorrectly sized filter won't seal properly and can allow unfiltered air into the system.
- Broken Clips/Screws: The plastic clips and screws that hold the filter housing together can become brittle and break over time. Be gentle when removing them, and consider having replacements on hand.
- Mold and Mildew: If you live in a humid climate, mold and mildew can grow on the cabin air filter and evaporator core. This can cause a musty odor. Consider using a disinfectant spray designed for automotive HVAC systems to kill mold and mildew.
- Reduced Airflow: A clogged cabin air filter can significantly reduce airflow through the HVAC system. This can make it difficult to cool or heat the cabin effectively.
Do's and Don'ts / Best Practices
Do:
- Consult your owner's manual or a service manual for specific instructions.
- Note the orientation of the old filter before removing it.
- Clean the filter housing before installing the new filter.
- Replace the cabin air filter at least once a year, or more often if you drive in dusty conditions.
- Consider using a high-quality filter with activated carbon for better odor control.
Don't:
- Force anything. If you're having trouble removing a panel or clip, double-check that you've removed all the necessary fasteners.
- Over-tighten screws. Plastic parts can easily be stripped.
- Run the HVAC system without a cabin air filter installed. This can allow debris to damage the evaporator core.
- Ignore signs of a clogged filter, such as reduced airflow or a musty odor.
Conclusion
Replacing your cabin air filter is a simple but essential maintenance task that can improve your driving comfort and extend the life of your car's HVAC system. While the location of the filter and the specific steps required may vary depending on your vehicle, the general process is the same. By following these instructions and taking your time, you can easily replace your cabin air filter yourself and save money on professional service. Regular replacement is key – aim for at least once a year, or every 12,000 to 15,000 miles, especially if you drive in areas with poor air quality or high pollen counts. A clean cabin air filter means cleaner air for you and a healthier HVAC system for your car.