How To Change Battery Nissan Key
So, your Nissan key fob is starting to act up? The range is getting shorter, the buttons are less responsive, or maybe it's just completely dead. More often than not, the culprit is a simple, replaceable coin-cell battery. Before you head to the dealership and spend a small fortune on a new fob, let's walk through how to change the battery yourself. It’s a straightforward process, even if you're just dipping your toes into automotive DIY. This guide assumes a level of familiarity with basic tools and electronics, but we'll cover the essentials to keep you on track.
Understanding Your Nissan Key Fob
Before we dive into the battery replacement, let's get a handle on the key fob itself. Knowing the anatomy of the key and its function will help you understand the process better and troubleshoot any issues you might encounter.
Key Specs and Main Parts
Nissan key fobs come in a variety of styles depending on the model and year of your vehicle. However, the basic components remain largely the same:
- Outer Casing: This is the protective shell that houses all the internal components. It's typically made of plastic and is usually held together by screws or snap-fit closures.
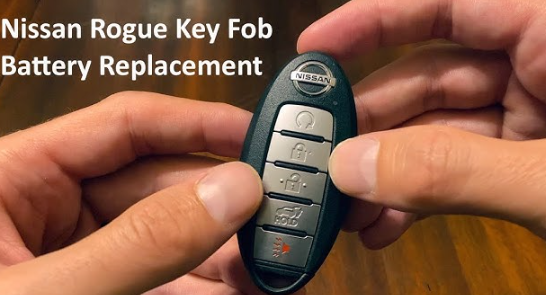
- Battery: Almost all Nissan key fobs use a CR2025 or CR2032 coin-cell battery. The exact type will be printed on the battery itself, so always double-check before purchasing a replacement.
- Circuit Board: This is the heart of the key fob, containing the microchip that communicates with your car's immobilizer and remote control systems.
- Buttons: These are the physical buttons you press to lock, unlock, and perform other functions with your vehicle.
- Emergency Key (if applicable): Many fobs contain a physical key that can be used to manually unlock the car door in case of a dead battery or a malfunction.
The specific location of these components will vary slightly depending on the fob design, but this gives you a general idea of what to expect.
Replacing the Battery: Step-by-Step
Now, let's get to the main event: replacing that battery. Here’s a detailed breakdown:
- Gather Your Tools: You'll need a few basic tools for this job:
- A small flathead screwdriver (preferably a plastic trim removal tool to avoid scratching the casing).
- A replacement CR2025 or CR2032 battery (check your existing battery to confirm the correct type).
- A soft cloth or towel to protect the fob from scratches.
- Open the Fob: The way you open the fob will depend on its design. Look closely for screws or a small slot where you can insert the flathead screwdriver.
- Fobs with Screws: Locate the screws (usually on the back of the fob). Carefully remove them and set them aside in a safe place.
- Fobs with Snap-Fit Closures: Insert the flathead screwdriver into the slot and gently twist to pry the fob open. Be careful not to apply too much force, as you could damage the plastic. Start slowly and work your way around the seam, gently popping the halves apart.
- Access the Battery: Once the fob is open, you'll see the circuit board and the battery. The battery is typically held in place by a small clip or a retaining bracket.
- Remove the Old Battery: Use the flathead screwdriver or your fingernail to gently pry the battery out of its holder. Note the polarity of the battery (the positive "+" and negative "-" sides).
- Install the New Battery: Place the new battery into the holder, ensuring that the polarity is correct. The positive (+) side should usually face up, but double-check the markings on the fob.
- Reassemble the Fob: Carefully align the two halves of the fob and snap them back together. If there were screws, reinstall them securely.
- Test the Fob: Press the buttons to see if the fob is working correctly. If it's not working, double-check the battery polarity and make sure the battery is properly seated in the holder.
Real-World Use – Basic Troubleshooting Tips
Even with careful instructions, things can sometimes go wrong. Here are a few troubleshooting tips:
- Fob Doesn't Work After Battery Replacement:
- Check Battery Polarity: Make sure the battery is installed with the correct polarity (+/-).
- Clean Battery Contacts: Use a cotton swab dipped in isopropyl alcohol to clean the battery contacts on the circuit board.
- Battery Not Seated Properly: Ensure the battery is making good contact with the terminals. Sometimes bending the little metal arms that hold the battery can help ensure good contact.
- Resync Fob to Car: Some Nissan models require you to resync the key fob to the car after a battery replacement. Consult your owner's manual for the specific procedure. This typically involves turning the ignition on and off a few times in a specific sequence.
- Fob Casing Damaged During Opening:
- Super Glue: If you crack the plastic casing, you can try to repair it with super glue. Use it sparingly and avoid getting it on the circuit board.
- New Casing: Replacement fob casings can be purchased online.
Safety Considerations
While changing a key fob battery is generally safe, there are a few things to keep in mind:
- Small Parts: Keep the battery and any small screws away from children and pets, as they can be a choking hazard.
- Static Electricity: The circuit board is sensitive to static electricity. Before handling the circuit board, ground yourself by touching a metal object to discharge any static buildup.
- Battery Disposal: Dispose of the old battery properly. Most retailers that sell batteries will also accept them for recycling.
Conclusion
Changing the battery in your Nissan key fob is a simple DIY project that can save you time and money. By following these steps and taking the necessary precautions, you can easily keep your key fob working properly. Remember to double-check the battery type, handle the circuit board with care, and dispose of the old battery responsibly.
We have a detailed wiring diagram of your Nissan keyfob available for download. This diagram can be incredibly useful for more complex repairs or for simply understanding the inner workings of your key fob. It includes detailed illustrations of the circuit board, component locations, and wiring schematics. This can be particularly helpful if you are experiencing issues beyond a simple battery replacement or if you are interested in modifying or repairing your key fob yourself.