How To Change Brake Light Bulb
Replacing a brake light bulb might seem daunting, but it's a relatively straightforward task that most car owners can handle themselves. This guide will walk you through the process step-by-step, saving you time and money compared to a visit to the mechanic.
Why Changing Your Brake Light Bulb Matters
A functioning brake light is crucial for your safety and the safety of other drivers on the road. It's your primary way to signal that you're slowing down or stopping, giving drivers behind you ample time to react. A burnt-out brake light significantly increases your risk of a rear-end collision.
Beyond safety, driving with a malfunctioning brake light can also lead to legal trouble. Many jurisdictions have laws requiring all vehicle lights to be in proper working order, and you could face a fine if caught driving with a burnt-out brake light. It's simply not worth the risk – replacing the bulb is a quick and inexpensive way to ensure you're driving safely and legally.
Ignoring a brake light problem can also mask other potential issues. If a bulb burns out frequently, it could indicate a problem with your vehicle's electrical system. Addressing this promptly can prevent more significant and costly repairs down the line. Regular checks of all your vehicle lights, including brake lights, are a vital part of preventative maintenance.
How to Choose the Right Brake Light Bulb
Choosing the correct replacement bulb is essential for proper function and safety. Using the wrong bulb can lead to dimmer lights, shorter lifespan, or even damage to your vehicle's electrical system. Here's how to ensure you select the right one:
Consult Your Owner's Manual
Your vehicle's owner's manual is the best resource for determining the correct brake light bulb type. It will specify the bulb number and wattage needed for your specific make and model. Look in the index under "lights" or "bulbs" to quickly find the information you need.
Use an Online Bulb Finder
Many auto parts retailers offer online bulb finders. Simply enter your vehicle's year, make, and model, and the tool will provide a list of compatible brake light bulbs. This is a convenient option if you don't have your owner's manual readily available.
Check the Old Bulb
Carefully remove the burnt-out bulb and examine it closely. The bulb type is usually printed on the base or the glass. Make sure the replacement bulb matches this number exactly.
Consider LED Upgrades
While halogen bulbs are the standard for most vehicles, LED brake light bulbs are becoming increasingly popular. LEDs offer several advantages, including:
- Longer lifespan: LEDs last significantly longer than halogen bulbs.
- Brighter light: LEDs often provide a brighter, more noticeable light.
- Lower energy consumption: LEDs use less energy, which can slightly improve fuel efficiency.
- Faster illumination: LEDs light up faster than halogen bulbs, providing quicker warning to following drivers.
However, be sure to choose LED bulbs specifically designed for brake lights and that are compatible with your vehicle's electrical system. Some older vehicles may require a resistor to prevent hyper-flashing (rapid blinking) when using LED bulbs.
Step-by-Step Guide to Changing Your Brake Light Bulb
Here's a detailed guide to replacing your brake light bulb. Remember to consult your owner's manual for specific instructions related to your vehicle model.
- Gather Your Supplies: You'll need a replacement brake light bulb (of the correct type), gloves (to protect your hands), a screwdriver (possibly, depending on your vehicle), and your owner's manual.
- Turn Off the Ignition: Ensure your vehicle's ignition is turned off and the parking brake is engaged.
- Locate the Brake Light Assembly: The brake light assembly is usually located on the rear of your vehicle, typically integrated with the tail light assembly. Consult your owner's manual if you're unsure of its location.
- Access the Bulb: This step varies depending on your vehicle. Some vehicles have access panels inside the trunk or cargo area, while others require you to remove the entire tail light assembly.
- Access Panel: If there's an access panel, open it to reveal the back of the tail light assembly.
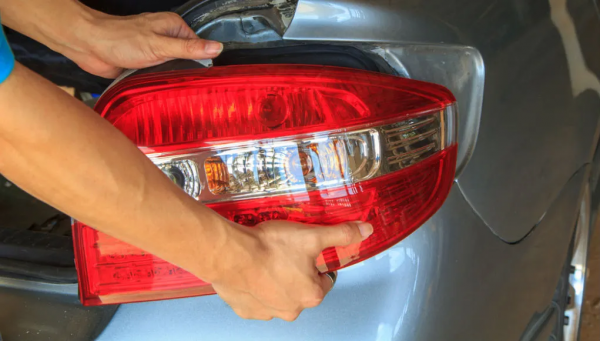
- Tail Light Removal: If you need to remove the tail light assembly, unscrew the mounting screws (usually located on the outside of the assembly). Carefully pull the assembly away from the vehicle, being mindful of any electrical connectors.
- Remove the Old Bulb: Once you have access to the bulbs, locate the burnt-out brake light bulb. The bulb socket typically twists and locks into place. Gently twist the socket counterclockwise and pull it out of the assembly. Then, pull the old bulb straight out of the socket.
- Install the New Bulb: Insert the new brake light bulb into the socket, ensuring it's properly seated. Avoid touching the glass of the bulb with your bare hands, as the oils from your skin can shorten its lifespan.
- Reinstall the Socket: Insert the socket back into the tail light assembly and twist it clockwise to lock it into place.
- Reassemble the Tail Light Assembly: If you removed the entire tail light assembly, reconnect any electrical connectors and carefully reattach the assembly to the vehicle, securing it with the mounting screws.
- Test the Brake Lights: Have a friend or family member press the brake pedal while you check the brake lights to ensure the new bulb is working correctly. Check both brake lights to ensure the other one is functioning.
- Replace the Access Panel: If you used an access panel, close and secure it.
Real-World Owner Experiences
Many car owners successfully change their brake light bulbs at home, saving money and gaining a sense of accomplishment. Here are some common experiences:
- The Importance of the Right Bulb: Several owners emphasize the importance of using the correct bulb type. Using the wrong bulb can lead to dim lights or even damage to the electrical system. Always double-check your owner's manual or an online bulb finder.
- Difficulty Accessing the Bulb: Some vehicles have complicated access to the brake light bulb. Owners often recommend consulting online videos or forums specific to their vehicle model for detailed instructions. Patience is key.
- LED Upgrades: Owners who have switched to LED brake light bulbs report improved brightness and longer lifespan. However, some caution that LEDs may require resistors to prevent hyper-flashing in older vehicles.
- Dealing with Stuck Bulbs: Occasionally, a brake light bulb can be difficult to remove from the socket. Owners suggest using pliers (carefully) or applying a penetrating oil to loosen the bulb.
- Double-Checking the Connection: Several owners have reported issues with the new bulb not working initially, only to discover that the socket wasn't fully seated or the bulb wasn't properly inserted. Always double-check the connection before assuming the bulb is defective.
Frequently Asked Questions (FAQs)
How much does it cost to have a mechanic change a brake light bulb?
The cost can vary depending on the mechanic and your location, but you can typically expect to pay anywhere from $20 to $50 for labor, plus the cost of the bulb (usually a few dollars). Changing it yourself is significantly cheaper.
How often should I check my brake lights?
It's a good idea to check your brake lights at least once a month. You can easily do this by having someone stand behind your vehicle while you press the brake pedal. You should also check them after any type of collision, even a minor one.
What does it mean if my brake lights are on even when I'm not pressing the pedal?
This could indicate a problem with your brake light switch, which is usually located near the brake pedal. The switch may be stuck or malfunctioning, causing the brake lights to remain on. It's best to have this inspected by a mechanic as soon as possible to prevent battery drain and potential safety issues.
Can I use any type of bulb in my brake light?
No. It's crucial to use the correct type of bulb specified for your vehicle's brake lights. Using the wrong bulb can lead to dim lights, shorter lifespan, or damage to your vehicle's electrical system. Always consult your owner's manual or an online bulb finder to ensure you're using the correct bulb.
What if my brake lights still don't work after replacing the bulb?
If your brake lights still aren't working after replacing the bulb, there could be other issues, such as a blown fuse, a faulty brake light switch, or a wiring problem. Check your vehicle's fuse box for a blown fuse related to the brake lights and replace it if necessary. If the problem persists, it's best to have your vehicle inspected by a qualified mechanic.
By following these steps and taking the necessary precautions, you can confidently replace your brake light bulb and ensure your safety on the road.