How To Change Instrument Panel Lights
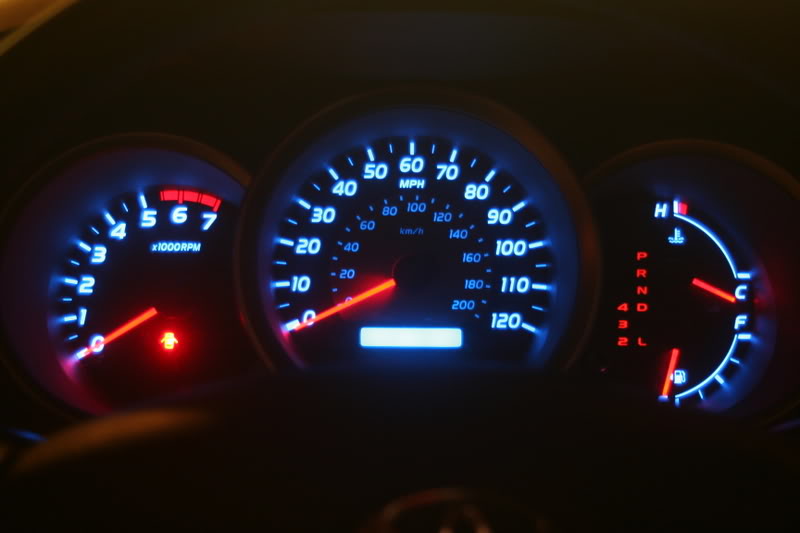
Dim, flickering, or completely dead instrument panel lights can make driving at night not only frustrating but also dangerous. Being able to clearly see your speed, fuel level, and other vital information is crucial for safe vehicle operation. In this article, we'll walk you through the process of diagnosing and fixing instrument panel light issues, empowering you to potentially save money and avoid unnecessary trips to the mechanic.
Symptoms of Instrument Panel Light Problems
Identifying the symptoms is the first step in addressing the problem. Here are some common indicators of instrument panel light issues:
- Complete Darkness: No lights illuminate on the instrument panel, even when the headlights are on.
- Dim Lighting: The instrument panel lights are significantly dimmer than usual, making it hard to read gauges.
- Flickering Lights: The lights flicker intermittently, making it difficult to maintain a consistent view of the instruments.
- Specific Gauge Darkness: Only certain gauges or sections of the instrument panel are dark, while others remain illuminated.
- Inconsistent Brightness: The brightness of the instrument panel lights fluctuates without any adjustment to the dimmer switch.
- Lights Only Work Intermittently: The lights may work sometimes, and not others, with no discernible pattern.
- Odometer Display Issues: The digital odometer display is dim, missing segments, or completely unreadable.
- Warning Lights Dim or Non-Functional: Warning lights (e.g., check engine, ABS) are either very dim or not working at all.
Root Causes of Instrument Panel Light Failure
Several factors can contribute to instrument panel light problems. Understanding the root cause is vital for implementing the correct fix:
- Blown Fuses: A blown fuse is the most common cause of complete instrument panel light failure. The fuse protects the circuit from excessive current, and if it blows, the lights will not receive power.
- Burned-Out Bulbs: In older vehicles, individual bulbs illuminate the instrument panel. These bulbs can burn out over time, leading to dim or dark spots. Even newer vehicles with LED backlighting can experience LED failure, though it's less common.
- Faulty Dimmer Switch: The dimmer switch controls the brightness of the instrument panel lights. A malfunctioning dimmer switch can cause flickering, inconsistent brightness, or complete loss of illumination. Dirt, corrosion, or internal damage can all contribute to dimmer switch failure.
- Wiring Issues: Damaged, corroded, or loose wiring can disrupt the flow of electricity to the instrument panel lights. Rodents, environmental factors, and simple wear and tear can damage wiring.
- Grounding Problems: A poor ground connection can cause a variety of electrical issues, including dim or flickering instrument panel lights. The ground connection provides a return path for the electrical current, and if it's compromised, the circuit will not function properly.
- Faulty Instrument Cluster: In some cases, the instrument cluster itself can be faulty. This is more common in modern vehicles with integrated electronic components within the cluster. Internal circuit board failures can cause widespread lighting problems.
- Faulty Light Sensor: Some modern vehicles use a light sensor to automatically adjust instrument panel brightness. A failing light sensor can cause the lights to be too dim or too bright, regardless of ambient lighting conditions.
What Happens If Ignored?
Ignoring instrument panel light issues can have serious consequences:
- Safety Hazard: Difficulty seeing vital information like speed and fuel level significantly increases the risk of accidents, especially at night.
- Reduced Resale Value: A malfunctioning instrument panel can negatively impact the resale value of your vehicle.
- Potential for Further Damage: Electrical problems can sometimes worsen over time, leading to more expensive repairs down the road. A short circuit caused by damaged wiring, for example, could potentially damage other electronic components.
- Inability to Monitor Vehicle Health: Failure of warning lights means you may not be aware of critical issues like low oil pressure or engine overheating, potentially leading to serious engine damage.
- Legal Issues: In some jurisdictions, driving with a faulty instrument panel could violate vehicle safety regulations.
Recommended Fixes
The appropriate fix depends on the underlying cause of the problem:
- Check the Fuses: This is the easiest and often the most effective first step. Consult your owner's manual to locate the fuse for the instrument panel lights. Use a fuse tester to check the fuse's continuity. Replace any blown fuses with the correct amperage rating.
- Inspect and Replace Bulbs: If individual bulbs are burned out, replace them with the correct type and wattage. Accessing the bulbs usually requires removing the instrument cluster bezel and possibly the cluster itself. Be careful when handling the cluster to avoid damaging any delicate components.
- Test and Replace the Dimmer Switch: A multimeter can be used to test the dimmer switch for continuity and proper function. If the switch is faulty, replace it with a new one. In some cases, cleaning the contacts of the dimmer switch with electrical contact cleaner might temporarily restore functionality, but replacement is generally recommended for a long-term solution.
- Inspect Wiring and Ground Connections: Visually inspect the wiring harness leading to the instrument panel for any signs of damage, corrosion, or loose connections. Clean and tighten any corroded or loose ground connections. You may need to use a wiring diagram to trace the circuits.
- Instrument Cluster Repair or Replacement: If the instrument cluster itself is faulty, you may need to have it professionally repaired or replaced. This is a more complex repair that often requires specialized tools and expertise. Some companies specialize in rebuilding instrument clusters.
- Check Light Sensor (If Applicable): For vehicles with automatic brightness adjustment, inspect the light sensor for damage or obstruction. Test the sensor's output with a multimeter to see if it's functioning correctly. Replacing a faulty light sensor is usually a straightforward process.
Cost Estimates and Shop Advice
The cost of repairing instrument panel lights can vary widely depending on the specific problem and the vehicle. Here's a general breakdown:
- Fuse Replacement: A few dollars for the fuse itself, plus the cost of your time.
- Bulb Replacement: $5 to $20 per bulb, depending on the type, plus labor if you're not comfortable doing it yourself.
- Dimmer Switch Replacement: $30 to $100 for the switch, plus $50 to $150 for labor.
- Wiring Repair: $50 to $500 or more, depending on the extent of the damage and the complexity of the repair.
- Instrument Cluster Repair: $150 to $500 or more, depending on the type of repair and the repair shop.
- Instrument Cluster Replacement: $300 to $1500 or more, depending on the vehicle and whether you use a new or rebuilt cluster. Programming may also be required.
- Light Sensor Replacement: $50-$200, including parts and labor.
Shop Advice: If you're not comfortable working on electrical systems, it's best to take your vehicle to a qualified mechanic. A reputable shop will have the necessary diagnostic tools and expertise to accurately diagnose and repair the problem. Get a written estimate before authorizing any repairs. Ask if the shop has experience working on instrument panels specifically, as some technicians are more comfortable with this type of work than others. It's also wise to check online reviews to gauge the shop's reputation.
TSBs and Common Failure Points: Check online resources and forums specific to your vehicle make and model for any Technical Service Bulletins (TSBs) related to instrument panel lighting issues. TSBs are issued by manufacturers to address known problems and provide repair instructions. For example, certain Ford models are known to have issues with the dimmer switch, while some GM vehicles have had problems with the instrument cluster circuit board. Furthermore, you can often find anecdotal data on forums regarding the average mileage when certain components, like bulbs or dimmer switches, tend to fail. Knowing this information can help you narrow down the potential causes of your problem. For example, a common failure point with early 2000s Honda Civics was the bulb that illuminated the climate control, often burning out around 100,000 miles.
By following these steps, you can diagnose and repair your instrument panel lights, ensuring a safer and more enjoyable driving experience.