How To Change Key Battery Nissan
Changing the key fob battery in your Nissan is a relatively straightforward task that can save you a trip to the dealership. This article will guide you through the process, providing the necessary knowledge and precautions to ensure a successful battery replacement. We'll cover the key specs, main parts of the fob, how it works, real-world troubleshooting, and crucial safety measures. Think of this as a technical breakdown, empowering you to handle this common maintenance task with confidence.
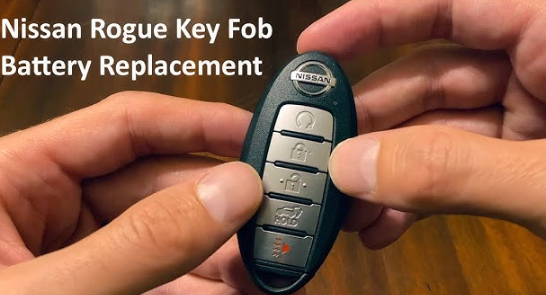
Understanding Your Nissan Key Fob
Purpose
The ability to replace your Nissan key fob battery is important for several reasons. Primarily, a dead battery means your remote keyless entry system won't function, making it difficult or impossible to unlock your doors remotely, start your vehicle (if equipped with push-button start), or activate the panic alarm. Beyond that, understanding the inner workings of your key fob can be valuable for diagnosing more complex issues later. This process provides an excellent opportunity to familiarize yourself with a common automotive component. It also allows you to avoid potentially costly dealer service charges for a simple battery replacement. Furthermore, if you're interested in car modifications or security systems, knowing how the key fob functions is a beneficial foundation.
Key Specs and Main Parts
Most modern Nissan key fobs use a CR2032 3V lithium coin cell battery. It’s crucial to use the correct battery type; using a different type can damage the key fob. The battery's voltage is critical for proper operation. Let's break down the main parts of a typical Nissan key fob:
- Fob Housing: The plastic casing that protects the internal components.
- Battery: The power source, usually a CR2032 3V lithium coin cell.
- Circuit Board: Contains the electronic components responsible for transmitting signals to the vehicle.
- Buttons: Used to send commands to the vehicle (lock, unlock, trunk release, panic).
- Battery Contact Terminals: Metal clips that connect the battery to the circuit board.
- Emergency Key (if equipped): A physical key stored inside the fob for manual entry in case of a dead battery or system malfunction.
The *internal resistance* of the battery impacts its ability to deliver current. A higher internal resistance (as the battery ages) reduces performance.
How It Works
The Nissan key fob works by transmitting a radio frequency (RF) signal to the vehicle's receiver. When you press a button on the fob, it activates a microchip on the circuit board. This microchip generates a coded signal that's specific to your vehicle. This signal is then transmitted through an antenna within the fob. The vehicle's receiver, typically located within the body control module (BCM), decodes the signal and performs the corresponding action, such as unlocking the doors or starting the engine. The rolling code technology is commonly used to prevent signal replay attacks. This means that each time the fob is used, it generates a new, unique code, making it significantly harder for thieves to intercept and duplicate the signal. When the battery is weak, the signal strength decreases, making it harder for the vehicle to receive and decode the signal. The range of the fob decreases, and you might need to be closer to the vehicle for it to work. The duty cycle also affects performance. This refers to the proportion of time a signal is transmitted. A low battery may shorten the duty cycle, resulting in missed signals.
Step-by-Step Battery Replacement Guide
- Gather Your Tools: You'll need a small flathead screwdriver or a plastic prying tool (spudger), a new CR2032 battery, and a soft cloth to protect the fob from scratches.
- Open the Fob: Examine your specific fob model. Some fobs have a small slot or groove where you can insert the screwdriver to pry it open. Others might require you to slide or remove the emergency key first. Refer to your owner's manual or online videos for instructions specific to your fob model. Apply gentle pressure to avoid damaging the plastic housing.
- Access the Battery: Once the fob is open, you'll see the battery held in place by contact terminals. Note the orientation of the battery (+ side up or down) before removing it.
- Remove the Old Battery: Use the screwdriver or prying tool to carefully dislodge the old battery. Avoid using excessive force, as this can damage the contact terminals.
- Install the New Battery: Place the new CR2032 battery into the battery compartment, ensuring it's oriented correctly. The + side of the battery is usually marked.
- Reassemble the Fob: Carefully align the two halves of the fob housing and press them together until they snap securely into place. Ensure there are no gaps or loose parts.
- Test the Fob: Test the fob by pressing the buttons to see if they function correctly. If the fob doesn't work, double-check the battery orientation and ensure the contact terminals are clean and making good contact with the battery.
Real-World Use - Basic Troubleshooting
If your key fob doesn't work after replacing the battery, consider these troubleshooting tips:
- Battery Orientation: Double-check that the battery is installed with the correct polarity (+/-).
- Contact Terminals: Ensure the metal contact terminals are clean and making good contact with the battery. Use a cotton swab dipped in isopropyl alcohol to clean them if necessary. Gently bend the terminals slightly to improve contact if needed.
- Battery Compatibility: Verify that you're using the correct CR2032 battery.
- Fob Damage: Inspect the circuit board for any visible damage, such as cracks or corrosion. If there's damage, the fob might need to be replaced.
- Vehicle's Receiver: In rare cases, the problem might lie with the vehicle's receiver. This is less common but requires professional diagnosis.
- Resyncing: Some vehicles require you to resync the key fob after a battery replacement. Consult your owner's manual for instructions on how to do this. The process usually involves turning the ignition on and off a certain number of times while pressing a button on the fob.
Example: After replacing the battery, your car might not start. This could be because the immobilizer system isn't recognizing the key fob. This may require a resync.
Safety
While changing a key fob battery is generally safe, there are a few precautions to keep in mind:
- Small Parts: Keep batteries and small parts away from children and pets, as they can be a choking hazard.
- Battery Handling: Avoid touching the battery with bare fingers, as this can transfer oils and reduce its lifespan. Use gloves or a clean cloth.
- Tool Usage: Use appropriate tools and apply gentle pressure to avoid damaging the fob housing or internal components.
- ESD (Electrostatic Discharge): Be mindful of static electricity, especially in dry environments. Ground yourself before handling the circuit board to prevent electrostatic discharge, which can damage sensitive electronic components.
- Battery Disposal: Dispose of old batteries properly according to local regulations. Lithium batteries should not be thrown in the regular trash.
Important: Avoid prying directly on the circuit board when removing the battery. This can damage the electronic components and render the fob useless.
Diagram Availability
For a more detailed visual guide, a schematic diagram of a typical Nissan key fob is extremely beneficial. This diagram illustrates the location of key components, wiring traces, and connection points, making it easier to understand the fob's internal structure. While we cannot directly embed the diagram here, we do have the file available. Please reach out, and we will gladly provide you with access to the detailed schematic.
By following these steps and understanding the underlying principles, you can confidently replace your Nissan key fob battery and potentially save yourself time and money. Remember to prioritize safety and consult your owner's manual for specific instructions related to your vehicle and key fob model. With a little patience and attention to detail, you can master this simple yet valuable automotive maintenance task.