How To Change Odometer From Kilometers To Miles
So, you're looking to switch your car's odometer display from kilometers (km) to miles (mi). This is a fairly common request, especially for individuals importing vehicles or those who simply prefer using the imperial system. While seemingly straightforward, the process can range from a simple button press to requiring specialized tools and software depending on your car's make, model, and year. This guide will walk you through the various methods, the underlying technology, potential pitfalls, and best practices to ensure a successful conversion.
Background: Odometer Systems and Measurement Units
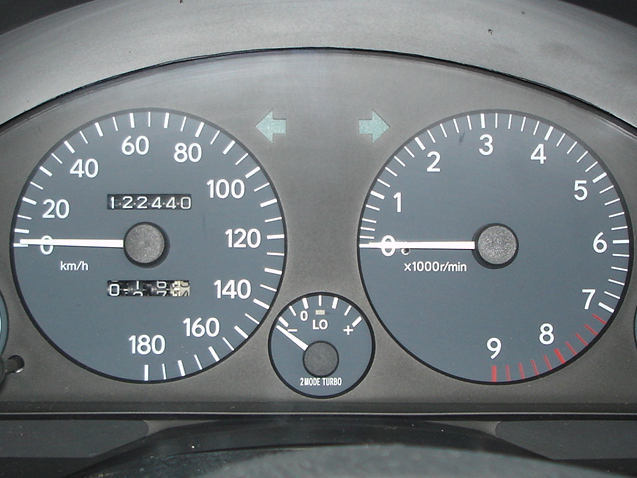
Before diving into the "how-to," let's understand the basic systems at play. The odometer is an instrument used to measure the distance traveled by a vehicle. Older vehicles used purely mechanical odometers, driven by a cable connected to the transmission. These are generally not electronically switchable between km and mi.
Modern vehicles predominantly use electronic odometers. These are integrated into the car's Electronic Control Unit (ECU), or more specifically, the instrument cluster control module. The ECU receives speed data from wheel speed sensors, calculates the distance traveled, and displays it on the digital odometer. This digital representation is typically part of the instrument cluster's liquid crystal display (LCD) or a similar digital display.
The key difference is the source of the data and how it's displayed. Mechanical odometers rely on direct mechanical linkage and gearing to display distance. Electronic odometers use software and electronic displays, allowing for greater flexibility, including the ability to potentially switch between measurement units.
Understanding Speed Sensors
A crucial element in electronic odometer systems is the speed sensor. These sensors, typically located at each wheel hub (or sometimes on the transmission), use various technologies like variable reluctance or Hall effect sensors to detect wheel rotation speed. This data is transmitted as a series of pulses to the ECU. The ECU then calculates the vehicle's speed and uses this speed data over time to determine the distance traveled.
Technical Breakdown: How to Change the Odometer
The method for changing the odometer display varies drastically depending on the vehicle. Here's a breakdown of common scenarios:
1. Built-in Option via the Instrument Cluster Menu
This is the simplest and most common scenario, particularly in newer vehicles. Many modern cars have a built-in setting within the instrument cluster's menu system that allows you to switch between kilometers and miles. Here's the general process:
- Access the Instrument Cluster Menu: This usually involves using buttons on the steering wheel stalk or the instrument cluster itself. Consult your owner's manual for specific instructions. The menu might be labeled "Settings," "Options," "Configuration," or something similar.
- Navigate to the "Units" or "Measurement" Setting: Once in the menu, look for a sub-menu related to units of measurement.
- Select "Miles" or "Kilometers": You should find an option to choose between miles (mi) and kilometers (km). Select your desired unit.
- Confirm and Exit: Follow the on-screen prompts to confirm your selection and exit the menu. The odometer should now display the distance traveled in your chosen unit. Note that the speedometer will also likely change units.
Note: Some vehicles require the ignition to be in the "on" position but with the engine off to access these menus. Others may require the engine to be running. Again, refer to your owner's manual.
2. Using a Diagnostic Scan Tool
If your car doesn't have a built-in menu option, you might be able to change the odometer display using a diagnostic scan tool. This requires a tool capable of accessing and modifying the vehicle's ECU parameters.
- Connect the Scan Tool: Plug the scan tool into the car's OBD-II (On-Board Diagnostics II) port. This port is typically located under the dashboard on the driver's side.
- Power On and Select Vehicle: Turn the ignition on and follow the scan tool's instructions to select your vehicle's make, model, and year.
- Access the Instrument Cluster Module: Navigate to the module responsible for controlling the instrument cluster. This might be labeled "Instrument Cluster," "IC," "IPC," or something similar.
- Look for "Configuration" or "Programming" Options: Within the instrument cluster module, look for options related to configuration, programming, or settings.
- Change the "Units" Setting: You should find a parameter that controls the odometer's unit of measurement. Change this setting from "Kilometers" to "Miles" or vice versa.
- Write the Changes: Follow the scan tool's instructions to write the changes to the ECU. This may involve a confirmation process.
- Verify the Change: Once the process is complete, verify that the odometer now displays the distance traveled in your chosen unit.
Important: Using a diagnostic scan tool to modify ECU parameters can be risky. Make sure you understand the tool's functions and proceed with caution. Incorrectly modifying ECU settings can cause serious problems with your vehicle. Some scan tools may require specific vehicle manufacturer licenses or subscriptions to access certain functions.
3. EEPROM Programming (Advanced)
This is the most advanced and complex method and should only be attempted by experienced professionals. It involves directly accessing and modifying the EEPROM (Electrically Erasable Programmable Read-Only Memory) chip on the instrument cluster circuit board. This chip stores the odometer data, and other vehicle-specific settings.
- Remove the Instrument Cluster: Carefully remove the instrument cluster from the vehicle. Consult a service manual for your specific vehicle to avoid damaging the dashboard.
- Disassemble the Instrument Cluster: Carefully disassemble the instrument cluster to access the circuit board.
- Locate the EEPROM Chip: Identify the EEPROM chip on the circuit board. The chip's identification number will be necessary to find the correct data offsets for odometer reading.
- Read the EEPROM Data: Use an EEPROM programmer to read the data from the chip. This data is typically in hexadecimal format.
- Modify the Data: Use a specialized software or calculator to convert the odometer reading from kilometers to miles (or vice versa) and modify the corresponding data in the EEPROM dump.
- Write the Modified Data: Use the EEPROM programmer to write the modified data back to the EEPROM chip.
- Reassemble and Reinstall: Reassemble the instrument cluster and reinstall it in the vehicle.
- Verify the Change: Verify that the odometer now displays the distance traveled in your chosen unit.
Warning: EEPROM programming is extremely delicate and requires specialized equipment and knowledge. Incorrectly programming the EEPROM chip can render the instrument cluster useless or cause other vehicle problems. This method is typically only used when other methods are not possible or when dealing with corrupted data. Furthermore, altering the odometer reading (regardless of unit) for fraudulent purposes is illegal.
Common Issues and Maintenance Concerns
- Compatibility: Not all vehicles allow you to change the odometer display. Some manufacturers lock this setting.
- Scan Tool Limitations: Some diagnostic scan tools may not have the necessary functionality to change the odometer display on certain vehicles.
- Data Corruption: Incorrectly modifying ECU or EEPROM data can corrupt the odometer reading or other vehicle settings.
- Tampering Concerns: Altering the odometer reading to misrepresent the vehicle's mileage is illegal and unethical.
- Vehicle Warranty: Modifying ECU settings or performing EEPROM programming may void your vehicle's warranty.
Do's and Don'ts / Best Practices
- Do consult your owner's manual first. This is the easiest and safest way to determine if your vehicle has a built-in option to change the odometer display.
- Do use a reputable diagnostic scan tool if you choose to use that method.
- Do back up your ECU data before making any changes. This will allow you to restore the original settings if something goes wrong.
- Don't attempt EEPROM programming unless you have extensive experience and the necessary equipment.
- Don't alter the odometer reading to misrepresent the vehicle's mileage.
- Do research your specific vehicle's procedures. What works on one model might not work on another.
- Do disconnect the battery before working on any electrical components.
Conclusion
Changing your odometer display from kilometers to miles (or vice versa) can be a relatively simple process on some vehicles, while requiring more complex procedures on others. Always start by consulting your owner's manual. If a built-in option is available, that is the recommended approach. If not, a diagnostic scan tool may be required, but proceed with caution and ensure you understand the tool's functions. EEPROM programming should only be considered as a last resort by experienced professionals. Remember to prioritize safety and ethical considerations throughout the process. If you're unsure about any step, it's always best to consult a qualified mechanic. They have the expertise and equipment to perform the conversion safely and accurately.