How To Change Oil And Oil Filter
Alright folks, let's talk about something every car owner needs to know: changing your oil and oil filter. It’s a fundamental maintenance task that, when done correctly, can significantly extend the life of your engine. We're not just topping off fluids here; we're performing preventative medicine for your ride. Consider this your comprehensive guide, breaking down the process with the detail an experienced DIYer like yourself expects. We'll cover everything from understanding the key components to practical tips and vital safety precautions.
Why Change Your Oil and Oil Filter?
Before we dive in, let's understand the 'why'. Engine oil's primary job is to lubricate the moving parts within your engine, reducing friction and wear. Over time, oil degrades due to heat, pressure, and contamination. It picks up dirt, metal particles (from normal wear), and combustion byproducts. This dirty, degraded oil loses its lubricating properties, leading to increased friction, reduced engine efficiency, and potentially catastrophic engine damage. The oil filter plays a crucial role in removing these contaminants, but it too becomes saturated over time and needs replacement. Think of it like this: a clogged filter is like a plugged artery – it restricts flow and puts a strain on the system. Regular oil and filter changes prevent these issues, ensuring your engine runs smoothly and lasts longer.
Key Specs and Main Parts
Understanding the parts involved is half the battle. Here's a rundown:
- Engine Oil: The lifeblood of your engine. Comes in various viscosities (e.g., 5W-30, 10W-40) specified by your vehicle manufacturer. The 'W' stands for winter, and the numbers indicate the oil's viscosity at different temperatures. Lower numbers mean thinner oil, better suited for cold starts.
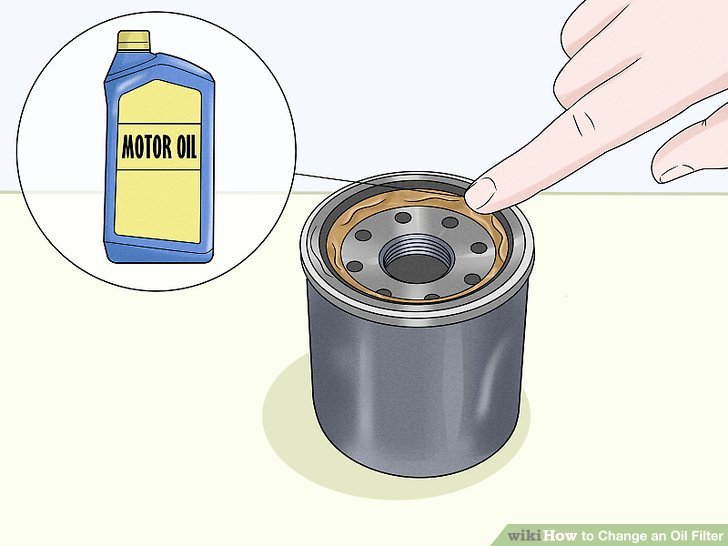
- Oil Filter: A cylindrical canister filled with a filtration medium (usually paper or synthetic fibers) that traps contaminants in the oil. They come in different sizes and thread patterns, so it's crucial to get the right one for your vehicle.
- Oil Drain Plug: Located at the bottom of the oil pan, this plug is removed to drain the old oil.
- Oil Pan: The reservoir that holds the engine oil.
- Oil Filter Wrench: A specialized wrench designed to grip and turn the oil filter for removal and installation. There are various types, including cap-type, band-type, and claw-type wrenches.
- Wrench for Drain Plug: Usually a socket or box-end wrench, sized appropriately for your drain plug.
- Drain Pan: A container to catch the old oil as it drains.
- Funnel: Used to pour the new oil into the engine without spilling.
- Jack and Jack Stands: Used to safely lift the vehicle for easier access to the oil drain plug and filter.
- Gloves: Protect your hands from dirty oil and chemicals.
- Rags or Shop Towels: For cleaning up spills and wiping down parts.
Key Specs: Consult your owner's manual for the correct oil type (viscosity and specification, such as API SN or ILSAC GF-5) and the amount of oil required for your engine. The oil filter will also have a specific part number for your vehicle. Using the wrong oil or filter can negatively impact engine performance and longevity.
How It Works: The Step-by-Step Process
- Preparation: Gather all your tools and materials. Ensure you have the correct oil and filter for your vehicle.
- Warm Up the Engine (Slightly): Run the engine for a few minutes to warm the oil. Warm oil flows more easily, aiding in draining the contaminants. However, be careful not to overheat the oil, as it can burn you.
- Secure the Vehicle: Park the vehicle on a level surface. Engage the parking brake. If necessary, use a jack to lift the vehicle and securely support it with jack stands. Never work under a vehicle supported only by a jack.
- Locate the Drain Plug: Crawl under the vehicle and locate the oil drain plug on the bottom of the oil pan.
- Position the Drain Pan: Place the drain pan under the drain plug.
- Remove the Drain Plug: Using the correct wrench, carefully loosen and remove the drain plug. Be prepared for the oil to flow out. Let the oil drain completely (at least 15-20 minutes).
- Remove the Oil Filter: Locate the oil filter. Using the oil filter wrench, loosen and remove the old oil filter. Be prepared for some oil to spill when you remove the filter. It's helpful to have a rag handy.
- Prepare the New Oil Filter: Lightly lubricate the rubber gasket on the new oil filter with fresh engine oil. This helps create a good seal.
- Install the New Oil Filter: Screw the new oil filter onto the engine by hand until the gasket makes contact with the engine. Then, tighten it an additional ¾ to a full turn, as specified on the filter. Do not overtighten!
- Reinstall the Drain Plug: Clean the drain plug and install a new crush washer (if applicable). Tighten the drain plug to the manufacturer's specified torque. This is important to prevent leaks and damage to the oil pan threads. If you don't have a torque wrench, tighten it snugly but not excessively.
- Lower the Vehicle (If Applicable): If you used a jack and jack stands, carefully lower the vehicle.
- Add New Oil: Locate the oil fill cap on the engine. Remove the cap and use a funnel to pour the correct amount of new oil into the engine. Refer to your owner's manual for the proper oil capacity.
- Check the Oil Level: After adding the oil, wait a few minutes for it to settle. Then, check the oil level using the dipstick. Add more oil if needed to reach the correct level.
- Start the Engine: Start the engine and let it run for a few minutes. Check for leaks around the oil filter and drain plug.
- Recheck the Oil Level: After running the engine, turn it off and let it sit for a few minutes. Recheck the oil level using the dipstick and add more oil if needed.
- Reset the Oil Life Monitoring System: If your vehicle has an oil life monitoring system, reset it according to the instructions in your owner's manual.
- Dispose of Used Oil Properly: Take the used oil and oil filter to a recycling center or auto parts store that accepts used oil. Never pour used oil down the drain or into the ground.
Real-World Use: Basic Troubleshooting Tips
- Drain Plug Stripped Threads: If you overtighten the drain plug, you can strip the threads in the oil pan. If this happens, you may need to have the threads repaired or replace the oil pan. There are self tapping drain plugs that are a good temp solution to this problem.
- Oil Filter Leaks: A leaking oil filter is often caused by a loose filter, a damaged gasket, or incorrect filter installation. Ensure the filter is properly tightened and the gasket is clean and lubricated.
- Difficulty Removing the Oil Filter: Sometimes, the oil filter can be very difficult to remove. Try using a different type of oil filter wrench or puncturing the filter with a screwdriver (carefully!) to relieve the vacuum.
- Oil Level Too High: Overfilling the engine with oil can cause foaming and reduce lubrication. If you accidentally overfill the engine, you may need to drain some oil to bring the level down to the correct mark.
Safety: Highlight Risky Components
Safety is paramount. Here are some key considerations:
- Hot Exhaust System: Avoid touching the exhaust system, as it can be extremely hot and cause severe burns.
- Jacking and Supporting the Vehicle: Use a proper jack and jack stands to safely lift and support the vehicle. Never work under a vehicle supported only by a jack.
- Hot Oil: Be careful when draining the oil, as it can be hot and cause burns. Wear gloves and eye protection.
- Chemical Exposure: Used engine oil contains harmful chemicals. Wear gloves to avoid skin contact and wash your hands thoroughly after handling used oil.
- Electrical Components: While unlikely to encounter high voltage wires, avoid contact with wiring and sensors close to where you are working.
Remember, this guide provides a general overview. Always consult your vehicle's owner's manual for specific instructions and recommendations.
We have a detailed diagram available for download that visually illustrates all the components and steps discussed. Contact us to receive the file.