How To Change The Battery In Nissan Altima Key
So, you're staring down the blinking red light of a lifeless Nissan Altima key fob, and the dread of a dealership visit – and the accompanying bill – is starting to creep in. Fear not! Replacing the battery in your key fob is a surprisingly simple task, one that most owners can accomplish with minimal tools and a little patience. Think of it like changing a lightbulb – a common, easily managed piece of routine maintenance. Let's dive into how to resurrect your key fob and get you back on the road.
The Case of the Disappearing Signal: Understanding Key Fob Batteries
Imagine your key fob as a tiny, sophisticated walkie-talkie. You press a button, sending a specific radio frequency signal to your car's receiver. The receiver, recognizing the signal, then performs the requested action – unlocking the doors, popping the trunk, or even starting the engine (if you have remote start). This entire exchange is powered by a small, coin-shaped battery, typically a CR2025 or CR2032. Over time, this battery, like any battery, loses its charge. The result? A key fob that becomes increasingly unreliable, requiring you to be closer and closer to the car for it to function, or worse, failing completely.
How the System Works: From Button Press to Car Response
Here's a closer look at the mechanics: When you press a button on the key fob, it completes a circuit. This circuit powers a tiny transmitter that generates a radio frequency signal. This signal is *encoded* with a specific code that identifies your key fob as authorized to operate your car. This encoded signal is then broadcast out from the fob. Your car has an antenna and a receiver unit. The receiver constantly listens for signals on the designated frequency. When it detects a signal, it decrypts the code. If the code matches the code stored in the car's computer (usually the engine control unit or ECU), the car executes the command associated with that button. All of this happens in a fraction of a second.
The type of battery used plays a crucial role in this process. CR2025 and CR2032 batteries are both 3-volt lithium coin cells. The difference lies in their thickness: CR2032 is slightly thicker and therefore has a higher capacity, meaning it can store more energy and potentially last longer. Your Altima's key fob is designed to accept a specific size, so always consult your owner's manual or the markings on the old battery before purchasing a replacement.
The DIY Guide: Battery Replacement Step-by-Step
Here's a detailed guide to replacing the battery in your Nissan Altima key fob. While specific models may have slight variations, the general principle remains the same:
- Gather Your Supplies: You'll need a small flathead screwdriver (or a plastic pry tool to avoid scratching), a new CR2025 or CR2032 battery (check your owner's manual for the correct type), and a soft cloth to protect the fob.
- Locate the Key Fob Access Point: Examine your key fob closely. Most Altimas use a physical key that slides out of the fob. Once the key is removed, you'll typically find a small slot or indentation where you can insert your screwdriver or pry tool.
- Open the Key Fob Casing: Gently insert the screwdriver or pry tool into the slot and twist or pry to separate the two halves of the key fob. Be careful not to apply excessive force, as you could damage the casing. On some models, you might need to use a small amount of force to overcome the snap fit.
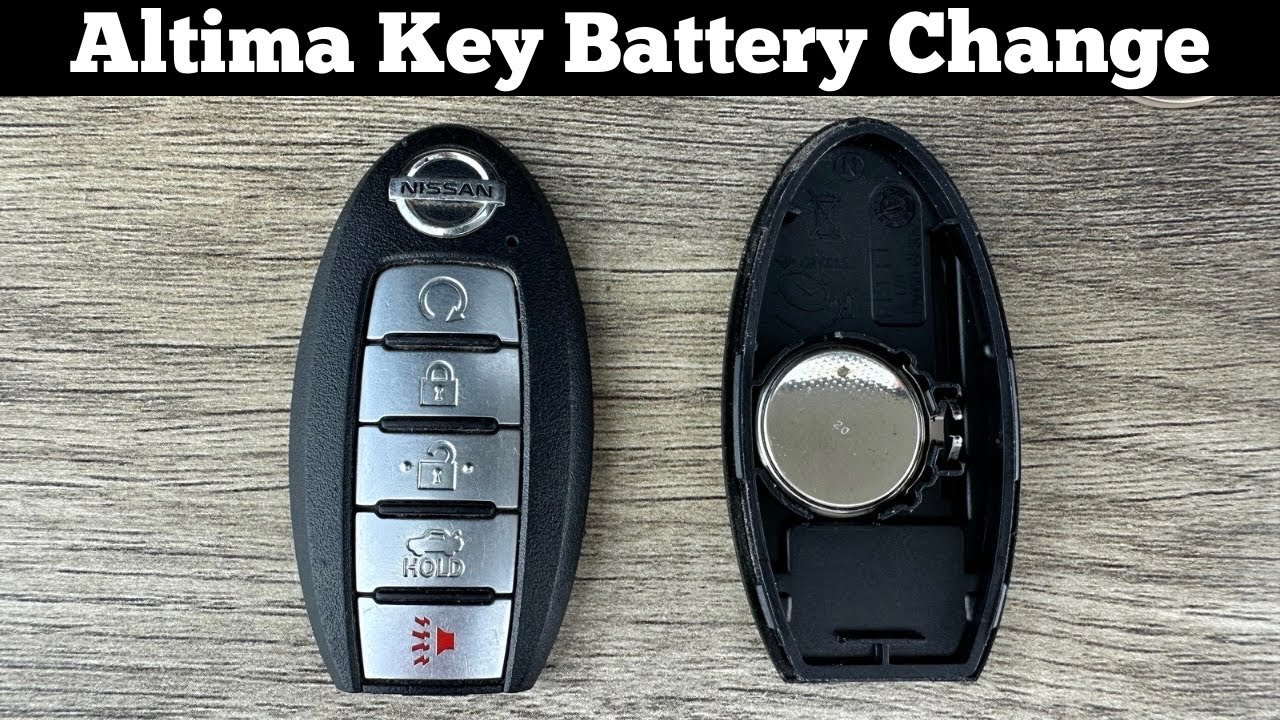
- Expose the Battery: Once the fob is open, you'll see the circuit board and the battery. The battery is usually held in place by a small clip or retaining arm.
- Remove the Old Battery: Use the screwdriver (or a small pen) to gently pry the battery loose from the clip. Be careful not to damage the circuit board. Note the polarity of the battery (the "+" and "-" markings) before removing it. This is crucial for inserting the new battery correctly.
- Install the New Battery: Insert the new battery into the battery compartment, making sure the "+" side is facing the correct direction (matching the polarity of the old battery). Secure it under the retaining clip.
- Reassemble the Key Fob: Carefully align the two halves of the key fob casing and snap them back together. Make sure all the edges are flush and the casing is securely closed.
- Test the Key Fob: Press the buttons on the key fob to test its functionality. The red light should illuminate, and the car should respond to the commands.
Troubleshooting: What to Do If It Doesn't Work
If your key fob still doesn't work after replacing the battery, consider these possibilities:
- Incorrect Battery Type: Double-check that you've used the correct battery type (CR2025 or CR2032).
- Incorrect Battery Polarity: Ensure the battery is inserted with the correct polarity ("+" side up or down, as indicated).
- Dirty Battery Contacts: Use a cotton swab dipped in rubbing alcohol to clean the battery contacts on the circuit board.
- Key Fob Damage: If you accidentally damaged the circuit board during the battery replacement, the key fob may need to be replaced.
- Car Battery Issue: In rare cases, a dead or weak car battery can interfere with the key fob's signal.
- Key Fob Needs Reprogramming: Sometimes, after the battery is removed, the key fob might need to be reprogrammed to the car. This usually requires a trip to the dealership or a locksmith with the necessary equipment.
Pros and Cons of DIY Battery Replacement
Pros:
- Cost Savings: Replacing the battery yourself is significantly cheaper than having a dealership or locksmith do it.
- Convenience: You can do it yourself at home, on your own schedule.
- Empowerment: It's a simple repair that gives you a sense of accomplishment.
Cons:
- Risk of Damage: There's a small risk of damaging the key fob casing or circuit board if you're not careful.
- Potential Reprogramming: In some cases, the key fob might need to be reprogrammed after the battery is replaced, requiring a trip to the dealership.
- Time Investment: Although it's a quick task, it still requires some time and effort.
Manufacturer Examples and Variations
While the general principle remains the same, the specific design of key fobs can vary slightly between different Nissan Altima models and model years. Some older models might have a screw holding the casing together instead of a snap-fit design. Always consult your owner's manual for specific instructions for your particular model.
Other manufacturers, like Toyota or Honda, also use similar coin cell batteries in their key fobs, but the access methods to replace the battery may be different. Some use a dedicated battery compartment cover secured with a small screw, while others require the entire fob to be split open.
Real-World Insights and Recommendations
Based on user experiences and common issues, here are some recommendations for replacing your Nissan Altima key fob battery:
- Protect the Casing: Use a soft cloth to protect the key fob casing from scratches when prying it open.
- Use the Right Tools: Avoid using sharp metal tools that could damage the circuit board. Plastic pry tools are ideal.
- Take Pictures: Before disassembling the key fob, take pictures of the internal components. This can be helpful if you get stuck during reassembly.
- Don't Force It: If the casing doesn't open easily, double-check for hidden screws or clips. Forcing it can break the plastic.
- Buy Quality Batteries: Invest in reputable brand-name batteries. Cheaper batteries may not last as long or may leak, causing damage.
- Consider a Keychain Tool: There are small keychain tools specifically designed for opening key fobs. These can be a convenient and safe option.
- Keep a Spare Battery: It's always a good idea to keep a spare battery on hand, especially if you rely on your key fob for remote start or other important functions.
Replacing the battery in your Nissan Altima key fob is a simple and cost-effective way to keep your car accessible. By following these steps and taking the necessary precautions, you can easily handle this task yourself and avoid the expense and inconvenience of a dealership visit. Just remember to be patient, use the right tools, and consult your owner's manual for specific instructions. With a little care, you'll be back on the road with a fully functional key fob in no time.