How To Change The Brake Light
Changing a brake light is a common car maintenance task that many vehicle owners can perform themselves. This guide provides a step-by-step approach to safely and effectively replace a brake light bulb, saving you time and money.
Why Changing Your Brake Light Matters
A functioning brake light is crucial for road safety. It alerts drivers behind you when you're slowing down or stopping, preventing accidents, especially in heavy traffic or low-visibility conditions. Driving with a burned-out brake light is not only dangerous, but it's also illegal in most jurisdictions. You could face a fine or a warning, so it’s essential to ensure all your lights are working properly. Moreover, addressing a faulty brake light promptly demonstrates responsible vehicle ownership and contributes to a safer driving environment for everyone.
Ignoring a brake light issue can lead to:
- Increased risk of rear-end collisions: Without a working brake light, other drivers have no warning of your deceleration.
- Legal penalties: Driving with a broken brake light can result in fines and points on your license.
- Failed vehicle inspections: A non-functioning brake light will cause your vehicle to fail a safety inspection, preventing you from legally operating it.
- Higher insurance rates: While indirect, repeated traffic violations can impact your insurance premiums.
How to Choose the Right Brake Light Bulb
Selecting the correct replacement brake light bulb is essential for proper functionality and compatibility. Using the wrong bulb can lead to dimmer light output, premature failure, or even damage to your vehicle's electrical system. Here's how to choose the right one:
1. Consult Your Owner's Manual
Your vehicle's owner's manual is the best resource for determining the correct bulb type. It will specify the exact bulb number required for your brake lights, along with other essential information about your vehicle's lighting system. Look for a section on "Bulb Replacement" or "Vehicle Specifications."
2. Check the Old Bulb
If you don't have your owner's manual readily available, you can carefully remove the old bulb and inspect it. The bulb type number is typically printed on the base of the bulb itself. You may need a magnifying glass to see it clearly. Note down the number and use it to find an exact replacement.
3. Use an Online Bulb Finder Tool
Many auto parts retailers offer online bulb finder tools. These tools allow you to enter your vehicle's year, make, and model to identify the correct brake light bulb. These tools often cross-reference various bulb manufacturers to ensure compatibility. Reputable websites like AutoZone, Advance Auto Parts, and O'Reilly Auto Parts offer these lookup services.
4. Understand Bulb Types
Brake light bulbs commonly come in several types, including:
- Incandescent: These are the traditional type of bulb, generally the least expensive, and most commonly used in older vehicles.
- LED (Light Emitting Diode): LED bulbs are more energy-efficient, last longer, and produce a brighter light compared to incandescent bulbs. They can be more expensive but are a worthwhile upgrade.
- Halogen: Halogen bulbs offer a brighter light than incandescent bulbs but are less energy-efficient and have a shorter lifespan than LEDs.
Important Considerations:
- Brightness (Lumens): Ensure the replacement bulb has a similar lumen output to the original bulb. Too bright can be blinding to other drivers, while too dim can be ineffective.
- Voltage: Brake lights typically operate on 12 volts. Confirm the replacement bulb is designed for this voltage.
- Base Type: Brake light bulbs come in various base types (e.g., bayonet, wedge). Match the base type to the original bulb to ensure it fits properly in the socket.
Once you have identified the correct bulb type, you can purchase it at any auto parts store or online retailer. Consider buying a spare to keep in your vehicle in case another bulb fails in the future.
How To Change Your Brake Light: A Step-by-Step Guide
Here's a detailed guide on how to change your brake light. Always prioritize safety and consult your vehicle's owner's manual for specific instructions related to your car model.
What You'll Need:
- Replacement brake light bulb (correct type for your vehicle)
- Gloves (to protect your hands and prevent oil transfer to the bulb)
- Screwdriver (Phillips or flathead, depending on the taillight assembly)
- Wrench (if needed to remove taillight assembly)
- Soft cloth or towel (to protect the vehicle's paint)
Steps:
- Safety First: Turn off the ignition and engage the parking brake. This is crucial to prevent any electrical hazards.
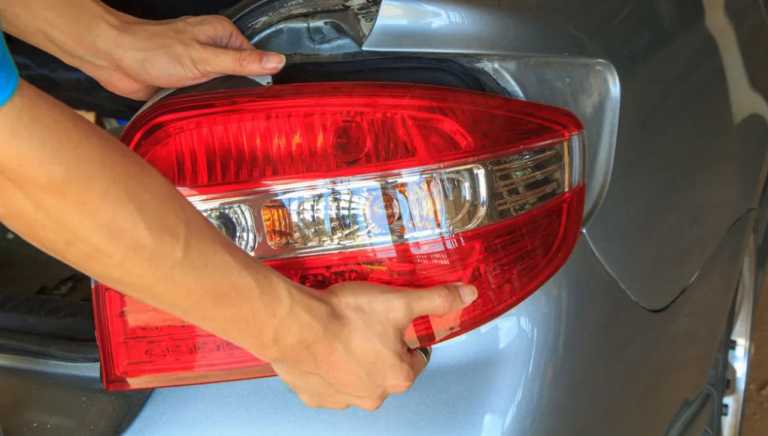
- Access the Taillight Assembly:
This varies depending on the vehicle. In many cars, you can access the taillight assembly from inside the trunk. Look for a panel or cover on the inside of the trunk, near the taillight. Some vehicles may require you to remove screws or clips to access the assembly. Refer to your owner’s manual for specific instructions on how to access the taillight assembly for your vehicle.
In some cases, you may need to remove the entire taillight housing from the outside of the vehicle. This usually involves removing screws or bolts holding the assembly in place. Be careful not to scratch the paint when removing the assembly.
- Remove the Bulb Socket:
Once you have access to the taillight assembly, locate the bulb socket for the brake light. The socket usually twists or clicks into place. Rotate the socket counterclockwise and gently pull it out of the taillight housing.
- Remove the Old Bulb:
The bulb will either push in and twist to lock in place, or simply pull straight out. If it’s a push-and-twist type, push the bulb in gently and rotate it counterclockwise to release it. If it simply pulls out, gently grasp the bulb and pull it straight out of the socket. Be careful not to break the bulb.
- Install the New Bulb:
Carefully insert the new bulb into the socket. If it’s a push-and-twist type, align the pins on the bulb with the slots in the socket, push it in, and rotate it clockwise to lock it in place. If it simply pushes in, insert the bulb straight into the socket until it is firmly seated. Avoid touching the glass part of the bulb with your bare fingers, as the oil from your skin can shorten its lifespan. If you do touch it, wipe it clean with a soft cloth.
- Reinstall the Bulb Socket:
Insert the bulb socket back into the taillight housing. Rotate it clockwise to lock it in place.
- Test the Brake Light:
Before reassembling everything, test the brake light to ensure it is working properly. Turn on the ignition and have someone press the brake pedal while you check the brake light. If the light does not work, double-check that the bulb is installed correctly and that the socket is properly connected.
- Reassemble the Taillight Assembly:
If the brake light is working, reassemble the taillight assembly by reinstalling the panel or cover in the trunk, or by reattaching the taillight housing to the vehicle with the screws or bolts. Make sure everything is securely fastened.
- Repeat for the Other Side (If Necessary):
If you have a burned-out brake light on the other side of the vehicle, repeat the process to replace that bulb as well. It's often a good idea to replace both brake light bulbs at the same time, as the other bulb may be close to burning out as well.
Real-World Owner Experiences
Many car owners have shared their experiences changing brake lights, offering valuable insights and tips. Here are some common themes:
- Difficulty Accessing the Taillight Assembly: Some owners report difficulty accessing the taillight assembly, especially in older vehicles. It's crucial to consult the owner's manual for specific instructions.
- Broken Fasteners: Plastic fasteners can become brittle over time and break when removing the taillight assembly. Having replacement fasteners on hand can save time and frustration.
- Corrosion: Corrosion can build up in the bulb socket, making it difficult to remove the old bulb. Using a contact cleaner can help loosen the bulb and improve the connection.
- LED Upgrades: Many owners have upgraded to LED brake light bulbs for improved brightness and longevity. While LEDs are more expensive, they can be a worthwhile investment.
One owner shared, "I struggled to remove the taillight assembly on my older car. The plastic clips were brittle and broke easily. I ended up having to order replacement clips online before I could finish the job." Another owner commented, "I upgraded to LED brake lights and the difference in brightness is amazing! I feel much safer knowing that drivers behind me can see my brake lights clearly."
Frequently Asked Questions (FAQs)
Q: How often should I check my brake lights?
A: You should check your brake lights regularly, ideally once a week. A quick visual inspection before each drive is also a good habit.
Q: Can I use any type of bulb for my brake lights?
A: No. You must use the correct bulb type specified for your vehicle. Refer to your owner's manual or an online bulb finder tool to determine the correct bulb.
Q: What if my brake light still doesn't work after replacing the bulb?
A: If the brake light still doesn't work after replacing the bulb, check the fuse for the brake lights. A blown fuse is a common cause of brake light failure. If the fuse is good, there may be a problem with the wiring or the brake light switch. Consult a qualified mechanic for further diagnosis.
Q: Can I replace a brake light bulb myself if I'm not mechanically inclined?
A: Changing a brake light bulb is generally a simple task that most car owners can perform themselves. However, if you are not comfortable working on your car, it's best to have a qualified mechanic replace the bulb for you.
Q: Are LED brake lights street legal?
A: Yes, as long as they meet the Department of Transportation (DOT) standards for brightness and color. Make sure the LED bulbs you purchase are DOT approved.
Q: What are the symptoms of a failing brake light switch?
A: Symptoms of a failing brake light switch include brake lights that don't illuminate when the brake pedal is pressed, brake lights that stay on constantly, or cruise control that doesn't disengage when the brake pedal is pressed. If you experience any of these symptoms, have your brake light switch inspected by a qualified mechanic.
By following these steps and tips, you can confidently change your brake light bulb and ensure your vehicle is safe and compliant with traffic laws. Remember to always prioritize safety and consult your owner's manual for specific instructions related to your vehicle model.