How To Change The Brakes On A Nissan Altima
Your Nissan Altima's brakes are arguably its most important safety feature. If they're not functioning correctly, it puts you, your passengers, and other drivers at risk. This article outlines how to diagnose brake problems, replace your Altima's brake pads and rotors, and understand why it's crucial to address brake issues promptly.
Symptoms of Worn or Damaged Brakes
Recognizing the symptoms of worn or damaged brakes is the first step in ensuring your safety. Here are some common signs that indicate your Nissan Altima's brakes need attention:
- Squealing or Screeching Noises: This is the most common symptom. A high-pitched squeal or screech, especially when braking, usually indicates that the brake pad wear indicators are contacting the rotor. These indicators are designed to make noise when the pads are nearing the end of their lifespan.
- Grinding Noise: A grinding noise suggests that the brake pads are completely worn down, and the metal backing plate is rubbing directly against the rotor. This is a serious issue that can cause significant damage to the rotors.
- Reduced Braking Performance: If you notice that your Altima takes longer to stop, or you need to apply significantly more pressure to the brake pedal, it could be a sign of worn brake pads, glazed rotors, or a leak in the brake system.
- Vibration or Pulsation in the Brake Pedal: A vibrating or pulsating brake pedal when braking often indicates warped rotors. The uneven surface of the rotor causes the brake pads to grab unevenly, resulting in the vibration.
- Pulling to One Side During Braking: If your Altima pulls to the left or right when you apply the brakes, it could be due to uneven brake wear, a stuck brake caliper, or a problem with the brake lines.
- Brake Pedal Feels Spongy or Soft: A spongy or soft brake pedal can indicate air in the brake lines or a leak in the brake system. This requires immediate attention as it can severely compromise braking performance.
- Brake Warning Light: The brake warning light on your dashboard can illuminate for various reasons, including low brake fluid, a problem with the ABS (Anti-lock Braking System), or a problem with the parking brake system. Consult your owner's manual or a qualified mechanic to diagnose the specific cause.
- Unusual Odors: A burning smell coming from the wheels after braking could indicate overheating brakes. This can be caused by excessive braking, a stuck brake caliper, or worn brake components.
Root Cause of Brake Problems
Brake problems typically arise from the normal wear and tear of components over time. Here's a breakdown of the most common causes:
- Worn Brake Pads: Brake pads are made of a friction material that gradually wears down as you use your brakes. The lifespan of brake pads varies depending on driving habits, road conditions, and the quality of the pads.
- Warped or Damaged Rotors: Brake rotors are the metal discs that the brake pads clamp onto to slow the vehicle. Over time, rotors can warp due to heat, uneven wear, or corrosion. Damage can also occur if worn brake pads are not replaced promptly, leading to metal-on-metal contact.
- Stuck Brake Calipers: Brake calipers house the brake pads and use hydraulic pressure to clamp them onto the rotors. Calipers can become stuck due to corrosion, dirt, or a lack of lubrication, preventing the pads from releasing fully. This can lead to premature brake pad wear and overheating.
- Leaking Brake Lines or Master Cylinder: The brake lines carry brake fluid from the master cylinder to the calipers. Leaks in the brake lines or master cylinder can reduce hydraulic pressure, leading to reduced braking performance and a spongy brake pedal.
- Contaminated Brake Fluid: Brake fluid is hygroscopic, meaning it absorbs moisture from the air. Over time, moisture contamination can lead to corrosion in the brake system and reduced braking performance. Contaminated brake fluid can also boil at lower temperatures, creating air bubbles in the lines.
- ABS System Malfunctions: While less common, problems with the ABS system can also affect braking performance. ABS malfunctions can cause the brake warning light to illuminate and may result in longer stopping distances.
Consequences of Ignoring Brake Problems
Ignoring brake problems can have serious and potentially life-threatening consequences. Here's what can happen if you neglect your brakes:
- Increased Stopping Distance: Worn brakes significantly increase your stopping distance, making it harder to avoid collisions. This is especially dangerous in emergency situations.
- Loss of Braking Control: Severely worn brakes can lead to a complete loss of braking control, especially in wet or slippery conditions.
- Damage to Other Brake Components: Neglecting brake problems can cause further damage to other brake components, such as the rotors and calipers. This can result in more expensive repairs down the road.
- Accidents and Injuries: Ultimately, neglecting brake problems can increase your risk of accidents and injuries. A sudden brake failure can have devastating consequences.
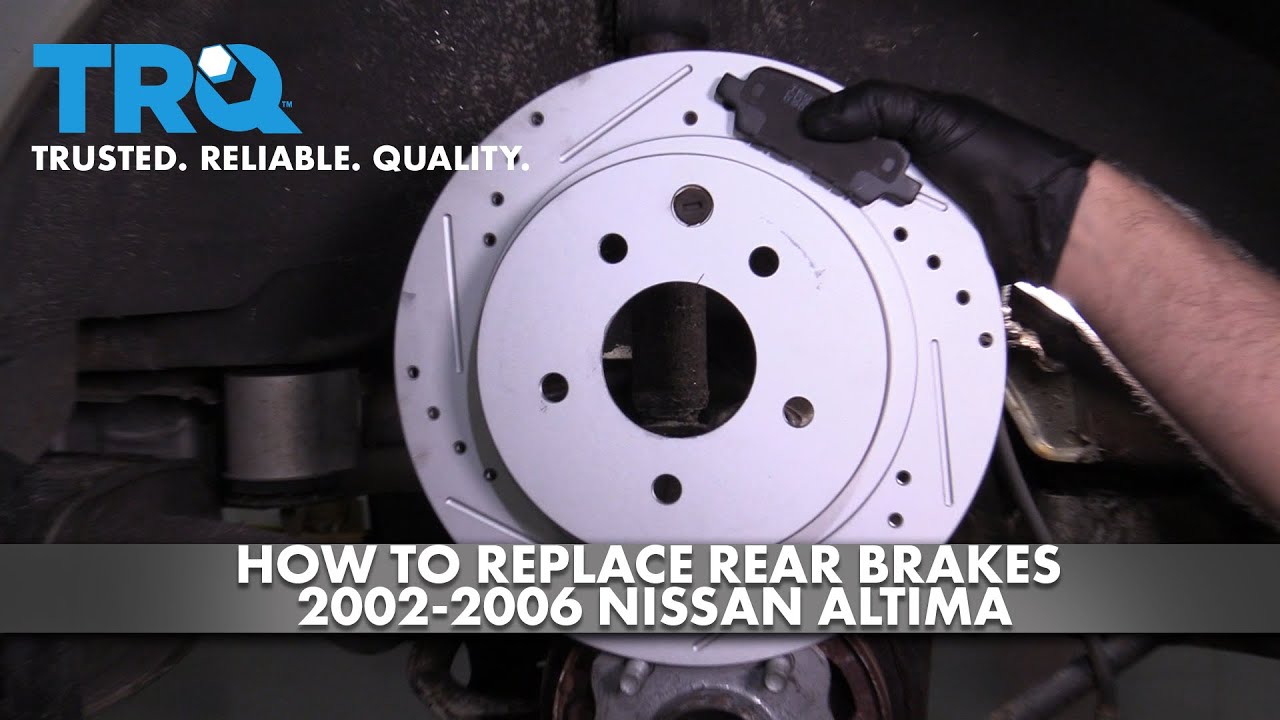
Recommended Fixes: Replacing Brake Pads and Rotors
The most common fix for brake problems is replacing the brake pads and, in some cases, the rotors. Here's a general overview of the process. This is for informational purposes only and should not be substituted for professional advice. If you are not comfortable working on your car's brakes, consult a qualified mechanic.
Tools and Materials Needed:
- New brake pads (front or rear, depending on the problem)
- New brake rotors (recommended if the old rotors are worn, warped, or damaged)
- Brake cleaner
- Caliper grease
- Socket set and wrench set
- Torque wrench
- C-clamp or brake caliper compressor tool
- Jack and jack stands
- Wheel chocks
- Gloves
- Safety glasses
- Brake fluid (check your owner's manual for the correct type)
Step-by-Step Instructions:
- Safety First: Park your Altima on a level surface, engage the parking brake, and use wheel chocks to secure the rear wheels.
- Loosen Lug Nuts: Use a lug wrench to loosen the lug nuts on the wheel of the brake you'll be working on. Do not remove them completely at this stage.
- Raise and Support the Vehicle: Use a jack to raise the vehicle and place jack stands securely under the frame. Never work under a vehicle supported only by a jack.
- Remove the Wheel: Remove the lug nuts completely and take off the wheel.
- Inspect the Brake Components: Examine the brake pads, rotors, and calipers for wear, damage, or leaks.
- Remove the Brake Caliper: Locate the bolts that hold the caliper to the caliper bracket. Remove these bolts and carefully slide the caliper off the rotor. Be careful not to damage the brake hose. You may need to compress the caliper piston slightly to remove the caliper.
- Support the Caliper: Use a bungee cord or wire to suspend the caliper from the suspension to avoid putting stress on the brake hose.
- Remove the Brake Pads: Remove the old brake pads from the caliper bracket. Note their orientation for reassembly.
- Remove the Caliper Bracket (if necessary for rotor replacement): If you are replacing the rotors, you will need to remove the caliper bracket. Locate the bolts that hold the bracket to the steering knuckle and remove them.
- Remove the Rotor: The rotor may be held in place by a few screws or may be rusted to the hub. If rusted, use a rubber mallet to gently tap the rotor until it comes loose.
- Clean the Hub Surface: Use a wire brush to clean the hub surface where the new rotor will mount.
- Install the New Rotor: Install the new rotor onto the hub. Secure it with the screws (if applicable).
- Reinstall the Caliper Bracket (if removed): Reinstall the caliper bracket and torque the bolts to the manufacturer's specifications.
- Compress the Caliper Piston: Use a C-clamp or brake caliper compressor tool to compress the caliper piston fully back into the caliper bore. This is necessary to make room for the new, thicker brake pads.
- Lubricate the Caliper Slides: Clean and lubricate the caliper slide pins with caliper grease. This ensures smooth movement of the caliper.
- Install the New Brake Pads: Install the new brake pads into the caliper bracket, ensuring they are properly seated.
- Reinstall the Caliper: Slide the caliper back onto the rotor and caliper bracket. Reinstall the caliper bolts and torque them to the manufacturer's specifications.
- Repeat on the Other Side: Repeat the process on the other side of the vehicle.
- Bleed the Brakes: After replacing the brake pads and rotors, it's essential to bleed the brakes to remove any air from the brake lines. Start with the wheel furthest from the master cylinder and work your way closer.
- Reinstall the Wheels: Reinstall the wheels and tighten the lug nuts hand-tight.
- Lower the Vehicle: Lower the vehicle to the ground and torque the lug nuts to the manufacturer's specifications.
- Test the Brakes: Pump the brake pedal several times to build up pressure. Then, take the vehicle for a test drive in a safe area to ensure the brakes are functioning properly.
Cost Estimates and Shop Advice
The cost of replacing brakes on a Nissan Altima can vary depending on several factors, including the quality of the parts, the labor rate of the mechanic, and whether you replace just the pads or the pads and rotors. Here's a general estimate:
- Brake Pad Replacement (Front or Rear): $150 - $300 per axle
- Brake Pad and Rotor Replacement (Front or Rear): $300 - $600 per axle
These are just estimates, and the actual cost may vary. It's always a good idea to get a quote from several different shops before having your brakes replaced.
Shop Advice: When choosing a mechanic, look for a shop that specializes in brakes or has a good reputation for brake repairs. Ask about the quality of the parts they use and whether they offer a warranty on their work. Don't be afraid to ask questions and get a clear understanding of the repair process.
Technical Service Bulletins and Common Failure Mileage
While specific TSBs (Technical Service Bulletins) vary depending on the model year of your Altima, it's worth checking with your local Nissan dealer or searching online databases for any relevant TSBs related to brake issues. These bulletins often provide valuable information about common problems and recommended repair procedures.
Generally, brake pads on a Nissan Altima last anywhere from 30,000 to 70,000 miles, depending on driving habits and road conditions. Rotors may last for two or more sets of brake pads. However, it's essential to inspect your brakes regularly and replace them when they show signs of wear or damage, regardless of mileage. Following a regular maintenance schedule is key to ensuring your brakes are functioning optimally. Contacting a local mechanic will allow for a full inspection of the vehicle and allow for any needed repairs or maintenance to be performed.