How To Check For A Bad Alternator
Alright, let's talk about alternators. These unsung heroes of your car's electrical system are often overlooked until they decide to take a vacation, leaving you stranded with a dead battery. Understanding how to diagnose a failing alternator isn't just about saving money on mechanic fees; it's about understanding your car and being prepared for potential issues, especially if you're someone who likes to tinker and modify your vehicles.
Purpose of Understanding Alternator Diagnosis
Why bother learning this stuff? Simple: preventative maintenance and quick repairs. A failing alternator can masquerade as a dying battery. By learning to diagnose the alternator, you can avoid replacing a perfectly good battery, identify potential issues before they leave you stranded, and gain a deeper understanding of your vehicle's electrical system. Plus, for those of you who enjoy modifying your cars with aftermarket accessories like amplifiers or lighting, knowing how your alternator functions is crucial for ensuring you're not overloading the system and causing premature failure.
Key Specs and Main Parts
Before we dive into troubleshooting, let's cover the basic components and their functions. An alternator's primary job is to convert mechanical energy from the engine (via a belt) into electrical energy to charge the battery and power the car's electrical systems when the engine is running. Key specifications to consider include:
- Voltage Output: Typically around 13.8-14.4 volts when the engine is running. This is crucial for charging the battery and running electrical components.
- Amperage Output: This indicates the alternator's capacity to supply current. Higher amperage alternators are needed for vehicles with heavy electrical loads.
- Duty Cycle: The proportion of time that the alternator is generating power.
The main parts of an alternator include:
- Rotor (Armature): The rotating component inside the alternator with coils of wire.
- Stator: The stationary component surrounding the rotor, also with coils of wire. As the rotor spins, it induces a current in the stator windings.
- Rectifier (Diode Bridge): Converts the AC (alternating current) generated by the stator into DC (direct current), which is required by the car's electrical system. Diodes are one-way valves for electricity; this bridge of diodes ensures that the AC waveform becomes a DC voltage.
- Voltage Regulator: Controls the alternator's output voltage to prevent overcharging the battery. This is a critical component; without it, the alternator could output dangerously high voltage.
- Brushes and Slip Rings: The brushes make electrical contact with the slip rings on the rotor, allowing current to flow to the rotor windings. Brushes wear down over time, leading to alternator failure.
- Pulley: Driven by the engine's serpentine belt, rotating the rotor.
How It Works
Here's the basic rundown of how an alternator functions:
- The engine turns the serpentine belt, which rotates the alternator pulley.
- The rotating pulley spins the rotor inside the alternator.
- The rotor, which is essentially an electromagnet, creates a magnetic field that interacts with the stator windings.
- This interaction induces an alternating current (AC) in the stator windings.
- The rectifier (diode bridge) converts the AC current into direct current (DC).
- The voltage regulator monitors the system voltage and adjusts the current flowing through the rotor windings to maintain a consistent voltage output (around 13.8-14.4 volts).
- The regulated DC voltage is then supplied to the battery for charging and to power the vehicle's electrical components.
Real-World Use: Basic Troubleshooting
So, how do you know if your alternator is failing? Here are some common symptoms and basic troubleshooting steps:
- Dimming or Flickering Headlights: This is a classic sign of a weak alternator. The alternator may not be providing enough power to keep the headlights bright, especially at idle.
- Dead Battery: If your battery keeps dying, even after being charged, the alternator may not be charging it properly.
- Warning Light (Battery or ALT): The dashboard warning light is a clear indication of a problem. Don't ignore it!
- Strange Noises: Growling, whining, or squealing noises from the alternator could indicate worn bearings or a loose belt.
- Electrical Issues: Problems with other electrical components, such as the radio, power windows, or wipers, could also be related to a failing alternator.
Basic Troubleshooting Steps:
- Visual Inspection: Check the alternator belt for cracks, wear, or looseness. Make sure the connections to the alternator are clean and tight. Inspect the alternator itself for any signs of damage or corrosion.
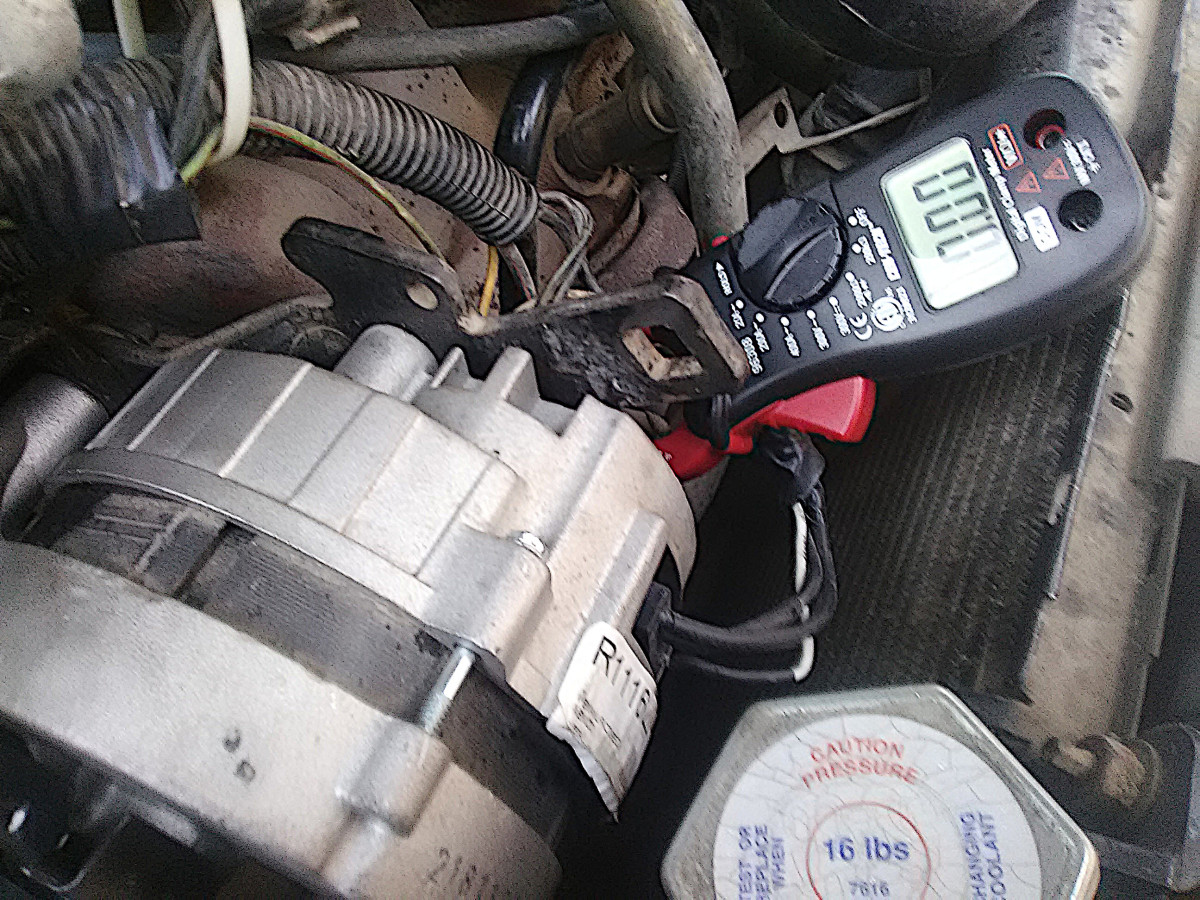
- Voltage Test (with a Multimeter):
- With the engine off, check the battery voltage. It should be around 12.6 volts.
- Start the engine and let it idle. Check the voltage at the battery terminals again. It should now be between 13.8 and 14.4 volts. A reading significantly below 13.8 volts suggests a failing alternator.
- Turn on the headlights, radio, and other electrical accessories. The voltage should remain above 13 volts. If it drops significantly, the alternator is likely struggling to keep up.
- Load Test: Many auto parts stores offer free alternator load testing. This test puts the alternator under a heavy electrical load to see if it can maintain the proper voltage output.
Safety Considerations
Working with electrical components can be dangerous. Always disconnect the negative battery cable before working on the alternator or any other part of the electrical system. Never touch the alternator terminals while the engine is running. Also be careful around the serpentine belt – keep your hands and loose clothing clear of the belt and pulleys when the engine is running. The rectifier (diode bridge) within the alternator can also store a charge, so don't immediately start working on the alternator even after the battery is disconnected.
High-amperage alternators, frequently used in modified vehicles, can pose a greater risk due to their higher current output. Ensure you understand the wiring requirements and safety precautions associated with these alternators before installation and troubleshooting.
Diagrams and Further Information
While we've covered the basics here, having a detailed wiring diagram specific to your vehicle can be incredibly helpful for troubleshooting. These diagrams show the exact wiring connections between the alternator, battery, voltage regulator, and other electrical components. They also include information on wire gauges, fuse locations, and other important details.
We have a generic diagram available for download that illustrates the core principles of alternator wiring. While it may not match your specific vehicle perfectly, it can provide a valuable overview of the system. Remember to always consult your vehicle's repair manual for the most accurate and detailed information.
By understanding the function, key components, and basic troubleshooting steps, you'll be well-equipped to diagnose and address alternator issues, saving you time, money, and potential roadside headaches.