How To Check The Starter On A Car
So, your car's not starting? Before you start tearing into the engine, let's check the starter. A faulty starter motor is a common culprit for a no-start condition, and with a bit of knowledge and some basic tools, you can diagnose the problem yourself. This article will walk you through the process of checking your car's starter system, step-by-step. We'll cover the key components, how they work together, and how to troubleshoot common issues.
Purpose of Checking the Starter
Understanding how to check your starter is invaluable for a few reasons. First and foremost, it can save you money on unnecessary mechanic bills. Instead of blindly replacing parts, you can pinpoint the exact issue. Secondly, it's a great learning experience! Dissecting the starter system helps you understand basic automotive electrical principles. Finally, knowing how to diagnose the starter system is crucial for car owners who enjoy tackling their own repairs, upgrades, or even modifications. Many aftermarket parts, from upgraded alternators to performance batteries, interact directly with the starter, so understanding its function is essential for a seamless integration.
Key Specs and Main Parts of the Starter System
The starter system might seem complex, but it's comprised of a few key components working together in a relatively straightforward manner:
- Battery: The heart of the electrical system, providing the initial power to crank the engine. Key specs include voltage (typically 12V) and cold cranking amps (CCA), which indicate the battery's ability to deliver current in cold weather.
- Ignition Switch: This acts as the gatekeeper, sending the signal to engage the starter when you turn the key.
- Starter Relay: A heavy-duty switch that uses a small current from the ignition switch to control a larger current flow to the starter solenoid. This prevents high current from flowing through the ignition switch, protecting it from damage.
- Starter Solenoid: An electromagnetic switch mounted directly on the starter motor. When energized, it does two crucial things: it engages the starter pinion gear with the engine's flywheel or flexplate, and it closes the circuit that sends high current to the starter motor.
- Starter Motor: A powerful electric motor that spins the engine's flywheel or flexplate, initiating the combustion cycle. Key specs include horsepower (HP) and torque, which determine the motor's cranking power.
- Flywheel/Flexplate: A toothed wheel attached to the engine's crankshaft. The starter pinion gear engages with these teeth to turn the engine.
- Wiring and Connections: Don't underestimate these! Corrosion, loose connections, or damaged wires can disrupt the entire system. Pay close attention to the ground connections.
Understanding Starter System Symbols
When examining electrical diagrams, understanding the symbols is paramount. Here's a quick breakdown of common symbols you'll encounter in starter system schematics:
- Solid Lines: Represent wires carrying electrical current. Thicker lines often indicate wires carrying heavier currents.
- Dotted Lines: Usually indicate ground connections or chassis grounds.
- Zigzag Lines: Represent resistors, which limit current flow.
- Circles with an "X": Represent lamps or light bulbs.
- Rectangles with a diagonal line: Commonly represent switches.
- Battery Symbol: Positive terminal is usually marked with a "+" and a longer line, while the negative terminal is marked with a "-" and a shorter line.
- Ground Symbol: Usually looks like a series of horizontal lines decreasing in size.
- Color Coding: Wiring diagrams often use color codes (e.g., red for power, black for ground) to differentiate circuits. Pay attention to the legend of the diagram.
How the Starter System Works
The starting process unfolds in a precise sequence:
- You turn the ignition key to the "start" position.
- This sends a low-current signal to the starter relay.
- The starter relay, acting like a switch, closes a circuit that allows a higher current to flow to the starter solenoid.
- The starter solenoid engages, pushing the starter pinion gear into the flywheel/flexplate. Simultaneously, the solenoid closes a high-current circuit directly to the starter motor.
- The starter motor spins, turning the engine's crankshaft.
- Once the engine starts, you release the key, which disengages the solenoid and retracts the pinion gear.
Real-World Use: Basic Troubleshooting Tips
Here's how to apply your knowledge to diagnose starter problems:
- No Cranking, No Sound: This could indicate a dead battery, a faulty ignition switch, a bad starter relay, a problem with the wiring, or a completely dead starter motor. Check the battery voltage first. If the battery is good, try jumping the starter solenoid terminals (with extreme caution - see safety section below) to see if the starter motor engages directly. If it does, the problem is likely in the ignition switch, starter relay, or wiring.
- Clicking Sound: A clicking sound usually indicates that the solenoid is engaging but the starter motor isn't turning. This could be due to a weak battery, corroded connections, or a worn-out starter motor. Check the battery voltage and clean the battery terminals and starter connections.
- Slow Cranking: This suggests a weak battery, high resistance in the wiring (due to corrosion or loose connections), or a worn-out starter motor struggling to turn the engine.
- Starter Spins But Doesn't Engage: This points to a problem with the starter solenoid or the starter pinion gear not properly engaging with the flywheel/flexplate. The solenoid might be faulty, or the pinion gear might be worn or damaged.
Troubleshooting Steps:
- Visual Inspection: Check all wiring connections to the starter, solenoid, and battery for corrosion, looseness, or damage. Clean and tighten as needed.
- Voltage Drop Test: Use a multimeter to measure the voltage drop across the starter circuit while cranking the engine. Excessive voltage drop indicates high resistance in the wiring. Connect the multimeter leads to each end of the cable. You can test both positive and ground cables in this fashion.
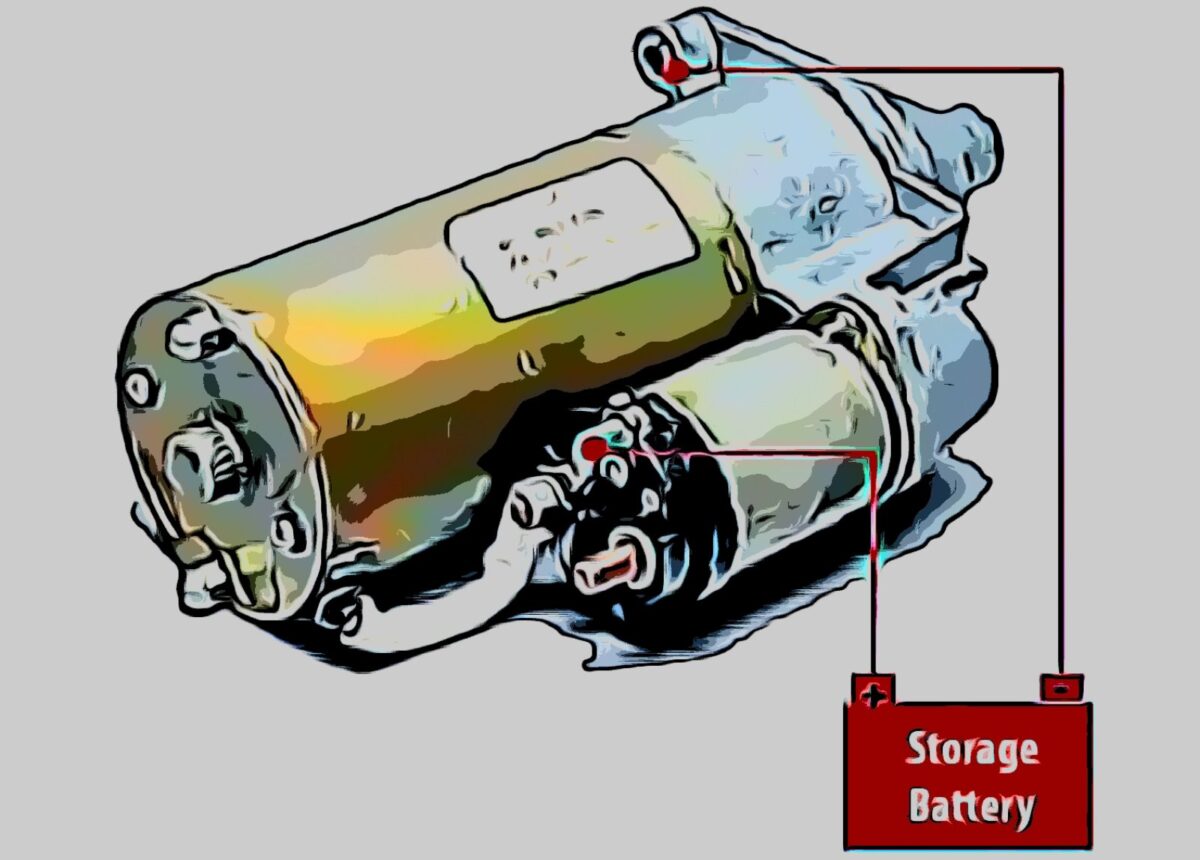
- Solenoid Test: With the ignition off, use a jumper wire to bypass the starter relay and apply 12V directly to the solenoid's control terminal (the small terminal). If the solenoid clicks and the starter motor engages, the solenoid is likely functioning.
- Direct Starter Test: Carefully (and with all safety precautions in place) apply 12V directly to the starter motor's power terminal (the large terminal) and ground the starter case. If the starter motor spins, it's likely functional.
Safety First!
Working with automotive electrical systems can be dangerous. Here are some critical safety precautions:
- Disconnect the Negative Battery Cable: Before working on any electrical component, disconnect the negative battery cable to prevent accidental shorts and electrical shocks.
- Use Insulated Tools: Always use tools with insulated handles to protect yourself from electric shock.
- Wear Safety Glasses: Protect your eyes from flying debris and battery acid.
- Be Extremely Careful When Jumping the Solenoid: This bypasses safety mechanisms and can result in sparks, burns, and potential damage to the vehicle. Ensure the vehicle is in park (automatic) or neutral (manual) with the parking brake firmly engaged. Keep clear of moving parts.
- Be Aware of Hot Surfaces: The starter motor and exhaust components can get very hot. Allow them to cool down before touching them.
- Work in a Well-Ventilated Area: Batteries can emit explosive gases. Work in a well-ventilated area to avoid the risk of explosion.
By following these steps and understanding the principles of the starter system, you can confidently diagnose and potentially repair a faulty starter. Remember to always prioritize safety and consult a qualified mechanic if you're unsure about any procedure.
We have the starter system diagram file available for you to download to assist you further in your diagnosis. With the diagram and a little patience, you can tackle this problem like a pro!