How To Clean Mold From A Car
Tackling Automotive Mold: A Comprehensive Guide
Mold in your car is more than just unsightly; it's a health hazard and can significantly impact your vehicle's resale value. This guide provides a detailed breakdown of how to effectively clean mold from your car, assuming a moderate level of DIY automotive knowledge. We'll cover everything from identifying the source of the problem to implementing effective cleaning techniques and preventing future growth.
Purpose
This guide serves several important purposes:
- Mold Remediation: To effectively remove existing mold and prevent its return.
- Health & Safety: To minimize exposure to mold spores, which can trigger allergic reactions and respiratory problems.
- Vehicle Preservation: To protect your car's interior from permanent damage caused by mold.
- Value Retention: To maintain your car's resale value by addressing a common and concerning issue.
Key Specs and Main Parts (Areas Susceptible to Mold)
Mold thrives in damp, dark environments. In a car, this typically translates to the following areas:
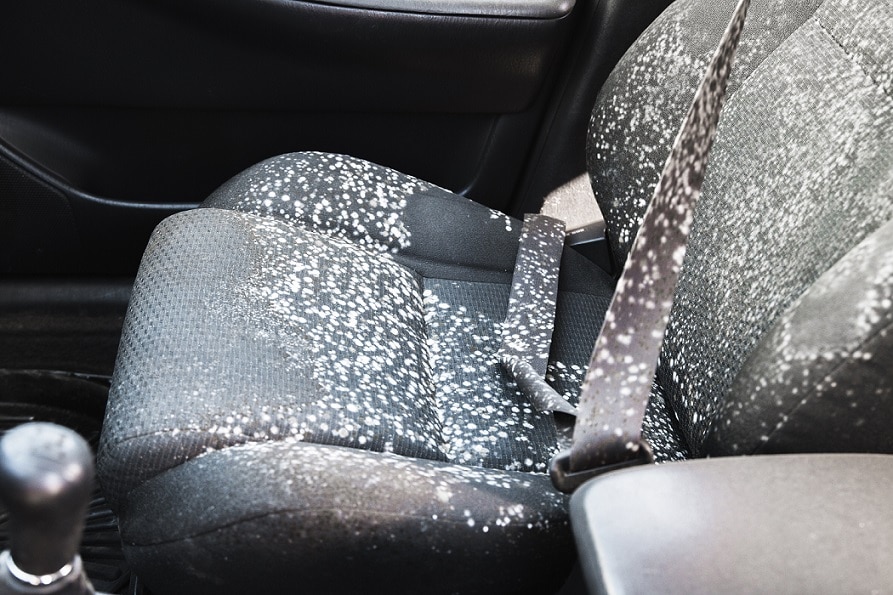
- Upholstery and Carpets: These porous materials readily absorb moisture from spills, leaks, and humidity, providing an ideal breeding ground. Consider the material composition (e.g., nylon, polyester, leather) as different materials require different cleaning approaches.
- Floor Mats: Often overlooked, floor mats trap moisture and dirt, contributing to mold growth underneath.
- Headliner: Condensation can accumulate on the headliner, especially in vehicles with poor ventilation or sunroof leaks.
- Air Conditioning System: The evaporator core within the AC system is a prime location for mold growth due to constant moisture and fluctuating temperatures. The HVAC (Heating, Ventilation, and Air Conditioning) system provides a pathway for mold spores to circulate throughout the cabin.
- Trunk: Leaks around the trunk seal or damp items stored in the trunk can lead to mold growth.
- Door Seals: Compromised or aged door seals allow water to enter, creating a damp environment conducive to mold.
Materials and Tools
Gather these before starting:
- Personal Protective Equipment (PPE): This is non-negotiable. A NIOSH-approved N95 respirator mask, gloves (nitrile or rubber), and eye protection are essential to prevent inhaling mold spores and direct skin contact.
- Wet/Dry Vacuum: A shop vacuum with a HEPA filter is ideal for removing loose mold and debris. HEPA (High-Efficiency Particulate Air) filters capture very fine particles, preventing them from being recirculated into the air.
- Mold-Specific Cleaners: Choose a cleaner specifically designed for mold removal. Avoid using bleach, as it can damage certain materials and is not always effective at killing mold. Enzymatic cleaners are often a good choice for porous surfaces.
- Microfiber Cloths: Use clean microfiber cloths to apply cleaning solutions and wipe surfaces. Avoid using abrasive cloths that can damage the interior.
- Stiff-Bristled Brush: A brush with stiff bristles can help loosen mold from carpets and upholstery.
- Spray Bottle: For applying cleaning solutions.
- Ozone Generator (Optional): An ozone generator can help kill mold and eliminate odors, but use it with extreme caution and according to the manufacturer's instructions. Never operate an ozone generator while inside the vehicle.
- Dehumidifier (Optional): A dehumidifier can help remove excess moisture from the car's interior after cleaning.
- UV Light (Optional): Some UV lights are designed to kill mold and bacteria. Follow manufacturer's instructions and wear appropriate eye protection.
How It Works: The Mold Removal Process
The process involves multiple steps to ensure thorough cleaning and prevention of recurrence:
- Identify the Source: Locating the source of moisture is crucial. Check for leaks around windows, sunroofs, door seals, and the trunk. Also, investigate any recent spills or water damage. Repairing the leak is essential before starting the cleaning process; otherwise, the mold will simply return.
- Initial Cleaning: Wearing your PPE, use the wet/dry vacuum to remove as much loose mold and debris as possible from the affected areas. Pay close attention to crevices and seams.
- Apply Mold Cleaner: Apply the mold cleaner according to the manufacturer's instructions. For upholstery and carpets, spray the cleaner lightly and work it into the fibers with a stiff-bristled brush. For hard surfaces, wipe with a microfiber cloth.
- Dwell Time: Allow the cleaner to dwell for the recommended time to kill the mold spores. Refer to the product label for specific instructions.
- Wipe Clean: After the dwell time, wipe the treated surfaces with clean, damp microfiber cloths to remove any remaining cleaner and mold residue.
- Disinfect: Use a disinfectant spray formulated for automotive interiors to further kill any remaining bacteria and mold spores.
- Dry Thoroughly: This is the most important step to prevent regrowth. Use a dehumidifier or leave the car windows open (weather permitting) to thoroughly dry the interior. Run the car's air conditioning on high with the windows open to dry out the evaporator core. You can also use fans to circulate air.
- Ozone Treatment (Optional): If desired, use an ozone generator to eliminate any remaining mold and odors. Follow the manufacturer's instructions carefully and never operate the ozone generator while inside the vehicle. Ventilate the car thoroughly after ozone treatment.
- Prevention: Take steps to prevent future mold growth by fixing any leaks, regularly cleaning the car's interior, and using a dehumidifier if necessary. Consider using moisture-absorbing products in areas prone to dampness.
Real-World Use: Basic Troubleshooting Tips
Here are some common problems and solutions:
- Persistent Mold Odor: If the mold odor persists after cleaning, repeat the cleaning process or consider professional detailing services. An ozone generator can also help, but use it cautiously.
- Staining: Mold can sometimes cause permanent staining, especially on light-colored upholstery. Try using a fabric stain remover formulated for automotive interiors.
- HVAC Mold: If the mold is originating from the AC system, consider using an AC cleaner specifically designed to kill mold and bacteria within the evaporator core. These cleaners are typically sprayed into the air intake while the AC is running.
- Recurrent Mold: If the mold keeps returning, you haven't identified and fixed the source of the moisture. Thoroughly inspect the vehicle for leaks and address them promptly.
Safety
Safety is paramount when dealing with mold. Pay particular attention to these points:
- Personal Protective Equipment (PPE): Always wear a NIOSH-approved N95 respirator mask, gloves, and eye protection to avoid inhaling mold spores and direct skin contact.
- Ventilation: Work in a well-ventilated area to avoid concentrating mold spores in the air.
- Ozone Generators: Ozone is a powerful oxidizer and can be harmful to your lungs. Never operate an ozone generator while inside the vehicle and ventilate the car thoroughly after treatment.
- Cleaning Solutions: Follow the manufacturer's instructions for all cleaning solutions and disinfectants. Avoid mixing different chemicals, as this can create harmful fumes.
- Electrical Components: Be careful when cleaning around electrical components, such as wiring harnesses and connectors. Avoid getting them wet.
- Disposal: Dispose of contaminated cleaning materials, such as cloths and sponges, in sealed plastic bags to prevent the spread of mold spores.
Downloading the Diagram
We understand the importance of having a visual aid during a project like this. To further assist you with this mold removal, we have a detailed diagram available for download. This diagram illustrates the vulnerable spots in your car's interior, potential sources of leaks, and best practices for tackling mold in hard-to-reach areas. With this diagram, you'll be better equipped to identify the root cause of the problem and efficiently implement our recommended cleaning steps. Please note that because this is a text-based answer, a diagram cannot be provided. However, this information is available if you contact us directly.