How To Drain A Gas Tank In A Car
Draining a gas tank might seem like a drastic measure, but it's a necessary skill for the serious DIY mechanic. Whether you're dealing with contaminated fuel, prepping a vehicle for long-term storage, or performing a fuel system repair, knowing how to safely and effectively drain a gas tank is crucial. This guide provides a detailed, step-by-step approach for experienced DIYers, covering the necessary precautions, tools, and techniques.
Fuel System Fundamentals
Before diving into the practical aspects of draining a tank, let's review the basics of a modern automotive fuel system. The primary components include:
- Fuel Tank: The reservoir holding the gasoline. Often made of plastic or metal, it's designed to withstand pressure and prevent leaks.
- Fuel Pump: Typically located inside the fuel tank, the fuel pump draws fuel and sends it to the engine at a specific pressure. These are usually electric, and many modern pumps are variable speed to optimize fuel delivery.
- Fuel Filter: Removes contaminants from the fuel before it reaches the engine. The fuel filter might be located inside the fuel tank, in the fuel line, or in the engine compartment.
- Fuel Lines: Tubes that transport the fuel from the tank to the engine and back (in return-style systems).
- Fuel Rail: A manifold distributing fuel to the injectors.
- Fuel Injectors: Precisely meter fuel into the engine's intake manifold or directly into the combustion chamber (in direct injection systems).
- Fuel Pressure Regulator: Maintains a consistent fuel pressure to the injectors. In returnless fuel systems, this is often integrated with the fuel pump module.
Understanding this system is critical because it highlights the importance of cleanliness and caution when working with fuel. Contamination and improper handling can damage these components and affect engine performance.
Technical Breakdown: Draining the Tank
There are several methods for draining a fuel tank, each with its own set of advantages and disadvantages. We will cover the most common method, using the fuel pump itself.
Method 1: Using the Fuel Pump
This is often the safest and most efficient method, as it utilizes the existing fuel system to transfer the fuel.
- Safety First: Disconnect the negative (-) battery terminal. This is absolutely essential to prevent accidental sparks that could ignite fuel vapors. Work in a well-ventilated area, away from any open flames, sparks, or heat sources. Have a fire extinguisher readily available.
- Access the Fuel Pump Connector: Locate the fuel pump electrical connector. This is typically accessible under the rear seat or in the trunk, often behind an access panel. Consult your vehicle's service manual for the exact location.
- Identify the Fuel Pump Wires: Use a wiring diagram (available in your service manual or online) to identify the positive (+) and negative (-) wires for the fuel pump.
- Prepare the Fuel Collection System: Connect a suitable length of fuel-resistant hose to the fuel outlet line, typically located near the fuel filter or fuel rail in the engine compartment. Secure the hose to prevent leaks and direct it into approved fuel containers. Do not use plastic containers that are not designed for fuel storage. They can dissolve and cause contamination.
- Powering the Fuel Pump: You will need to *carefully* apply power to the fuel pump to activate it. You can do this either by:
- Jump Wires: Using jumper wires, connect the positive wire from the battery (with an inline fuse, ideally 5-10 amps) to the positive wire of the fuel pump connector, and connect the negative wire from the battery to the negative wire of the fuel pump connector. Ensure correct polarity. This will manually activate the fuel pump.
- Bypassing the Fuel Pump Relay: Locate the fuel pump relay in the vehicle's fuse box (refer to your service manual). Remove the relay. Using a jumper wire, bridge the terminals in the relay socket that provide power to the fuel pump. Again, consult your service manual to identify the correct terminals.
- Monitor the Fuel Flow: Observe the fuel flowing through the hose into the container. Once the fuel tank is empty or the desired amount has been drained, immediately disconnect the power to the fuel pump.
- Reassemble and Secure: Disconnect the jumper wires (or remove the jumper from the relay socket). Reconnect the fuel pump electrical connector. Reinstall the access panel and the rear seat (if applicable). Reconnect the negative battery terminal.
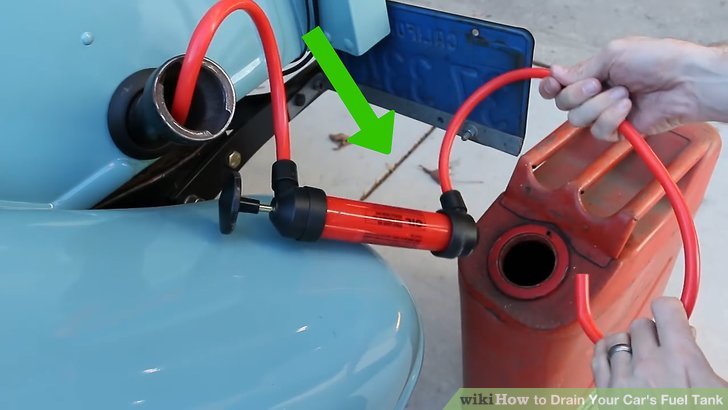
Method 2: Siphoning (Use Only As Last Resort!)
Siphoning is generally discouraged due to the risk of ingesting fuel and the potential for damage to the fuel system. Many modern vehicles have anti-siphon devices in the fuel filler neck. If you *must* siphon, follow these precautions:
- Use a Siphon Pump: Never attempt to siphon fuel by mouth. Use a commercially available siphon pump with a hand bulb.
- Insert the Hose Carefully: Carefully insert the siphon hose into the fuel tank through the filler neck. Avoid forcing the hose, as this could damage the fuel system.
- Pump the Fuel: Use the hand bulb of the siphon pump to initiate the fuel flow. Direct the fuel into approved fuel containers.
Common Issues and Maintenance Concerns
- Fuel Contamination: Water, rust, and debris can accumulate in the fuel tank over time. This contamination can damage the fuel pump, injectors, and other fuel system components. If you suspect contamination, inspect the drained fuel and consider cleaning or replacing the fuel tank.
- Fuel Pump Failure: A failing fuel pump can cause various engine problems, including hard starting, poor performance, and stalling. If you suspect a fuel pump failure, perform a fuel pressure test to diagnose the issue.
- Fuel Line Leaks: Fuel lines can become brittle and crack over time, leading to fuel leaks. Inspect the fuel lines regularly for signs of damage and replace them as needed.
- Anti-Siphon Devices: Modern vehicles often have anti-siphon devices that make it difficult or impossible to siphon fuel. Trying to force a hose past these devices can damage the fuel system.
- Fuel Vapor Hazards: Gasoline vapors are highly flammable and can be explosive. Always work in a well-ventilated area and take precautions to prevent sparks or open flames.
Do's and Don'ts
Do's:
- Do disconnect the negative battery terminal.
- Do work in a well-ventilated area.
- Do use approved fuel containers.
- Do have a fire extinguisher readily available.
- Do consult your vehicle's service manual.
- Do use a fuel pressure gauge to verify the system is no longer under pressure before disconnecting fuel lines.
Don'ts:
- Don't smoke or use open flames near fuel.
- Don't siphon fuel by mouth.
- Don't use plastic containers not designed for fuel storage.
- Don't force hoses into the fuel tank.
- Don't ignore warning signs like fuel leaks or unusual smells.
- Don't bypass safety devices, such as fuses.
Conclusion
Draining a gas tank is a task that requires careful planning and execution. Using the fuel pump method, as detailed above, is the safest and most recommended way to drain your tank. Remember to always prioritize safety by disconnecting the battery, working in a well-ventilated area, and using proper fuel containers. If you are uncomfortable with any of these steps or encounter difficulties, consult a qualified mechanic. While siphoning might seem quicker, the risks involved generally outweigh the benefits. By following these guidelines, you can confidently tackle this task and maintain your vehicle's fuel system properly.