How To Fix A Peeling Steering Wheel
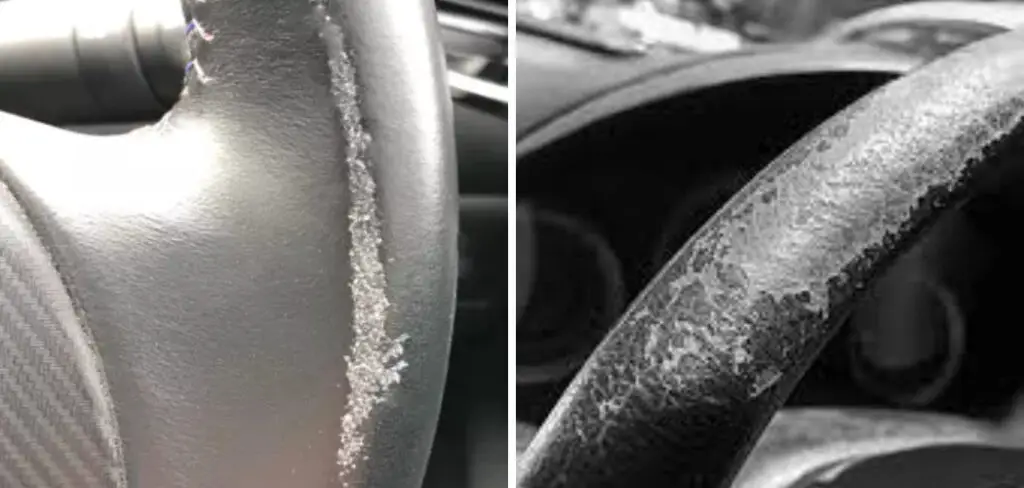
A peeling steering wheel isn't just an aesthetic issue; it impacts grip, comfort, and even the overall driving experience. Nobody wants to grip a sticky, flaking mess while navigating traffic. This article dives deep into the causes of steering wheel peeling, explores the repair process, and outlines best practices to prevent future damage. Whether your steering wheel is leather, vinyl, or urethane, we'll cover the techniques needed to restore it to a respectable condition.
Understanding Steering Wheel Construction and Degradation
Before tackling the repair, it's crucial to understand how steering wheels are constructed and why they peel. Modern steering wheels typically consist of a metal frame (usually steel or aluminum) providing structural integrity. This frame is then molded or wrapped with various materials to provide a comfortable and functional grip. The most common materials include:
- Leather: Genuine leather offers a premium feel and durability but is susceptible to UV damage, drying, and cracking if not properly maintained. Think of it like skin; it needs regular conditioning.
- Vinyl: Vinyl is a synthetic alternative offering good durability and affordability. However, it can become brittle and crack over time, especially when exposed to extreme temperatures and sunlight.
- Urethane (Polyurethane): Urethane is another synthetic material known for its resistance to wear and tear. It's often used in high-wear areas and can mimic the look and feel of leather. However, it's not immune to degradation and can still peel or crack.
The peeling process, regardless of the material, usually stems from a combination of factors:
- UV Exposure: Ultraviolet (UV) radiation from sunlight breaks down the chemical bonds in the surface material, leading to fading, cracking, and peeling.
- Oil and Sweat: The natural oils and sweat from your hands contain acids and salts that can degrade the material over time. Regular cleaning is essential.
- Temperature Fluctuations: Extreme heat and cold can cause the material to expand and contract, leading to stress and cracking, especially in vinyl and urethane.
- Friction and Abrasion: Constant rubbing against clothing, keys, or other objects can wear down the surface finish and contribute to peeling.
- Material Degradation: Over time, the plasticizers (chemicals that keep the material flexible) can leach out, causing the material to become brittle and prone to cracking and peeling. This is especially true for older vehicles.
- Poor Manufacturing: In some cases, the peeling can be attributed to substandard materials or manufacturing processes, resulting in premature failure.
Technical Breakdown: The Repair Process
Repairing a peeling steering wheel is a multi-step process that requires patience and attention to detail. The specific steps may vary depending on the extent of the damage and the material of the steering wheel. Here's a general outline:
1. Preparation is Key
Before you begin, gather your materials. You'll likely need:
- Cleaning Supplies: Automotive interior cleaner, microfiber towels, degreaser (if the wheel is excessively oily).
- Sanding Supplies: Sandpaper in varying grits (e.g., 120, 220, 400), sanding block.
- Adhesive Promoter: A specialized primer to improve adhesion of repair materials (especially important for vinyl and urethane).
- Filler/Repair Compound: Leather filler, vinyl repair compound, or urethane repair compound, depending on the material of your steering wheel. Ensure the product is compatible with the material.
- Color Matching Supplies: Automotive interior paint or dye specifically designed for leather, vinyl, or urethane. Color matching can be tricky; consider using a professional color matching service.
- Clear Coat (Optional): A protective clear coat to enhance durability and UV resistance.
- Application Tools: Small brushes, spatulas, foam applicators.
- Safety Gear: Gloves, safety glasses, respirator (especially when sanding or spraying chemicals).
Next, disconnect the negative terminal of your car battery to prevent accidental airbag deployment. This is a crucial safety step. Then, thoroughly clean the steering wheel with automotive interior cleaner to remove dirt, grease, and grime. Use a degreaser if necessary. Mask off the surrounding areas (e.g., dashboard, steering column) with painter's tape to protect them from overspray or accidental damage.
2. Sanding and Surface Preparation
This step is critical for achieving a smooth and durable repair. Use 120-grit sandpaper to carefully remove any loose or flaking material. Feather the edges of the damaged areas to create a smooth transition to the surrounding intact material. Be gentle and avoid sanding too aggressively, as this can damage the underlying substrate. Progress to finer grits (220, 400) to smooth out the surface and remove any scratches left by the coarser sandpaper. Vacuum up any sanding dust and wipe down the steering wheel with a tack cloth to remove any remaining debris.
3. Applying Adhesive Promoter
Apply an adhesive promoter to the sanded areas. This will significantly improve the adhesion of the repair compound. Follow the manufacturer's instructions for application and drying time. Adhesive promoters are especially important for vinyl and urethane repairs, as these materials tend to be less porous than leather.
4. Filling and Leveling
Apply the appropriate filler or repair compound to the damaged areas. Use a small spatula or applicator to carefully fill in the cracks, peels, or gouges. Apply thin layers and allow each layer to dry completely before applying the next. This will prevent shrinkage and ensure a strong bond. Overfill the damaged areas slightly, as the filler will shrink slightly as it dries. Once the filler is completely dry, sand it down with fine-grit sandpaper (400 grit) to level it with the surrounding surface. Take your time and be patient; this is where finesse is key.
5. Color Matching and Painting
This is arguably the most challenging step. Accurately matching the color of your steering wheel can be difficult. Consider purchasing a color matching kit or using a professional color matching service. Apply the automotive interior paint or dye in thin, even coats, allowing each coat to dry completely before applying the next. Use a spray gun for best results, but aerosol cans can also be used with careful technique. Avoid applying too much paint at once, as this can lead to runs and drips. Allow the paint to dry completely according to the manufacturer's instructions.
6. Clear Coat Application (Optional)
If desired, apply a clear coat to protect the painted surface and enhance durability. Use a clear coat specifically designed for automotive interiors. Apply thin, even coats, allowing each coat to dry completely before applying the next. Allow the clear coat to dry completely according to the manufacturer's instructions.
7. Final Touches
Once everything is dry, carefully remove the masking tape. Inspect the repair and make any necessary touch-ups. Reconnect the negative terminal of your car battery. Clean the steering wheel with a gentle interior cleaner and apply a leather conditioner (if applicable) to protect and moisturize the material.
Common Issues and Maintenance Concerns
- Color Matching Difficulties: As mentioned before, color matching can be a major challenge. Take your time, use a professional service if needed, and always test the color in an inconspicuous area before applying it to the entire steering wheel.
- Filler Shrinkage: Some fillers may shrink as they dry, requiring multiple applications. Choose a high-quality filler that is known for minimal shrinkage.
- Peeling Re-occurrence: If the underlying cause of the peeling is not addressed, the repair may not last. Ensure you're protecting your steering wheel from UV exposure and regularly cleaning and conditioning it.
- Airbag Safety: Always disconnect the battery before working on the steering wheel to prevent accidental airbag deployment. If you're not comfortable working around airbags, consider seeking professional assistance.
Do's and Don'ts / Best Practices
Do's:
- Do disconnect the battery.
- Do wear appropriate safety gear (gloves, safety glasses, respirator).
- Do thoroughly clean the steering wheel before starting the repair.
- Do sand the damaged areas to create a smooth surface for the repair compound.
- Do use an adhesive promoter to improve adhesion.
- Do apply thin layers of filler and paint, allowing each layer to dry completely.
- Do use high-quality materials specifically designed for automotive interiors.
- Do protect your steering wheel from UV exposure with a sunshade.
- Do regularly clean and condition your steering wheel.
Don'ts:
- Don't rush the process.
- Don't sand too aggressively.
- Don't apply too much filler or paint at once.
- Don't use harsh chemicals or abrasive cleaners.
- Don't neglect regular maintenance.
- Don't attempt repairs if you're not comfortable working around airbags.
Conclusion
Repairing a peeling steering wheel can be a rewarding DIY project, saving you money compared to professional reupholstering or replacement. By understanding the causes of peeling, following the proper repair techniques, and implementing preventive maintenance, you can restore your steering wheel to its former glory and enjoy a more comfortable and aesthetically pleasing driving experience. If you're meticulous and patient, you can achieve excellent results. However, if the damage is extensive or you lack the necessary skills and tools, it's always best to seek professional assistance from an automotive upholstery specialist. A well-maintained steering wheel not only enhances the look of your interior, but also contributes to a safer and more enjoyable driving experience. Always prioritize safety and take your time.