How To Fix A Seat Belt Buckle That Won't Click
That dreaded feeling when your seatbelt refuses to click into its buckle – it’s more than just an annoyance. It's a safety hazard. Before rushing to a mechanic, let's explore how to diagnose and potentially fix a seat belt buckle that's giving you trouble. Remember, seatbelts are critical safety devices, and if you're not completely confident in your abilities, professional help is always the best course of action.
The Stuck Seatbelt: A Common Problem
Imagine this: You're running late, jump into your car, and try to buckle up, only to find the seatbelt tongue stubbornly refuses to engage with the buckle. You jiggle it, poke it, maybe even offer a frustrated yell, but nothing. It feels like the internal mechanism is jammed. This scenario is surprisingly common, stemming from a variety of causes. The good news is, in many cases, you can troubleshoot and even resolve the issue yourself.
Understanding the Anatomy of a Seatbelt Buckle
To effectively troubleshoot, it's essential to understand the basic components and functionality of a seatbelt buckle. At its core, a seatbelt buckle is a surprisingly simple yet robust mechanical device. The main components are:
- The Housing: The rigid outer shell, typically made of durable plastic or metal, protects the internal mechanism.
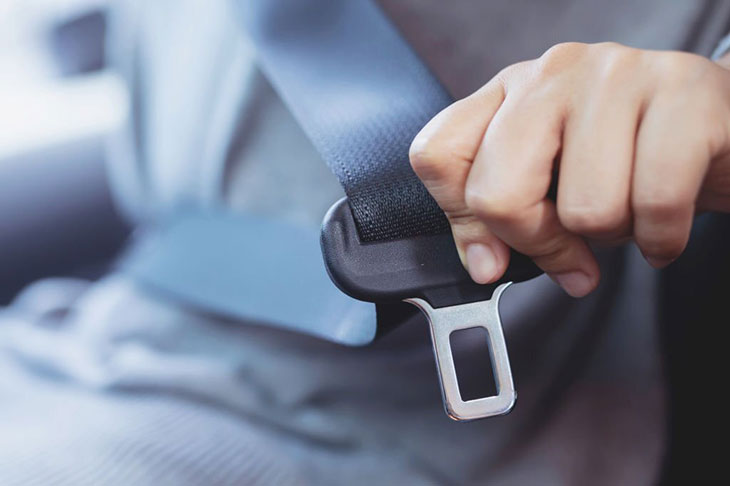
- The Latch Plate (Tongue): This is the metal part on the end of the seatbelt that you insert into the buckle.
- The Locking Mechanism: This is the heart of the buckle – a system of levers, springs, and a pawl (a pivoting latch) that engages with the latch plate to secure it.
- The Release Button: Activating this button disengages the locking mechanism, allowing the latch plate to be removed.
- The Ejection Spring: A spring that assists in ejecting the latch plate when the release button is pressed.
How the Locking Mechanism Works: A Deep Dive
Think of the locking mechanism like a tiny, precisely engineered trap. When you insert the latch plate (the "tongue") into the buckle, it pushes aside a lever. This lever, in turn, allows the pawl to swing into place, engaging with a notch or indentation on the latch plate. This engagement prevents the latch plate from being pulled out. The strength of this engagement is crucial – it needs to withstand significant force in the event of a collision.
When you press the release button, it pushes the lever in the opposite direction, retracting the pawl and freeing the latch plate. The ejection spring then helps to push the latch plate out of the buckle, making it easy to remove.
Diagnosing the Problem: What's Gone Wrong?
The "no-click" situation usually arises from one of these common culprits:
- Obstruction: Foreign objects like crumbs, dirt, coins, or even small pieces of plastic can get lodged inside the buckle, preventing the latch plate from fully engaging. This is the most common cause.
- Corrosion/Rust: Over time, particularly in humid environments, rust and corrosion can build up inside the buckle, hindering the smooth movement of the internal components.
- Bent or Damaged Latch Plate: If the latch plate is bent or deformed, it may not properly align with the locking mechanism inside the buckle.
- Worn or Broken Components: Springs can lose their tension, levers can break, and the pawl can become worn down, all leading to a failure of the locking mechanism.
- Release Button Issues: A stuck or broken release button can prevent the internal mechanism from resetting, even after the latch plate has been removed (or tried to be inserted).
Troubleshooting Steps: From Simple to Complex
Before you start dismantling anything, try these simple fixes:
- Visual Inspection: Carefully examine the buckle opening and the latch plate for any visible obstructions. Use a flashlight to get a better view inside the buckle.
- Cleaning: Use a can of compressed air to blow out any loose debris from the buckle. You can also try using a small, stiff brush (like an old toothbrush) to dislodge stubborn particles.
- Lubrication: Apply a small amount of dry lubricant (like graphite powder or a silicone-based spray) into the buckle opening. Avoid using oil-based lubricants, as they can attract dirt and grime. Do not over-lubricate.
- Latch Plate Inspection: Check the latch plate for any signs of bending or damage. If it's slightly bent, you might be able to gently straighten it with pliers, but be careful not to break it. If the damage is severe, the entire seatbelt assembly will need to be replaced.
- Release Button Check: Ensure the release button moves freely and returns to its original position after being pressed. If it's sticking, try cleaning around it with a cotton swab and a small amount of isopropyl alcohol.
Advanced Troubleshooting: A Peek Inside (With Caution!)
If the simple fixes don't work, you might need to take a closer look at the internal mechanism. This is where things get tricky, and it's essential to proceed with caution. Disassembling a seatbelt buckle can be dangerous if you don't know what you're doing, as it contains springs and other small parts that can fly out.
Only attempt this if you are comfortable working with small mechanical parts and understand the risks involved.
- Disassembly (if possible): Some seatbelt buckles are designed to be disassembled (though many are not). Look for screws or clips that hold the housing together. If you can find them, carefully remove them and gently pry open the housing. Take pictures as you disassemble, so you can remember how everything goes back together.
- Internal Inspection: Once the housing is open, carefully examine the internal components for any signs of damage, wear, or corrosion. Pay close attention to the pawl, lever, and springs.
- Cleaning and Repair: Clean any dirt or corrosion from the internal components with a small brush and isopropyl alcohol. If you find any broken or worn parts, you may be able to replace them, but finding replacement parts for seatbelt buckles can be difficult.
- Reassembly: Carefully reassemble the buckle, making sure that all the components are in their correct positions. Refer to the pictures you took during disassembly.
Pros and Cons of DIY Repair
Pros:
- Cost Savings: Repairing the buckle yourself can save you money compared to replacing the entire seatbelt assembly or taking it to a mechanic.
- Learning Experience: You'll gain a better understanding of how your car's safety systems work.
- Convenience: You can potentially fix the problem in your own garage, without having to schedule an appointment with a mechanic.
Cons:
- Safety Risks: If you don't properly repair the buckle, it could fail in a collision, leading to serious injury or death.
- Complexity: Seatbelt buckles are complex mechanical devices, and repairing them can be challenging.
- Liability: If you repair the buckle yourself and it fails, you could be held liable for any resulting injuries.
Manufacturer Examples and Considerations
Different car manufacturers use slightly different designs for their seatbelt buckles. For example, some older Volvo models are known for their robust but sometimes finicky locking mechanisms. Toyota buckles often suffer from debris accumulation. In general, European manufacturers tend to emphasize more complex designs, while American manufacturers often opt for simpler, more straightforward mechanisms.
Regardless of the manufacturer, the underlying principles are the same. However, the specific tools and techniques required for disassembly and repair may vary. Always consult your car's repair manual or a trusted online resource before attempting any repairs.
When to Call a Professional
There are certain situations where DIY repair is simply not an option. If you encounter any of the following, stop immediately and consult a qualified mechanic:
- Damaged Seatbelt Webbing: If the seatbelt webbing is frayed, torn, or damaged in any way, the entire seatbelt assembly must be replaced.
- Deployed Pretensioner: If your car has a seatbelt pretensioner (a device that tightens the seatbelt in a collision), and it has been deployed, the entire seatbelt assembly must be replaced.
- Broken or Severely Damaged Buckle: If the buckle is cracked, broken, or severely damaged, it cannot be repaired and must be replaced.
- Uncertainty: If you are not completely confident in your ability to repair the buckle safely and effectively, it is always best to err on the side of caution and consult a professional.
Real-World Insights and Recommendations
In the real world, preventative maintenance is key. Regularly cleaning your seatbelt buckles with compressed air and a dry lubricant can help prevent many of the common problems that lead to a "no-click" situation. Also, avoid spilling food or drinks in your car, as these can attract dirt and debris that can clog the buckles.
Ultimately, your safety is paramount. While DIY repair can be a viable option in some cases, it's crucial to weigh the risks and benefits carefully. If you're unsure, don't hesitate to seek professional help. A properly functioning seatbelt is a life-saving device, and it's worth investing in its maintenance and repair.