How To Fix Crack In Car Dashboard
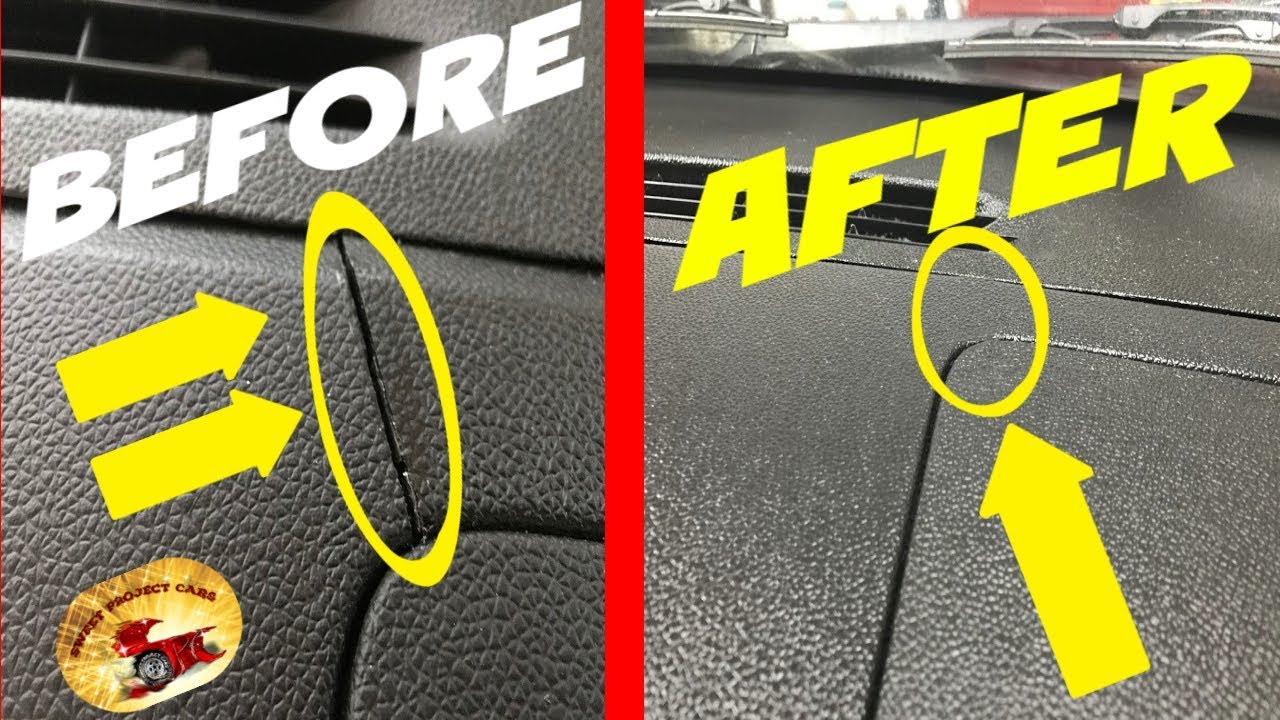
Ah, the dreaded dashboard crack. That unsightly blemish staring back at you from your car's interior, a constant reminder of sun exposure, temperature swings, and the inexorable passage of time. But fear not, fellow auto enthusiasts! While a perfect, factory-fresh restoration might require professional intervention, there are effective DIY methods to significantly improve, and in some cases, completely eradicate those cracks. Let's dive into the how, why, and when of dashboard crack repair.
The Problem: Understanding Dashboard Cracks
To properly address the issue, we first need to understand its root cause. Imagine your dashboard as a complex composite material. It's typically composed of a rigid substrate (often plastic or metal), a foam or cushioning layer for impact absorption, and a vinyl or leatherette outer skin for aesthetics and durability. The problem arises when these materials expand and contract at different rates due to temperature fluctuations. Think of it like this: a metal bridge expands in the summer heat. If this expansion isn't accounted for with expansion joints, the bridge could buckle. Similarly, your dashboard's various layers, constrained by being bonded together, create internal stresses. Over time, these stresses concentrate at weak points, eventually leading to cracks.
Common Causes: A Closer Look
- UV Exposure: The sun's ultraviolet rays are a major culprit. UV radiation degrades the chemical bonds in the vinyl or leatherette, making it brittle and susceptible to cracking.
- Temperature Fluctuations: Extreme heat causes expansion, while cold causes contraction. This constant cycle of expansion and contraction weakens the dashboard material.
- Material Aging: Over time, the plasticizers (chemicals that keep the vinyl pliable) evaporate, causing the dashboard to become stiff and prone to cracking.
- Poor Manufacturing: In some cases, the quality of materials or the manufacturing process itself can contribute to premature cracking.
The Solution: A Step-by-Step Repair Guide
Now, let's get to the practical part. The following steps outline a common DIY dashboard crack repair process. It's important to note that the success of this method depends on the severity of the crack and the type of dashboard material.
Step 1: Assessment and Preparation
Thorough assessment is crucial. Examine the crack closely. Is it a hairline fracture or a deep, gaping split? How many cracks are there? The extent of the damage will dictate the time, effort, and materials required. Gather your tools and materials:
- Cleaning Supplies: Mild soap, water, and a soft cloth to clean the dashboard surface.
- Dashboard Repair Kit: These kits typically include filler, color-matching pigments, texture pads, and applicator tools.
- Sandpaper: Fine-grit sandpaper (400-grit and 600-grit) for smoothing the repaired area.
- Putty Knife or Applicator: For applying the filler material.
- Heat Gun or Hair Dryer: To help cure the filler and blend the texture.
- Safety Glasses and Gloves: For personal protection.
Step 2: Cleaning and Masking
Clean the area around the crack with mild soap and water. This removes dirt, grime, and any loose debris that could interfere with the repair. Allow the area to dry completely. Use masking tape to protect the surrounding dashboard surface from accidental damage or staining.
Step 3: Applying the Filler
This is the core of the repair. Carefully apply the filler material to the crack, ensuring it penetrates the entire depth of the damage. Overfill the crack slightly, as the filler will shrink as it cures. Use the putty knife or applicator to smooth the filler surface and remove any excess material. Refer to the manufacturer's instructions for the specific drying time.
Step 4: Sanding and Smoothing
Once the filler is completely dry, use the fine-grit sandpaper (400-grit) to gently sand the repaired area. The goal is to blend the filler seamlessly with the surrounding dashboard surface. Be careful not to sand too aggressively, as this could damage the surrounding material. Follow up with 600-grit sandpaper for an even smoother finish.
Step 5: Texturing and Color Matching
Most dashboard repair kits include texture pads that can be used to replicate the original dashboard texture. Press the texture pad firmly onto the repaired area while the filler is still slightly pliable (some kits require a specific curing agent). If the repair kit includes color-matching pigments, carefully mix the pigments to match the original dashboard color. Apply the color-matched paint to the repaired area using a small brush or sponge. Apply thin layers and allow each layer to dry completely before applying the next.
Step 6: Curing and Finishing
Use a heat gun or hair dryer to gently cure the repaired area. This will help the filler harden and bond with the surrounding material. Be careful not to overheat the dashboard, as this could cause further damage. Remove the masking tape and inspect the repair. If necessary, apply a dashboard protectant to restore the shine and protect the repaired area from future damage.
Pros and Cons of DIY Repair
Pros:
- Cost-Effective: DIY repair is significantly cheaper than professional repair or dashboard replacement.
- Convenience: You can perform the repair at your own pace and convenience.
- Satisfaction: Completing the repair yourself can be a rewarding experience.
Cons:
- Quality of Results: The quality of the repair depends on your skill level and the quality of the repair kit. A perfectly seamless repair might be difficult to achieve.
- Time-Consuming: The repair process can be time-consuming, especially for larger or more complex cracks.
- Potential for Further Damage: If not done carefully, the repair process could potentially damage the surrounding dashboard material.
Use Cases and Manufacturer Examples
DIY dashboard crack repair is best suited for minor to moderate cracks, especially those caused by sun exposure or temperature fluctuations. It's a viable option for older vehicles where a perfect restoration isn't a primary concern. For example, repairing cracks on a classic 1970s muscle car to preserve its originality, or patching up cracks on a daily driver to improve its aesthetics.
Many manufacturers, such as 3M, SEM, and Permatex, offer dashboard repair kits specifically designed for DIY use. These kits vary in price and features, so it's important to choose one that is appropriate for your specific needs and skill level. Some manufacturers even offer instructional videos and online resources to help you through the repair process.
Professional Repair: When to Seek Expert Help
While DIY repair can be effective for many types of dashboard cracks, there are situations where professional repair is the best option:
- Extensive Damage: If the dashboard has multiple large cracks or if the material is severely damaged, professional repair is recommended.
- Complex Repairs: If the dashboard has intricate details or if the cracks are located in difficult-to-reach areas, professional repair is advisable.
- Color Matching Challenges: If you are unable to accurately match the original dashboard color, a professional can provide expert color-matching services.
- Desired Perfection: If you want a perfectly seamless repair, professional repair is the only option.
Professional dashboard repair typically involves more advanced techniques and equipment, such as plastic welding, heat forming, and custom color matching. While more expensive than DIY repair, professional repair can provide a higher quality and more durable result.
Insights and Recommendations
In the realm of dashboard crack repair, prevention is always better than cure. Investing in a quality sunshade and using a dashboard protectant regularly can significantly reduce the risk of cracking. When choosing a dashboard repair kit, read reviews and choose a reputable brand with a good track record. Always follow the manufacturer's instructions carefully. Don't rush the repair process; take your time and pay attention to detail.
Ultimately, the decision to repair a dashboard crack yourself or seek professional help depends on your skill level, budget, and desired outcome. With the right tools, materials, and techniques, you can significantly improve the appearance of your dashboard and restore its original beauty. Remember, a well-maintained interior not only enhances your driving experience but also increases the resale value of your vehicle. Happy repairing!