How To Fix Cracks In Dash
Cracks in your car's dashboard are not only unsightly, diminishing the overall aesthetic appeal of your vehicle, but they can also signal more significant underlying issues. Fortunately, fixing those cracks is often a manageable DIY project, saving you potentially hundreds of dollars in professional repair costs. This article provides a comprehensive guide on how to fix cracks in your dash, offering practical advice and insights to help you restore your car's interior to its former glory.
Why Addressing Dashboard Cracks Matters
Ignoring dashboard cracks can lead to a cascade of problems that extend beyond simple aesthetics. Here's why it's important to address them promptly:
- Reduced Resale Value: A cracked dashboard significantly reduces your car's resale value. Potential buyers are often deterred by visible damage, perceiving it as a sign of neglect or further underlying problems.
- Safety Concerns: While seemingly minor, cracks can worsen over time, potentially obstructing your view or interfering with the deployment of airbags in an accident. A disintegrating dashboard can also create hazardous projectiles during a collision.
- Further Degradation: Cracks expose the dashboard's underlying materials to the elements, including sunlight, heat, and moisture. This can accelerate further degradation, leading to more extensive and costly repairs down the line.
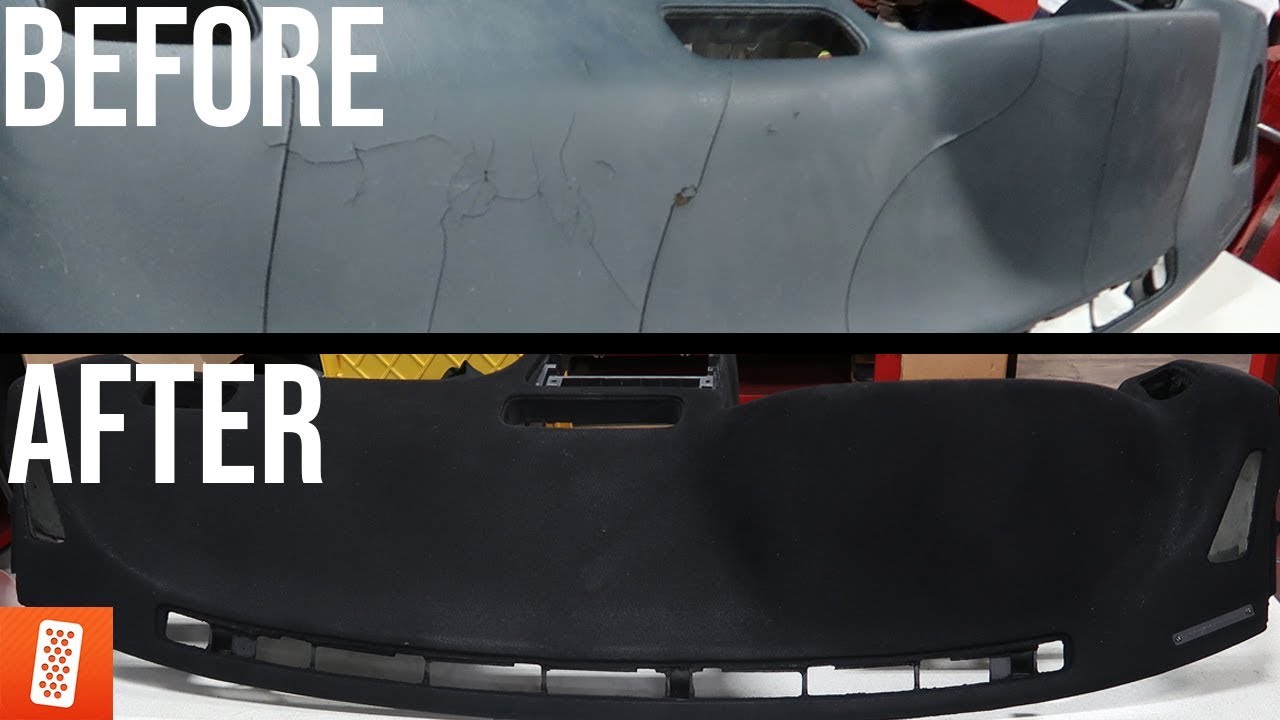
- Unpleasant Aesthetics: A cracked dashboard simply looks bad. It detracts from the overall driving experience and can make your car feel old and neglected. Fixing the cracks can dramatically improve the interior's appearance.
How to Choose the Right Repair Method and Materials
The best approach to fixing dashboard cracks depends on the severity of the damage, the type of material your dashboard is made of (vinyl, plastic, leather, etc.), and your budget. Here's a breakdown of common methods and materials:
1. Surface Crack Repair Kits
For small, hairline cracks, a surface crack repair kit is often the best solution. These kits typically include a vinyl or plastic filler, a color-matching compound, and applicators. They're relatively inexpensive and easy to use, making them a good option for DIYers. Always choose a kit specifically designed for the type of material your dashboard is made of.
Steps:
- Clean the Surface: Thoroughly clean the area around the crack with a mild detergent and water. Remove any dirt, grease, or loose debris.
- Apply Filler: Carefully apply the filler to the crack, using a small applicator or putty knife. Ensure the filler completely fills the crack and is slightly above the surface.
- Let it Dry: Allow the filler to dry completely according to the manufacturer's instructions. This may take several hours or even overnight.
- Sand Smooth: Once dry, gently sand the filler smooth with fine-grit sandpaper. Be careful not to damage the surrounding dashboard.
- Apply Color-Matching Compound: Apply the color-matching compound to the repaired area, blending it seamlessly with the surrounding color.
- Let it Dry and Cure: Allow the compound to dry and cure according to the manufacturer's instructions.
- Apply Protectant: Finish by applying a vinyl or plastic protectant to the entire dashboard to help prevent future cracking.
2. Deep Crack and Hole Repair
For larger, deeper cracks or holes, a more substantial repair is required. This often involves using a two-part epoxy or a specialized dashboard repair compound. These materials provide a stronger bond and can fill larger gaps.
Steps:
- Prepare the Area: Clean the area thoroughly and remove any loose or crumbling material. You may need to use a utility knife to carefully remove damaged sections.
- Apply Epoxy or Repair Compound: Mix the two-part epoxy or repair compound according to the manufacturer's instructions. Apply the mixture to the crack or hole, filling it completely.
- Reinforce (Optional): For very large holes, you may want to reinforce the repair with a piece of fiberglass mesh or screen. Embed the mesh into the epoxy or compound while it's still wet.
- Let it Dry and Harden: Allow the epoxy or compound to dry and harden completely. This may take several hours or even a full day.
- Sand Smooth: Once hardened, sand the repaired area smooth with progressively finer grits of sandpaper.
- Apply Color-Matching Compound: Apply a color-matching compound to blend the repair with the surrounding dashboard.
- Apply Texture (Optional): Depending on the original dashboard texture, you may need to use a texture pad or spray to recreate the original finish.
- Apply Protectant: Finish with a vinyl or plastic protectant.
3. Dashboard Covers
While not a direct repair, a dashboard cover can be a cost-effective and relatively easy way to conceal cracks and protect the dashboard from further damage. Custom-fit dashboard covers are available for most vehicle makes and models.
Pros:
- Easy Installation: Dashboard covers are typically easy to install, often requiring no tools or adhesives.
- Cost-Effective: They are generally less expensive than professional repairs.
- Protective: They protect the dashboard from further sun damage and cracking.
- Conceals Existing Damage: Effectively hides existing cracks and imperfections.
Cons:
- Aesthetic Compromise: May not perfectly match the original dashboard's appearance.
- Fit Issues: Improperly fitted covers can look awkward.
Choosing the Right Color-Matching Compound
Selecting the right color-matching compound is crucial for a seamless repair. Many kits come with a range of colors that can be mixed to achieve the perfect match. Test the color on an inconspicuous area of the dashboard before applying it to the repaired area. Consider using a color-matching app or consulting with an automotive paint supplier for assistance.
Real-World Owner Experiences
Many car owners have successfully tackled dashboard crack repairs themselves. Here are a few real-world experiences:
"My Honda Civic had a nasty crack running across the top of the dash. I used a vinyl repair kit from Amazon and followed the instructions carefully. It took a few hours, but the result was surprisingly good. The crack is barely noticeable now, and it saved me a ton of money compared to getting it professionally repaired." - John S.
"I tried to ignore the cracks in my truck's dashboard, but they just kept getting worse. I finally decided to use a dashboard cover. It wasn't a perfect solution, but it made a huge difference in the overall appearance of the interior. Plus, it protects the dash from further sun damage." - Maria L.
"My vintage Mustang had some serious cracks and holes in the dashboard. I used a two-part epoxy and fiberglass mesh to repair the damage. It was a challenging project, but the end result was worth the effort. The dashboard looks almost new again." - David K.
FAQs About Fixing Dashboard Cracks
Q: Can I prevent dashboard cracks from happening in the first place?
A: Yes! Parking in the shade, using a sunshade, regularly cleaning and conditioning your dashboard, and avoiding harsh chemicals can all help prevent cracking.
Q: How much does it cost to have a dashboard professionally repaired?
A: Professional dashboard repair can range from $200 to $1000 or more, depending on the severity of the damage and the type of car. Dashboard replacement is even more expensive.
Q: Can I use household glue to fix dashboard cracks?
A: No. Household glue is not designed for the specific materials used in dashboards and may not provide a durable or aesthetically pleasing repair. Always use products specifically designed for automotive interior repair.
Q: How long will a dashboard repair last?
A: The longevity of a dashboard repair depends on the quality of the materials used, the skill of the person performing the repair, and the environmental conditions the car is exposed to. With proper care, a well-executed repair can last for several years.
Q: Where can I buy dashboard repair kits and materials?
A: Dashboard repair kits and materials are available at most auto parts stores, hardware stores, and online retailers like Amazon.
Q: Is it safe to drive with a cracked dashboard?
A: While a small crack may not pose an immediate safety risk, larger cracks or crumbling dashboards can be a distraction and potentially interfere with airbag deployment. It's best to repair the damage as soon as possible.
By understanding the causes of dashboard cracks, choosing the right repair method, and following the steps outlined in this guide, you can effectively fix those unsightly cracks and restore your car's interior to its original beauty. Remember to take your time, be patient, and follow the manufacturer's instructions carefully for the best results. Good luck!