How To Fix Door Latch On Car
So, you're tackling a sticky car door latch? Excellent! It's a common problem, and with a little know-how, you can often save yourself a trip to the mechanic. This article provides a comprehensive guide to understanding and fixing your car door latch. We'll cover the key components, how they work together, troubleshooting tips, and crucial safety precautions. And remember, we have a detailed schematic diagram available for download that will be invaluable during this process.
Purpose of Understanding the Door Latch Mechanism
Why bother diving into the intricacies of your car's door latch? There are several compelling reasons:
- DIY Repairs: The most obvious reason. Understanding the system allows you to diagnose and fix common latch issues, saving you money on labor costs.
- Preventative Maintenance: Catching problems early can prevent them from escalating into more expensive repairs. Regular lubrication and inspection are key.
- Customization/Modding: If you're into car modifications, understanding the latch mechanism is crucial for tasks like installing aftermarket door handles or security systems.
- Accident Avoidance: A malfunctioning door latch can be dangerous, especially if a door opens unexpectedly while driving. Knowing how it works allows you to address potential safety hazards proactively.
- General Automotive Knowledge: Expanding your understanding of your vehicle's systems is always a good investment, enhancing your overall car ownership experience.
Key Specs and Main Parts
Before we delve into the troubleshooting, let's familiarize ourselves with the key components of a typical car door latch assembly. Keep in mind that designs can vary slightly between manufacturers and vehicle models, but the fundamental principles remain the same.
Main Components:
- Outer Door Handle: The part you grab to initiate the door opening sequence. It's connected to the latch mechanism via a series of rods or cables.
- Inner Door Handle: Located inside the car, this handle provides an alternative way to release the latch. It's often connected to a separate linkage for redundancy.
- Latch Assembly: This is the heart of the system. It's typically housed within the door and contains the components responsible for securing the door to the striker plate.
- Striker Plate: This is a U-shaped metal piece mounted on the car's body frame. The latch pawl engages with the striker plate to hold the door closed.
- Linkage Rods/Cables: These connect the door handles to the latch assembly. They transmit the force required to release the latch.
- Lock Cylinder/Actuator: Allows you to lock and unlock the door, either manually with a key or electronically via a central locking system. The actuator is a small electric motor.
- Lock/Unlock Lever: A manual lever inside the car that directly locks or unlocks the door.
Key Specifications:
While you won't typically encounter detailed specifications for a latch mechanism unless you're designing one from scratch, there are a few factors to consider:
- Material Strength: Latch components are usually made of hardened steel to withstand repeated use and impact forces.
- Actuation Force: The amount of force required to release the latch should be within a reasonable range for comfortable operation.
- Corrosion Resistance: Components are often treated with a protective coating to prevent rust and corrosion, especially in regions with harsh weather conditions.
Understanding Schematic Symbols (Downloadable Diagram)
The schematic diagram available for download uses standard symbols to represent different components and connections. Here's a brief guide:
- Solid Lines: Typically represent mechanical linkages, such as rods and cables. The thickness of the line might indicate the size or strength of the component.
- Dashed Lines: Often indicate electrical connections, such as wiring for the central locking system.
- Circles: Can represent pivots or joints in the linkage.
- Rectangles: Often used to represent the latch assembly, lock cylinder, or actuator.
- Arrows: Indicate the direction of movement or force.
- Color Coding: While not always present, color coding can be used to differentiate between different systems (e.g., red for locking, green for unlocking).
The diagram will also show how these components are interconnected, providing a visual representation of the entire system.
How It Works: The Mechanics of the Latch
Let's break down the door latch operation step-by-step:
- Closing the Door: When you slam the door shut, the latch pawl strikes the striker plate. The pawl is designed to rotate past the striker plate and then spring back into place, securely hooking onto the striker.
- Latch Engagement: Once the pawl is engaged, the door is held firmly closed. A secondary detent mechanism often prevents the pawl from accidentally disengaging.
- Opening the Door (Outer Handle): When you pull the outer door handle, it pulls on a linkage rod or cable. This linkage then acts on the latch assembly, releasing the pawl from the striker plate.
- Opening the Door (Inner Handle): The inner door handle works similarly, but often utilizes a separate linkage for redundancy. This ensures you can still open the door from the inside even if the outer handle linkage is broken.
- Locking/Unlocking: When you lock the door (either manually or electronically), a mechanism within the latch assembly prevents the pawl from being released by either door handle. Unlocking the door reverses this process.
Real-World Use: Troubleshooting Common Latch Problems
Here are some common issues you might encounter and how to troubleshoot them:
- Door Won't Open From Inside/Outside:
Possible Causes: Broken linkage rod/cable, seized latch mechanism, faulty lock actuator.
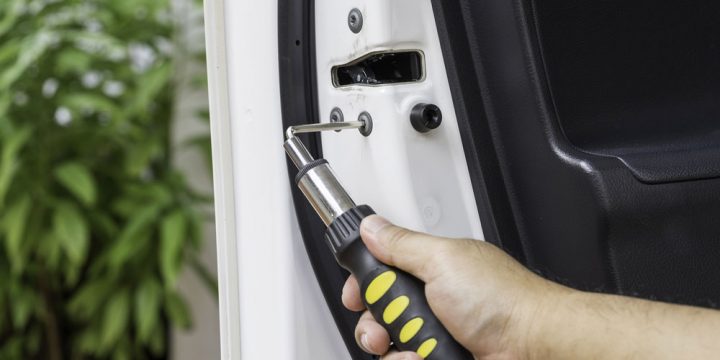
Troubleshooting: First, check the linkage rods/cables for any signs of damage or disconnection. If they appear to be intact, try lubricating the latch mechanism with a penetrating oil like WD-40 (sparingly!). If the problem persists, the latch assembly may need to be replaced. Use the downloadable schematic to guide your inspection.
- Door Opens But Won't Stay Closed:
Possible Causes: Worn or damaged striker plate, faulty latch pawl, misaligned door.
Troubleshooting: Inspect the striker plate for wear or damage. You might be able to adjust its position slightly to ensure proper engagement with the latch. If the latch pawl is worn, the entire latch assembly will likely need replacement. Check the door alignment to ensure it's not rubbing against the frame, preventing the latch from fully engaging.
- Key Won't Turn in Lock Cylinder:
Possible Causes: Worn key, damaged lock cylinder, frozen mechanism.
Troubleshooting: Try a different key if you have one. Lubricate the lock cylinder with a graphite lubricant. If the problem persists, the lock cylinder may need to be replaced or re-keyed.
- Electric Locks Not Working:
Possible Causes: Faulty actuator, wiring problem, blown fuse.
Troubleshooting: Check the fuse for the central locking system. Use a multimeter to test the voltage at the actuator connector. If there's no voltage, trace the wiring back to the fuse box or central locking control module. If there *is* voltage, the actuator itself is likely faulty.
Safety Precautions
Working on car door latches involves some inherent risks. Here's what to keep in mind:
- Sharp Edges: Door panels and latch components often have sharp edges. Wear gloves to protect your hands.
- Airbags: Never tamper with airbag systems. Disconnect the battery before working on any electrical components near airbags.
- Power Windows/Locks: Be careful not to pinch your fingers or hands in power windows or door locks. Disconnect the battery if necessary to prevent accidental activation.
- Eye Protection: Wear safety glasses to protect your eyes from debris and lubricants.
- Striker Plate Adjustment: Be cautious when adjusting the striker plate. Over-tightening can damage the surrounding bodywork.
Remember, if you're uncomfortable with any aspect of this repair, it's always best to consult a qualified mechanic. Better safe than sorry!
With the downloadable diagram and this guide, you should be well-equipped to tackle most common car door latch problems. Good luck, and happy wrenching!
And remember, you can download the detailed schematic diagram to guide you through the repair process. It's an invaluable resource that will make the job much easier.