How To Fix Hail Damage On Hood
Hail damage. Those dreaded dings that transform your car's pristine hood into a topographical map. It's a frustrating problem, but one that can often be tackled at home, especially if you're comfortable with DIY auto repairs. This article will walk you through the process of repairing hail damage on your hood, covering everything from understanding the damage to employing the right techniques and tools.
Understanding Hail Damage and Repair Options
Before diving into the repair process, it's crucial to assess the extent of the damage. Minor dents can often be repaired using Paintless Dent Repair (PDR), while more severe dents might require more involved techniques like dent pulling and filler application. The choice depends on the size, depth, and location of the dents, as well as whether the paint is chipped or cracked.
PDR aims to restore the panel to its original shape without disturbing the factory finish. Dent pulling involves adhering tabs to the dent and using a specialized tool to gently pull the metal back into place. Filler, also known as body filler or Bondo, is used to fill in imperfections after the metal is pulled, creating a smooth surface for painting.
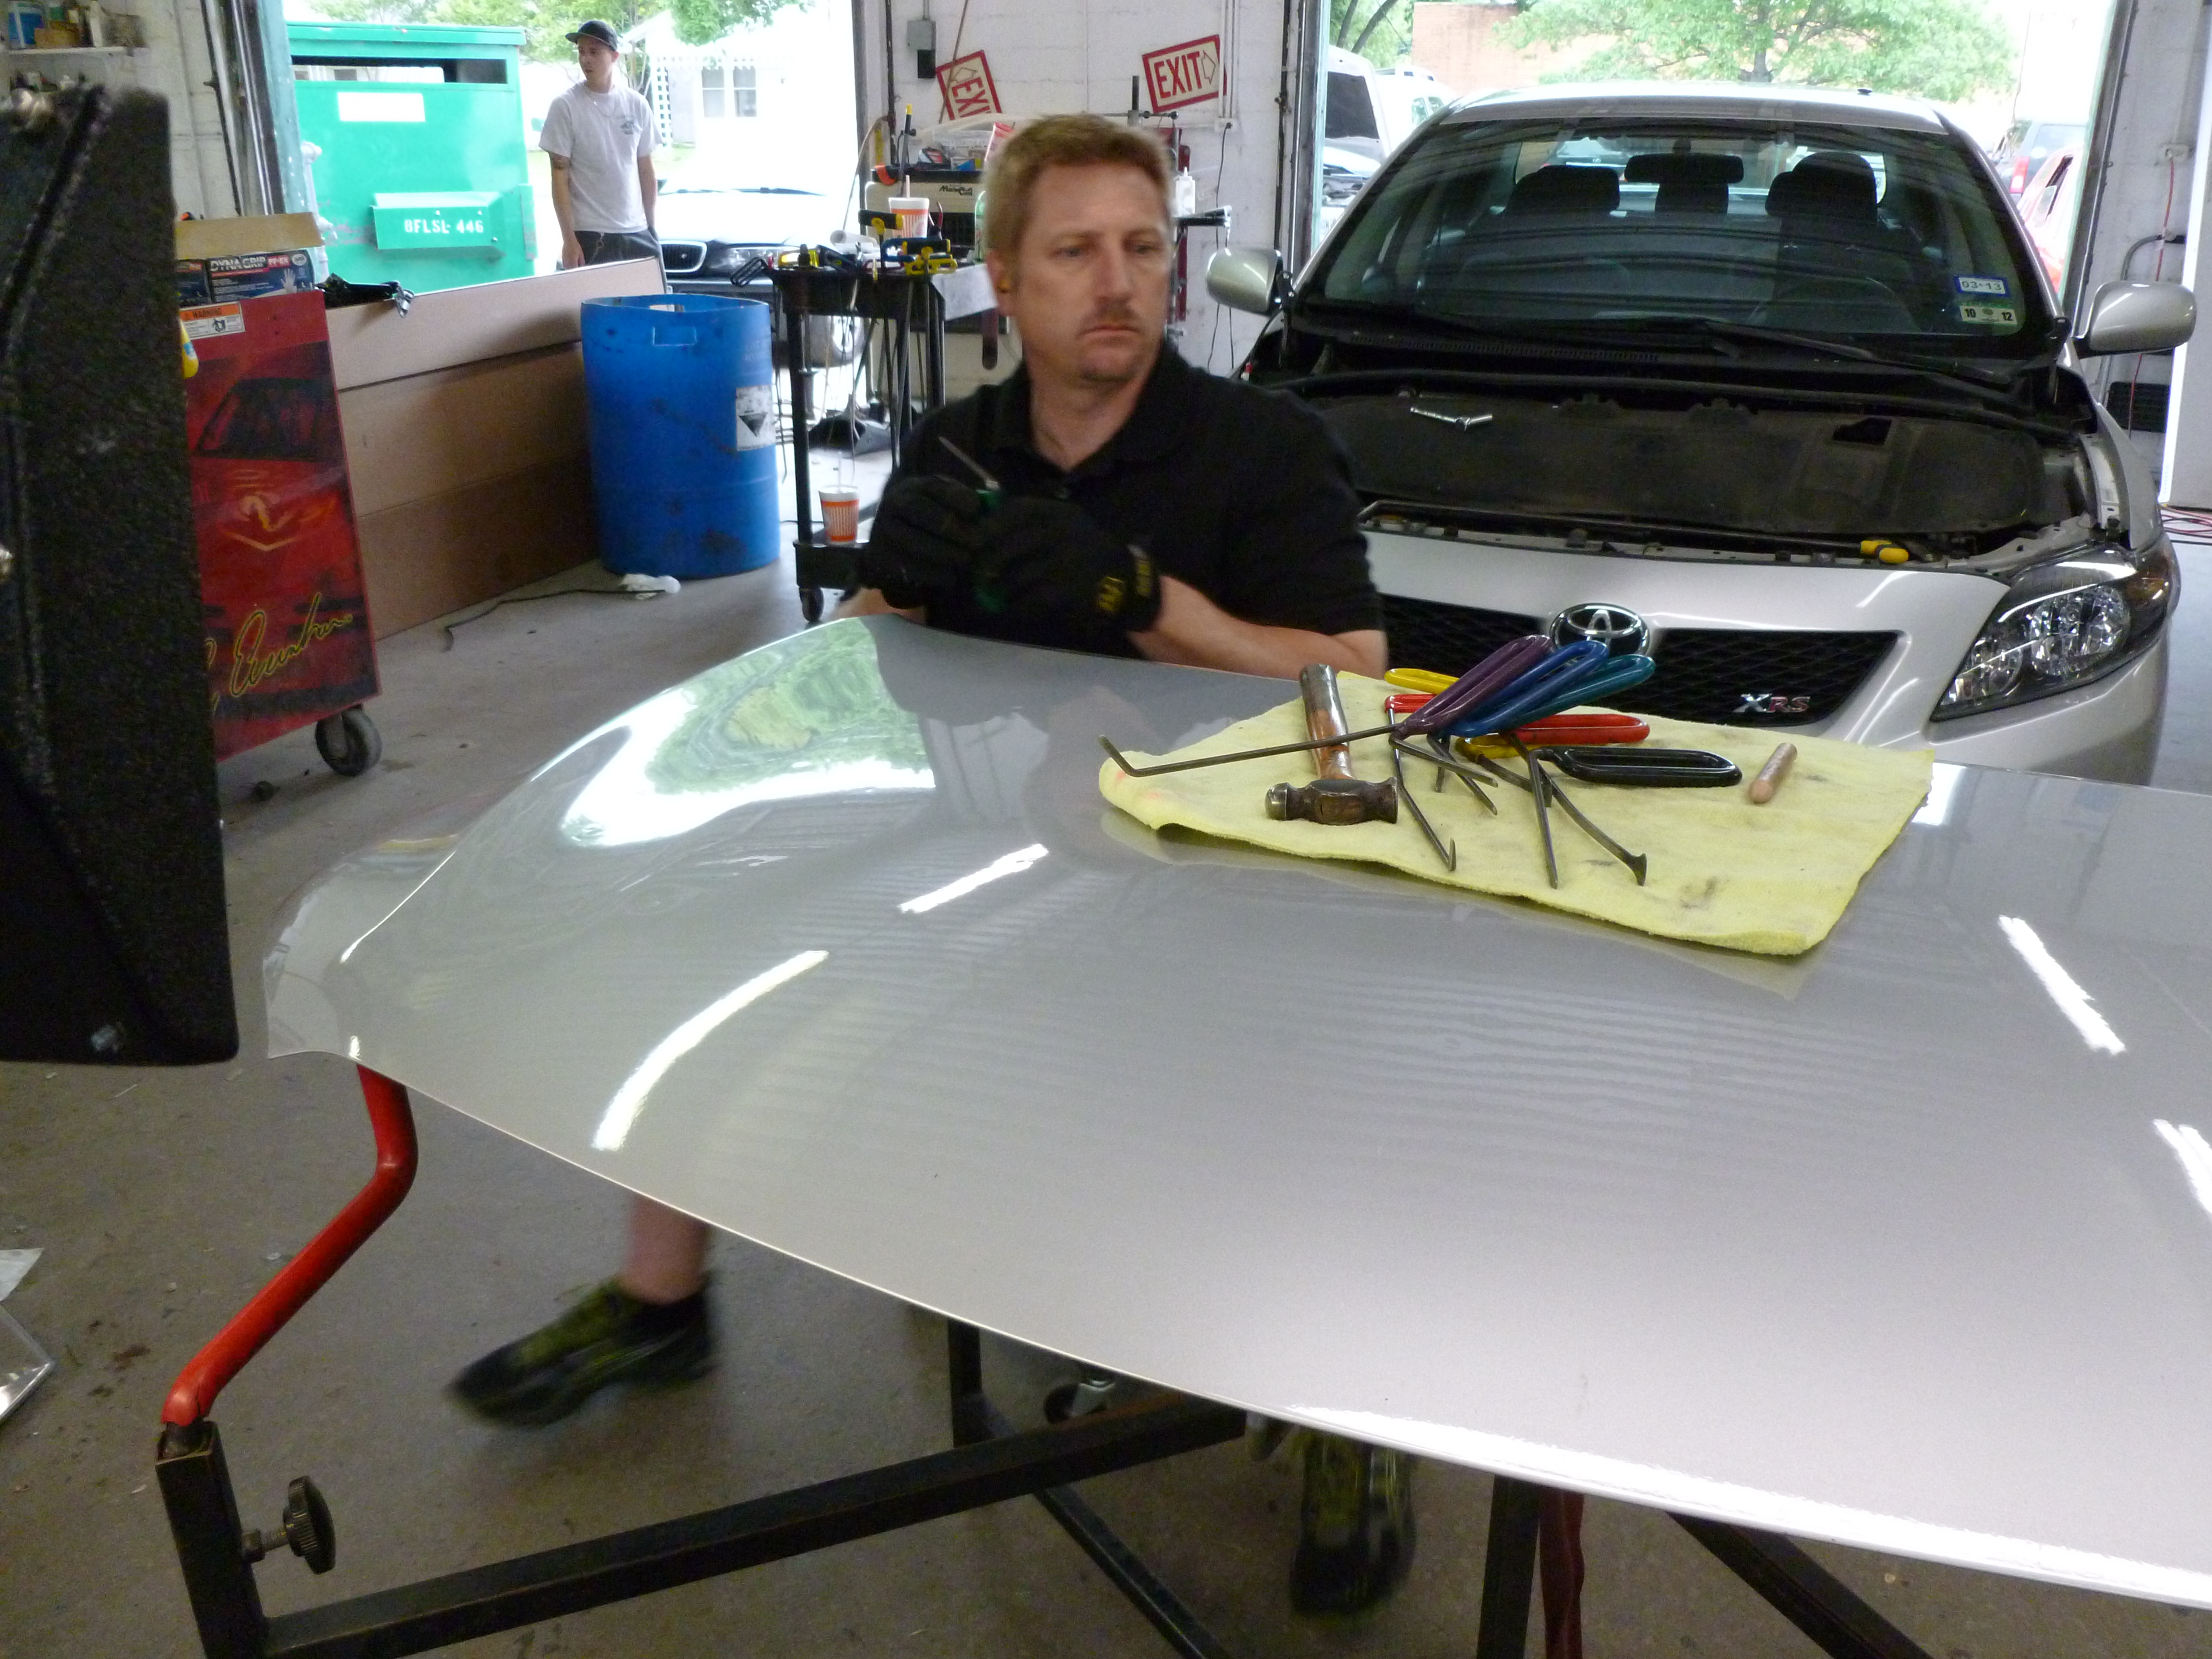
Key Specs and Main Parts
The tools and materials required for hail damage repair vary depending on the method chosen. For PDR, you'll need:
- PDR Rods: These are specialized tools with various shapes and tips designed to access the back of the dent and massage it back into place. Choosing the right rod is critical based on the access point and dent location.
- PDR Light: A specialized light with a striped or grid pattern helps you visualize the contours of the dent and track your progress.
- Hammer and Tapping Tools: Used in conjunction with the rods to gently manipulate the metal.
For dent pulling and filler application, you'll need:
- Dent Puller: A tool that adheres tabs to the dent and pulls the metal. Slide hammers or glue pullers are common types.
- Glue Tabs: Specialized tabs that stick to the panel using a hot glue gun.
- Hot Glue Gun: Used to apply the glue to the tabs.
- Body Filler (Bondo): A putty-like material used to fill in imperfections.
- Hardener: Activates the body filler.
- Mixing Board and Spreader: For mixing the filler and applying it evenly.
- Sandpaper (various grits): Used to sand down the filler and feather it into the surrounding paint. Common grits include 80, 180, 320, and 400.
- Primer: Applied after sanding to provide a smooth base for the paint.
- Paint: Matching the original paint color is essential. Use your car's paint code (usually found on a sticker inside the driver's side door jamb) to order the correct paint.
- Clear Coat: Protects the paint and adds shine.
- Spray Gun (optional): Provides a more even finish than aerosol cans, but requires experience and proper setup.
- Wax and Grease Remover: Cleans the surface before painting.
- Masking Tape and Paper: To protect surrounding areas from overspray.
How It Works: The Repair Process
Let's break down the repair process for both PDR and dent pulling/filler.
Paintless Dent Repair (PDR)
- Clean the area: Thoroughly clean the hood with soap and water, then degrease it.
- Locate the dents: Use the PDR light to clearly identify all dents. The light will distort around the dent.
- Access the back of the panel: This might involve removing trim panels or accessing the hood through existing openings.
- Massage the dent: Carefully insert the PDR rod and use it to gently massage the metal from the back side. Use the PDR light to monitor your progress. The key is to work slowly and methodically.
- Tapping: Use a hammer and tapping tool on the outside of the dent to fine-tune the repair.
- Repeat: Continue working on the dents until they are minimized or eliminated.
Dent Pulling and Filler Application
- Clean the area: As with PDR, start with a thorough cleaning and degreasing.
- Attach glue tabs: Apply hot glue to the glue tabs and attach them to the center of each dent. Let the glue cool and harden completely.
- Pull the dents: Use the dent puller to gently pull the metal back into place. Don't pull too hard, as you could stretch the metal. Work slowly and incrementally.
- Remove the glue tabs: Use a plastic scraper or adhesive remover to remove the glue tabs.
- Prepare the surface: Use sandpaper (80 grit) to rough up the area around the dent and create a surface for the filler to adhere to.
- Mix the filler: Follow the manufacturer's instructions to mix the body filler with the hardener. Proper mixing is crucial for the filler to cure correctly.
- Apply the filler: Use the spreader to apply a thin, even layer of filler over the dented area. Overfill slightly, as you'll be sanding it down.
- Let the filler cure: Allow the filler to cure completely according to the manufacturer's instructions.
- Sand the filler: Start with coarser sandpaper (180 grit) to remove the bulk of the excess filler. Then, move to finer grits (320 and 400) to smooth the surface and feather it into the surrounding paint.
- Prime: Apply several thin coats of primer to the sanded area, allowing each coat to dry completely. Sand the primer with fine sandpaper (400 grit) to create a smooth base for the paint.
- Paint: Apply several thin coats of paint, allowing each coat to dry completely.
- Clear coat: Apply several thin coats of clear coat, allowing each coat to dry completely.
- Buff and polish: After the clear coat has cured completely, buff and polish the painted area to restore the shine and blend it with the surrounding paint.
Real-World Use: Basic Troubleshooting Tips
- Dent pulling stretches the metal: If you over-pull a dent, you might need to use a shrinking disc or heat to shrink the metal back to its original shape. This requires experience and should be approached with caution.
- Filler cracking: If the filler cracks, it could be due to improper mixing, applying too thick of a layer, or insufficient surface preparation. Remove the cracked filler and start over.
- Paint not matching: Even with the correct paint code, variations in paint batches and fading can cause the new paint to not perfectly match the original. Blending the paint into the surrounding panels can help minimize the difference.
- PDR doesn't work: If the dent is too deep or the metal is stretched, PDR might not be effective. In these cases, dent pulling and filler application might be necessary.
Safety: Highlight Risky Components
Working on cars involves inherent risks. Here are some key safety considerations:
- Eye protection: Always wear safety glasses to protect your eyes from flying debris and chemicals.
- Respirator: When sanding body filler or spraying paint, wear a respirator to protect your lungs from harmful dust and fumes.
- Gloves: Wear gloves to protect your skin from chemicals and sharp edges.
- Ventilation: Work in a well-ventilated area to avoid inhaling fumes.
- Electrical safety: Disconnect the negative battery cable before working on any electrical components.
- Hot glue: Be careful when using a hot glue gun to avoid burns.
- Sharp tools: Use caution when using sharp tools like scrapers and sandpaper.
Working with body filler and paints involves chemicals that can be harmful. Always read and follow the manufacturer's instructions carefully.
Repairing hail damage requires patience and skill. If you're not comfortable with any of these procedures, it's best to consult a professional auto body repair shop.
We have a detailed diagram of hood construction and common hail damage points available for download. This diagram can be a valuable resource for understanding the structure of your hood and identifying areas prone to damage. It also shows common PDR access points. Feel free to contact us for the file.