How To Flush Ac System On A Car
Maintaining a functional air conditioning (AC) system in your car is crucial for comfort, especially during hot weather. Over time, contaminants like moisture, debris from compressor wear, and old refrigerant oil can accumulate within the system, reducing its efficiency and potentially causing component failures. Flushing the AC system is a process of removing these contaminants, restoring the system's performance, and prolonging the lifespan of its components. This article will provide a comprehensive guide on how to properly flush an AC system on a car, assuming you have intermediate mechanical skills and access to necessary tools.
Background of Automotive AC Systems
Before diving into the flushing procedure, it's essential to understand the basics of how an automotive AC system works. It's a closed-loop system that relies on refrigerant to absorb and transfer heat.
- Compressor: The heart of the system. It compresses the refrigerant, raising its pressure and temperature. Think of it as a pump that circulates the refrigerant.
- Condenser: Located typically in front of the radiator, the condenser dissipates heat from the high-pressure, high-temperature refrigerant vapor, turning it into a high-pressure liquid.
- Receiver/Drier (or Accumulator): This component filters out moisture and debris from the refrigerant. The drier contains a desiccant, a substance that absorbs moisture. It's important to replace this when the system is opened.
- Expansion Valve (or Orifice Tube): This regulates the flow of refrigerant into the evaporator. It reduces the pressure of the refrigerant, causing it to expand and cool rapidly.
- Evaporator: Located inside the vehicle's cabin, the evaporator absorbs heat from the cabin air, causing the refrigerant to vaporize. The cooled air is then blown into the cabin.
Refrigerant (like R-134a or the newer R-1234yf) circulates continuously throughout this loop, changing state from liquid to vapor and back again.
Technical Breakdown: The Flushing Process
Flushing the AC system involves using a specialized solvent to remove contaminants from the lines, condenser, evaporator, and other components. The goal is to remove old oil, debris, and any moisture that could be harmful. There are two main methods for flushing an AC system:
Method 1: Using a Dedicated AC Flushing Machine
This is the preferred method for professional mechanics as it offers the most thorough and controlled flush. However, the equipment cost makes it less practical for DIYers.
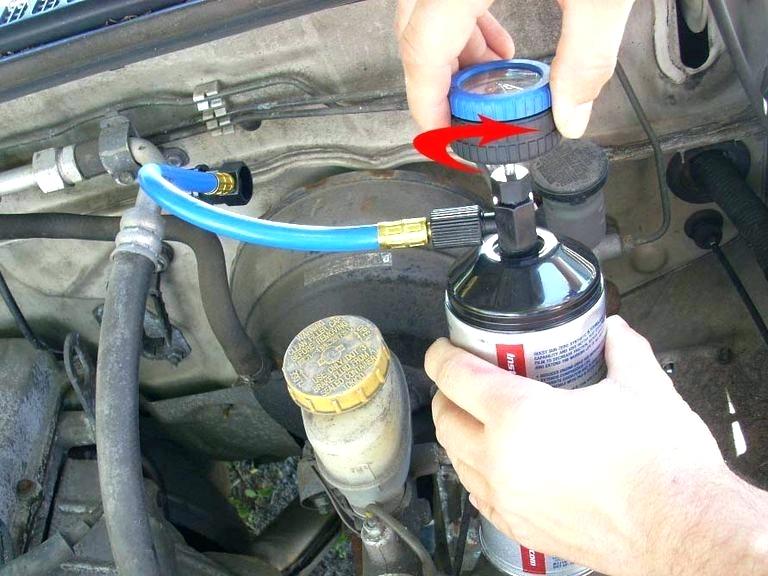
- Preparation: Disconnect the battery. Recover all existing refrigerant using a refrigerant recovery machine. This is crucial to prevent environmental damage and is legally required.
- Component Isolation: Disconnect the lines at the compressor, condenser, evaporator, and receiver/drier (or accumulator). Note the orientation and routing of the lines for reassembly.
- Machine Hookup: Connect the flushing machine's hoses to the inlet and outlet of each component individually. The machine will circulate a specialized AC flush solvent through each component in a closed loop.
- Flushing Procedure: Follow the machine's instructions for flushing each component. This typically involves circulating the solvent for a specific amount of time, followed by a purge cycle to remove any remaining solvent.
- Visual Inspection: After flushing, inspect each component for any remaining debris. If necessary, repeat the flushing process.
Method 2: Using Compressed Air and AC Flush Solvent
This method is more accessible to DIYers as it requires less specialized equipment, but it's crucial to understand the limitations and potential risks. Never flush the compressor, receiver/drier, or expansion valve/orifice tube. These components are highly sensitive and should be replaced if contaminated.
- Preparation: As before, disconnect the battery and recover all existing refrigerant. Disconnect the AC lines at the compressor, condenser, evaporator, and receiver/drier (or accumulator).
- Component Removal: Remove the expansion valve or orifice tube. These components cannot be effectively flushed and should be replaced. Remove the receiver/drier or accumulator; these must be replaced whenever the system is opened.
- Flushing the Condenser: Connect a hose to the inlet of the condenser. Pour a small amount of AC flush solvent into the condenser. Use compressed air (regulated to a low pressure, around 30-40 PSI) to push the solvent through the condenser and out the outlet. Collect the solvent in a container to observe the contaminants. Repeat this process until the solvent comes out clean.
- Flushing the Evaporator: Follow the same procedure as with the condenser, ensuring that the compressed air pressure is low to avoid damaging the evaporator core.
- Flushing the Hoses/Lines: Flush each hose individually, using compressed air to push the solvent through.
- Drying the Components: After flushing, use compressed air to thoroughly dry each component. Allow them to air dry completely for at least an hour.
Common Issues and Maintenance Concerns
- Contamination: The biggest issue is incomplete removal of contaminants. Residual debris can quickly clog the system and damage the new compressor.
- Moisture: Moisture is a major enemy of AC systems. It reacts with the refrigerant to form acids that corrode components. Always replace the receiver/drier (or accumulator) after flushing.
- Compressor Failure Debris: If the system failed due to a compressor meltdown, the system will be heavily contaminated with metal particles. A more aggressive flushing procedure, and possibly component replacement, is usually required.
- Selecting the Right Solvent: Use only AC flush solvents specifically designed for automotive AC systems. Avoid using harsh chemicals that could damage the system's components.
- Proper Reassembly: Ensure all O-rings are replaced with new, AC-compatible O-rings and that all connections are properly tightened to prevent leaks.
Do’s and Don’ts / Best Practices
Do’s:
- Do recover the refrigerant properly before disconnecting any lines.
- Do wear safety glasses and gloves when working with AC flush solvents.
- Do use compressed air to thoroughly dry all components after flushing.
- Do replace the receiver/drier (or accumulator) and expansion valve/orifice tube after flushing.
- Do use new O-rings specifically designed for AC systems during reassembly.
- Do vacuum the system down for at least 30-45 minutes after reassembly to remove any remaining moisture and air.
- Do add the correct type and amount of refrigerant oil as specified by the vehicle manufacturer.
- Do use a refrigerant scale when recharging the system to ensure the correct amount of refrigerant is added.
Don’ts:
- Don't flush the compressor. Replace it if it's suspected to be contaminated.
- Don't use excessive air pressure when flushing, as this could damage the evaporator or condenser.
- Don't reuse old O-rings.
- Don't expose the system to the atmosphere for extended periods, as this will allow moisture to enter.
- Don't overcharge the system with refrigerant.
- Don't skip the vacuuming step. It's essential for removing moisture.
Conclusion
Flushing an AC system can significantly improve its performance and longevity. While a dedicated AC flushing machine provides the most thorough cleaning, DIYers can achieve satisfactory results using compressed air and AC flush solvent, provided they follow the correct procedures and take necessary precautions. Remember that the compressor, receiver/drier, and expansion valve/orifice tube should never be flushed. Always replace these components. It is highly recommended to have a qualified AC technician recover and recharge the refrigerant, as it requires specialized equipment and knowledge of refrigerant handling. Prioritizing safety, using the right tools, and adhering to best practices will contribute to a successful AC system flush and a cooler, more comfortable driving experience. If you're unsure about any step, consulting with a professional mechanic is always a wise decision.