How To Get Rid Of Mold In Car
Mold in your car isn't just unsightly; it's a health hazard. As an experienced DIYer, you know the importance of maintaining your vehicle, and that includes tackling problems like mold head-on. This article provides a comprehensive guide to identifying, removing, and preventing mold growth in your car, so you can breathe easy knowing your ride is clean and safe.
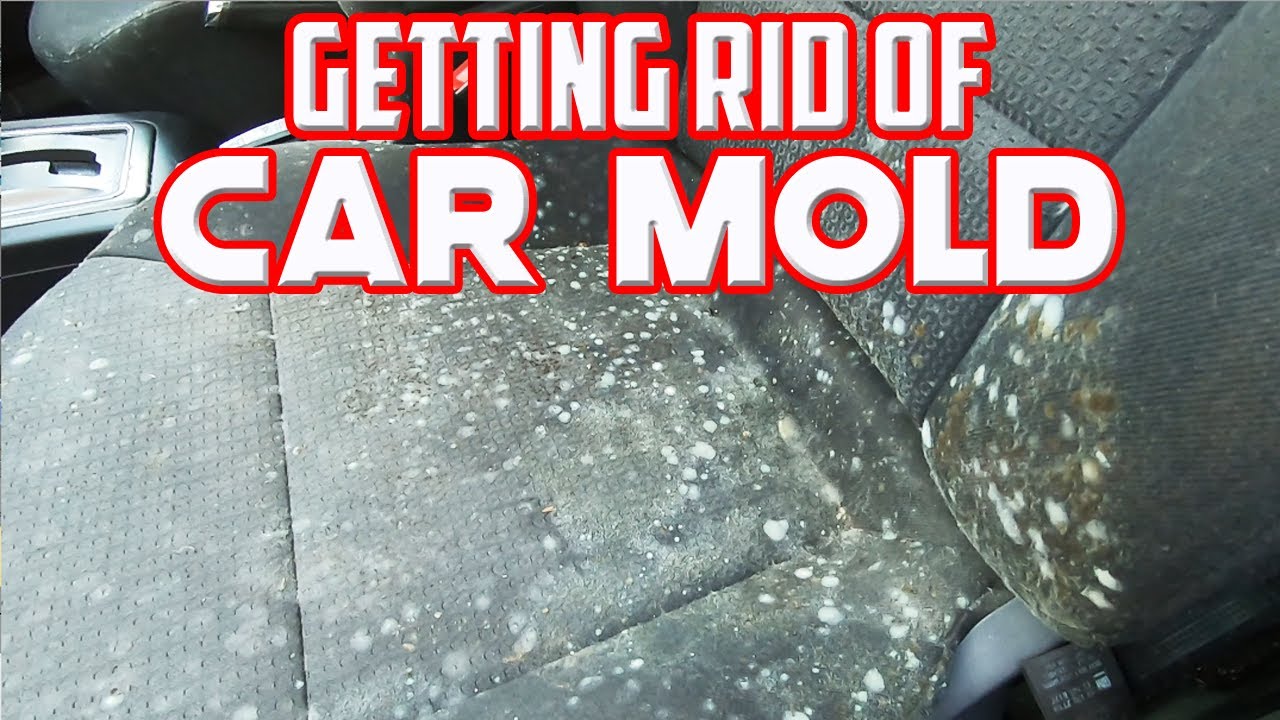
Understanding the Mold Problem in Your Car
Mold thrives in damp, dark environments, and your car, unfortunately, provides the perfect breeding ground, especially after leaks, spills, or just humid weather. Before we get into the nitty-gritty of removal, let's understand the problem at hand.
Identifying Mold and Its Sources
Visible mold is usually the first sign. Look for these telltale indicators:
- Musty odor: A persistent, unpleasant smell even after cleaning.
- Visible growth: Discoloration (often black, green, white, or brown) on seats, carpets, headliner, or under the floor mats.
- Water stains: Evidence of past or present leaks.
Common sources of mold growth include:
- Leaky windows or sunroofs: Water intrusion creates a perfect environment for mold.
- Spilled drinks or food: Organic matter fuels mold growth.
- Wet carpets or upholstery: Rainwater tracked in on shoes, condensation from the AC, or spills that haven't been properly dried.
- Clogged drain lines: The AC system's evaporator core has a drain to remove condensation. A clogged drain can lead to moisture buildup and mold growth in the HVAC system and cabin.
Tools and Materials You'll Need
Gathering the right tools and materials is crucial for effective mold removal. Here's a list:
- Personal Protective Equipment (PPE): A respirator mask (N95 or higher), gloves (nitrile or rubber), and eye protection. Mold spores can be harmful when inhaled, so PPE is essential.
- Vacuum cleaner: A shop vacuum with a HEPA filter is ideal. HEPA filters capture even the smallest mold spores.
- Mold-killing solutions: Options include:
- Commercial mold killers: Follow the manufacturer's instructions carefully.
- Vinegar: A natural and effective option for mild mold growth.
- Baking soda: Absorbs moisture and odors.
- Borax: A more potent mold killer; handle with care.
- Cleaning cloths and brushes: Microfiber cloths are excellent for wiping surfaces. Stiff-bristled brushes are helpful for scrubbing carpets and upholstery.
- Spray bottles: For applying cleaning solutions.
- Drying equipment: A dehumidifier, fans, or a wet/dry vacuum for extracting moisture.
- Upholstery cleaner (optional): For cleaning seats and carpets after mold removal.
- Steam cleaner (optional): Can be effective for deep cleaning and sanitizing surfaces.
The Mold Removal Process: Step-by-Step
Now, let's get down to the actual mold removal. Follow these steps carefully for the best results.
- Preparation:
- Park your car in a well-ventilated area, preferably outdoors.
- Remove all loose items from the car, including floor mats, seat covers, and personal belongings.
- Thoroughly vacuum the entire interior of the car, paying close attention to areas where mold is visible or suspected. Use the HEPA filter vacuum to prevent spores from spreading.
- Treating Mold-Affected Areas:
- Apply your chosen mold-killing solution to the affected areas. Follow the manufacturer's instructions for commercial products, or use a spray bottle to apply vinegar, baking soda solution, or borax solution.
- Allow the solution to sit for the recommended time (usually 10-15 minutes).
- Scrub the affected areas with a brush or cloth to remove the mold.
- Wipe away any excess solution with a clean, damp cloth.
- Drying:
- This is crucial. Mold thrives in moisture, so thorough drying is essential.
- Use a wet/dry vacuum to extract any remaining moisture from carpets and upholstery.
- Place a dehumidifier inside the car to remove excess humidity.
- Use fans to circulate air and speed up the drying process. Leave the windows slightly open (weather permitting) to allow air to flow through the car.
- Consider using a car-specific interior dryer if you have one.
- Ensure all surfaces are completely dry before proceeding. This may take several hours or even a day.
- Cleaning and Deodorizing:
- Once the affected areas are dry, use an upholstery cleaner to clean the seats and carpets.
- Vacuum the entire interior again to remove any remaining debris.
- Consider using an odor eliminator or air freshener to neutralize any lingering musty smells.
- For stubborn odors, try placing bowls of baking soda or activated charcoal inside the car for several days to absorb the smells.
- Addressing the Source:
- This is the most important step! If you don't fix the source of the moisture, the mold will likely return.
- Inspect your car for leaks. Check the window seals, sunroof, door seals, and firewall for any signs of water intrusion.
- Repair any leaks promptly. This may involve replacing weather stripping, sealing cracks, or unclogging drain lines.
- Check the AC system's drain line for clogs. Clean the drain line with a wire or compressed air.
Preventing Future Mold Growth
Prevention is always better than cure. Here are some tips to prevent mold from returning to your car:
- Regularly clean your car's interior. Vacuum carpets and upholstery frequently.
- Address spills immediately. Clean up spills as soon as they happen to prevent moisture buildup.
- Keep your car dry. Avoid leaving wet items in your car, such as towels or clothes.
- Use floor mats. Floor mats can help protect your car's carpets from moisture.
- Park in a well-ventilated area. Avoid parking in damp or shaded areas.
- Run the AC regularly. The AC system can help dehumidify the air inside your car.
- Check for leaks regularly. Inspect your car for leaks and repair them promptly.
Safety Considerations
Working with mold can be hazardous to your health. Take the following precautions:
- Always wear PPE. A respirator mask, gloves, and eye protection are essential.
- Work in a well-ventilated area. Open the windows and doors of your car to allow for proper ventilation.
- Avoid direct contact with mold. Do not touch mold with your bare hands.
- Be careful when using chemicals. Follow the manufacturer's instructions carefully and avoid mixing different cleaning products.
- If you have respiratory problems or allergies, consult a doctor before attempting mold removal.
Troubleshooting Tips
- Persistent musty odor: Check the AC system's evaporator core for mold growth. You may need to have the evaporator core cleaned or replaced.
- Mold returning quickly: You haven't addressed the source of the moisture. Inspect your car for leaks and repair them promptly.
- Stubborn mold stains: Try using a more potent mold killer or a steam cleaner. You may also need to have the affected area professionally cleaned.
Real-World Use
Let's say you've noticed a musty smell and some black spots on your car's carpet after a heavy rain. This is a classic scenario for mold growth. Using the steps outlined above, you'd first identify the source of the moisture (likely a leaky window seal). Then, you'd vacuum the area, apply a mold-killing solution like vinegar, scrub the carpet, and thoroughly dry it with a dehumidifier and fans. Finally, you'd repair the leaky window seal to prevent the mold from returning.
By following these steps, you can effectively remove mold from your car and keep it from coming back, ensuring a healthier and more enjoyable driving experience.
We have a detailed diagram illustrating the common areas in a car susceptible to mold growth and potential leak points. This visual aid can further assist you in your inspection and remediation efforts. Contact us to access the file for download.