How To Install A Cam Sensor
So, you're tackling a cam sensor replacement? Excellent choice! Whether you're chasing down a pesky trouble code, improving performance, or just performing some preventative maintenance, getting your hands dirty and understanding your engine is always a good idea. This guide will walk you through the process of installing a cam sensor, covering the technical aspects, potential pitfalls, and best practices. We'll assume you're already familiar with basic automotive tools and safety procedures.
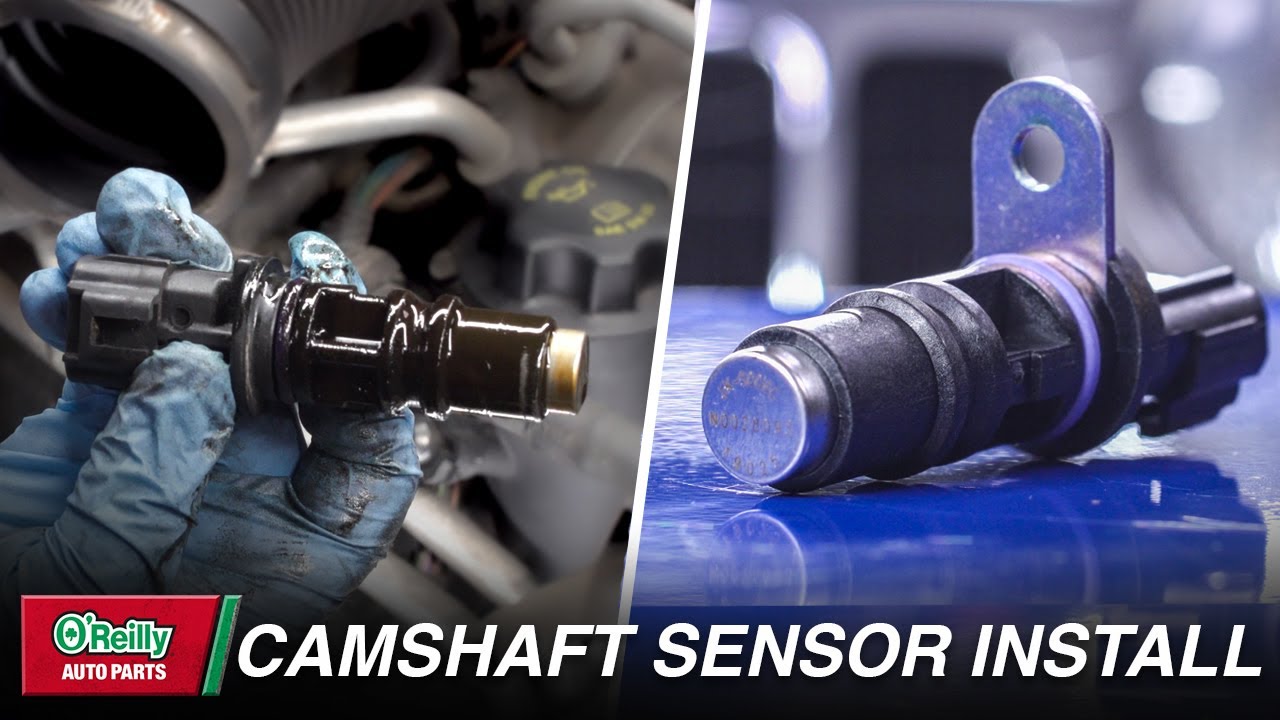
Background: The Camshaft Position Sensor
The Camshaft Position Sensor (CMP), often referred to as the cam sensor, is a vital component of your engine's electronic control system. To understand its importance, let's briefly delve into the engine's operation. Internal combustion engines operate on a four-stroke cycle: intake, compression, combustion (power), and exhaust. Precise timing is crucial for each of these strokes to occur efficiently. This timing is dictated by the synchronized rotation of the crankshaft and camshaft(s).
The crankshaft, connected to the pistons via connecting rods, converts the reciprocating motion of the pistons into rotary motion, which ultimately drives the wheels. The camshaft(s), on the other hand, control the opening and closing of the intake and exhaust valves. These valves allow air and fuel to enter the combustion chamber (intake) and exhaust gases to exit (exhaust).
The Engine Control Unit (ECU), the brains of your engine, needs to know the precise position of both the crankshaft and the camshaft(s) to properly time fuel injection and ignition. This is where the crank and cam sensors come into play. The Crankshaft Position Sensor (CKP) provides information about crankshaft position and engine speed (RPM), while the CMP sensor provides information about the camshaft's position.
Technical Breakdown: How the Cam Sensor Works
Most cam sensors are based on either the Hall effect or Variable Reluctance principle. Both types generate a signal that the ECU interprets as the camshaft's position.
Hall Effect Sensors
Hall effect sensors consist of a permanent magnet, a semiconductor material (the Hall element), and a toothed reluctor wheel (or tone ring) attached to the camshaft. As the camshaft rotates, the teeth of the reluctor wheel pass by the sensor. When a tooth passes, it alters the magnetic field around the Hall element. This change in the magnetic field generates a small voltage (the Hall voltage) in the semiconductor material. The ECU detects this voltage pulse and uses it to determine the camshaft's position. Hall effect sensors typically require a reference voltage (usually 5V or 12V) to operate. They are generally more accurate and less susceptible to noise than variable reluctance sensors.
Variable Reluctance Sensors
Variable reluctance sensors, also known as magnetic pickup sensors, consist of a coil of wire wrapped around a permanent magnet and a toothed reluctor wheel on the camshaft. As the reluctor wheel rotates, the teeth passing by the sensor cause the magnetic field to fluctuate. This fluctuation induces a small AC voltage in the coil. The frequency and amplitude of this AC voltage change as the camshaft rotates, providing the ECU with information about the camshaft's position and speed. Variable reluctance sensors do not require an external power supply but can be more susceptible to electromagnetic interference (EMI).
Installation Procedure (General Steps)
Regardless of the sensor type, the installation procedure is generally similar. Always consult your vehicle's service manual for specific instructions, torque specifications, and any vehicle-specific quirks.
- Preparation and Safety: Disconnect the negative battery terminal to prevent electrical shorts. Locate the cam sensor on your engine. It's typically found near the camshaft gear or valve cover. Gather your tools: socket set, wrench set, screwdrivers (likely flathead and Phillips), multimeter (optional but recommended), torque wrench, and possibly penetrating oil.
- Sensor Removal: Disconnect the electrical connector from the old cam sensor. Be gentle; the plastic connectors can become brittle with age. You may need to depress a locking tab or release a retaining clip. Carefully remove the mounting bolt(s) securing the sensor to the engine. If the sensor is stuck, apply penetrating oil and gently wiggle it free. Avoid excessive force, as you could damage the sensor housing or surrounding components.
- Inspection and Cleaning: Inspect the area where the sensor mounts. Clean away any dirt, debris, or corrosion. Check the reluctor wheel for damage (missing or bent teeth). If the reluctor wheel is damaged, you'll need to address that issue before installing the new sensor. Clean the electrical connector terminals with electrical contact cleaner.
- Sensor Installation: Apply a small amount of dielectric grease to the electrical connector terminals. This will help prevent corrosion and ensure a good connection. Carefully install the new cam sensor into its mounting location. Ensure it's seated properly and aligned correctly. Install the mounting bolt(s) and torque them to the manufacturer's specified torque. Over-torquing can damage the sensor or the threads in the engine.
- Connector and Testing: Reconnect the electrical connector to the new cam sensor. Ensure the connector is securely attached and the locking tab or retaining clip is engaged. Reconnect the negative battery terminal. Start the engine and check for any warning lights. If the check engine light persists, use an OBD-II scanner to check for any trouble codes. Clear any old codes and see if they reappear.
- Verification: If you have a multimeter and know how to use it, you can test the new sensor's output signal. Consult your vehicle's service manual for the correct testing procedure and expected voltage readings.
Common Issues and Maintenance Concerns
- Sensor Failure: Cam sensors can fail due to age, heat exposure, vibration, and contamination. Symptoms of a failing cam sensor can include:
- Check engine light (CEL) illuminated
- Trouble codes related to cam sensor circuit (e.g., P0340, P0341)
- Engine misfires
- Rough idling
- Difficulty starting
- Reduced fuel economy
- Engine stalling
- Connector Problems: The electrical connector can become corroded, loose, or damaged, leading to intermittent signal problems.
- Wiring Issues: The wiring harness leading to the cam sensor can become frayed, shorted, or open, causing signal problems.
- Reluctor Wheel Damage: Damage to the reluctor wheel can disrupt the sensor's signal and cause performance problems.
- Contamination: Oil leaks or other contaminants can foul the sensor and affect its accuracy.
Do's and Don'ts / Best Practices
Do's
- Consult your vehicle's service manual: This is your most valuable resource for specific instructions, torque specifications, and troubleshooting tips.
- Use quality replacement parts: Opt for a reputable brand when purchasing a new cam sensor. A cheap sensor may fail prematurely or provide inaccurate readings.
- Apply dielectric grease: This helps prevent corrosion and ensures a good electrical connection.
- Torque fasteners to specification: Over-torquing can damage the sensor or the threads in the engine.
- Cleanliness is key: Keep the work area clean and free of debris.
- Double-check your work: Before starting the engine, ensure all connections are secure and fasteners are properly torqued.
- Use an OBD-II scanner: To read and clear trouble codes related to the cam sensor.
Don'ts
- Don't force anything: If a bolt or connector is stuck, use penetrating oil and gentle persuasion. Avoid excessive force.
- Don't ignore warning signs: If your engine is exhibiting symptoms of a failing cam sensor, address the issue promptly to prevent further damage.
- Don't overtighten fasteners: Refer to the service manual for the correct torque specifications.
- Don't use abrasive cleaners on the sensor or connector: These can damage the delicate components.
- Don't work on a hot engine: Allow the engine to cool completely before starting any work.
Conclusion
Replacing a cam sensor is a relatively straightforward task that most experienced DIYers can handle. By following these instructions, consulting your vehicle's service manual, and taking your time, you can successfully install a new cam sensor and restore your engine's performance. Remember to prioritize safety, use quality parts, and pay attention to detail. If you're unsure about any aspect of the procedure, don't hesitate to consult a qualified mechanic. A properly functioning cam sensor is crucial for optimal engine performance and fuel efficiency. Getting this job done right can save you money and keep your car running smoothly for years to come.