How To Install A Car Seat Base
Alright, let's dive into installing a car seat base. Whether you're expanding your family, upgrading your vehicle, or simply replacing a worn-out component, understanding how to properly install a car seat base is crucial for your child's safety. This isn't just about following instructions; it's about knowing why each step matters.
Purpose of Understanding Car Seat Base Installation
Gaining a solid understanding of this process serves several important purposes. First and foremost, it ensures the safe and secure transportation of your child. A properly installed base significantly reduces the risk of injury in the event of a collision. Secondly, it allows you to troubleshoot potential issues that might arise during installation, such as compatibility problems or difficulty achieving a tight fit. Finally, familiarizing yourself with the installation process empowers you to confidently install and remove the base as needed, whether you're switching it between vehicles or cleaning it.
Key Specs and Main Parts
Let's break down the essential components and specifications involved in car seat base installation. While specific designs vary between manufacturers and car models, the core elements remain consistent.
Main Parts:
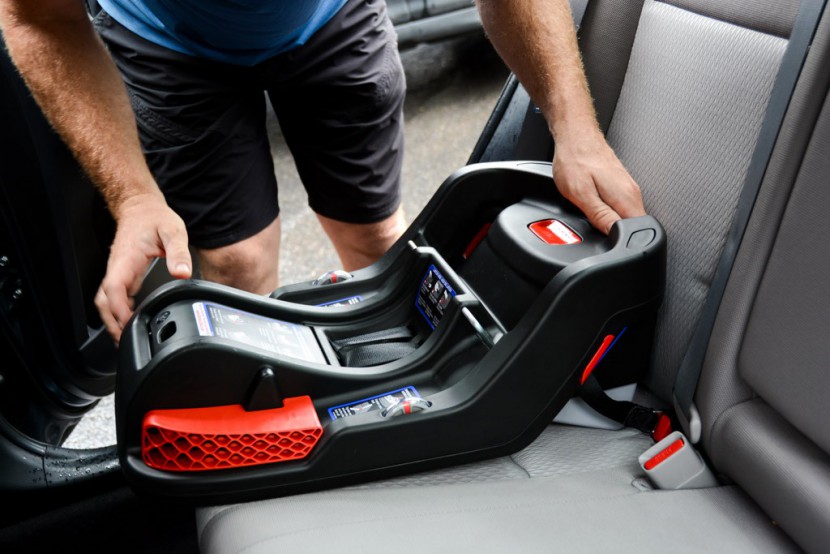
- Base: The foundation that stays securely attached to the vehicle's seat.
- Locking Mechanism: This component secures the car seat carrier to the base. This can be a simple latching system or a more complex mechanism with visual indicators to confirm proper engagement.
- LATCH Connectors (Lower Anchors and Tethers for Children): These metal clips attach the base to the vehicle's lower anchor points.
- Top Tether Strap: A strap that connects to a designated anchor point in the vehicle, providing an additional point of stability and reducing forward movement in a crash. Not all vehicles have top tether anchors for every seating position.
- Seat Belt Guides: Used when installing the base with the vehicle's seat belt instead of LATCH.
- Recline Adjustment: Allows you to adjust the angle of the base to ensure the car seat is properly reclined for the child's age and weight. This helps keep the baby's head from slumping forward.
- Level Indicator: A visual aid (bubble level, line, or digital display) to confirm the base is at the correct angle.
Key Specs:
- Weight Limit: The maximum weight of the child that the base is designed to support. Exceeding this weight limit compromises safety.
- Height Limit: The maximum height of the child that the base is designed to support. Often indicated by when the child's head reaches a certain point on the car seat shell.
- Vehicle Compatibility: Not all car seat bases are compatible with all vehicles. Consult the car seat and vehicle owner's manuals to ensure compatibility. Look specifically for details on LATCH anchor spacing and top tether anchor locations.
- Expiration Date: Car seats and bases have expiration dates, usually molded into the plastic. This is due to degradation of the plastic and webbing over time. Never use an expired car seat or base.
How It Works: Securing the Base
The fundamental principle behind car seat base installation is to create a rigid and stable connection between the base and the vehicle. This is achieved using either the LATCH system or the vehicle's seat belt. Let's look at both methods:
LATCH Installation:
- Locate the Lower Anchor Points: These are metal bars located in the bight (crease) of the vehicle's seat. They are typically covered by small plastic caps or indicated by markings on the seat.
- Attach the LATCH Connectors: Connect the LATCH connectors on the car seat base to the vehicle's lower anchor points. Ensure they click or lock into place securely.
- Tighten the LATCH Strap: Most bases have a strap to tighten the connection. Pull the strap until the base is firmly attached and doesn't move more than one inch from side to side or front to back when tested near the belt path.
- Attach the Top Tether (if applicable): Locate the top tether anchor point in the vehicle (often on the rear shelf, seatback, or cargo area). Attach the top tether strap to the anchor point and tighten it according to the car seat manual. The top tether significantly reduces forward head excursion in a crash.
- Verify Level: Use the level indicator on the base to ensure it is properly reclined. Adjust the recline adjustment as needed.
Seat Belt Installation:
- Route the Seat Belt: Thread the vehicle's seat belt through the designated seat belt guides on the car seat base. Refer to the car seat manual for the correct routing path.
- Buckle the Seat Belt: Buckle the seat belt and pull it tight.
- Lock the Seat Belt: Most vehicles have a locking mechanism on the seat belt that needs to be engaged to prevent the seat belt from loosening. This is usually done by pulling the seat belt all the way out and then slowly letting it retract. Refer to your vehicle's owner's manual for specific instructions.
- Tighten the Seat Belt: Press down firmly on the car seat base and tighten the seat belt as much as possible. You may need to use your body weight to get a tight fit.
- Verify Level: Use the level indicator on the base to ensure it is properly reclined. Adjust the recline adjustment as needed.
Real-World Use: Basic Troubleshooting
Even with careful installation, you might encounter some common issues. Here are a few troubleshooting tips:
- Base Won't Stay Tight: Double-check that the LATCH connectors are securely attached or that the seat belt is properly locked. If using LATCH, ensure the strap is tightened sufficiently. If using a seat belt, ensure you are using the locking mechanism correctly.
- Level Indicator is Off: Adjust the recline angle of the base until the level indicator shows the correct angle. Some bases have multiple recline positions.
- Compatibility Issues: If the LATCH anchors are too close or too far apart, or if the top tether anchor is in an inconvenient location, you might need to use a different seating position or a different car seat base. Contact the car seat manufacturer for guidance.
- Difficult to Buckle Seatbelt: Check that seatbelt is not twisted. It can sometime be a challenge to release it. If it does not come out to give slack, check that the release latch is not pinned and move the seat to allow movement.
Safety: Risky Components
While the entire car seat installation process is safety-critical, certain components require extra attention:
- LATCH Connectors: Ensure they are fully engaged and locked onto the vehicle's anchor points. A partially attached connector can detach in a crash.
- Top Tether: The top tether is often overlooked, but it significantly enhances safety by reducing head excursion. Always use the top tether if one is available.
- Seat Belt Locking Mechanism: If the seat belt is not properly locked, the base can loosen over time, compromising safety. Verify that the seat belt is locked before each use.
- Base Shell: Inspect the base shell for any cracks, breaks, or signs of damage. A damaged base should be replaced immediately.
Remember, your child's safety depends on a properly installed car seat base. Take the time to understand the process, follow the instructions carefully, and don't hesitate to seek professional assistance if needed. A certified Child Passenger Safety Technician (CPST) can inspect your installation and provide guidance.
We have a detailed diagram of a universal car seat base available for download. It includes detailed illustrations and specifications. This diagram provides a visual aid to complement the information outlined in this article and can be a valuable resource for understanding the components and installation process. Feel free to reach out, and we'll happily provide it.