How To Install A Doona Car Seat
Welcome, fellow DIY enthusiasts! Today, we’re diving deep into something critically important: the installation of a Doona car seat. While it might seem simple at first glance, proper installation is paramount for your child's safety. Think of this as akin to ensuring your performance brakes are installed correctly – no room for error!
Purpose: Secure Your Precious Cargo
Understanding and executing a correct Doona installation isn’t just about following instructions; it’s about ensuring the safety and well-being of your child. Incorrect installation can significantly reduce the effectiveness of the car seat in a collision. This detailed guide and the accompanying diagram (which you can download; link provided at the end) serve several crucial purposes:
- Safety Assurance: Correct installation minimizes the risk of injury in the event of an accident.
- Optimal Performance: When installed properly, the Doona can perform as designed, absorbing and distributing impact forces effectively.
- Preventing Common Mistakes: Many installation errors are avoidable with proper knowledge and attention to detail.
- Troubleshooting: Understanding the mechanics allows you to diagnose and resolve potential issues, such as loose harnesses or improper leveling.
Key Specs and Main Parts
Before we get our hands dirty, let's familiarize ourselves with the key components and specifications of the Doona. Keep these in mind as we proceed through the installation process. For your reference, the downloadable diagram will provide detailed visual representations of each part.
Main Components:
- Doona Infant Car Seat/Stroller: The core unit, combining the functionality of a car seat and stroller.
- Base (Optional but Recommended): Provides a secure and convenient anchor point within the vehicle.
- Infant Insert: Used for smaller infants to ensure proper fit and support.
- Harness System: Consists of shoulder straps, a crotch strap, and a chest clip, securing the child within the seat.
- Side Impact Protection (SIP): Integrated into the Doona to absorb impact forces in side collisions.
- Vehicle Seat Belt Guides: Channels that guide the vehicle seat belt when installing without the base.
- Level Indicator: Helps to ensure the car seat is installed at the correct angle.
- ISOFIX Connectors (If Applicable): Rigid connectors that attach directly to the vehicle's ISOFIX anchor points (also known as LATCH in the US).
Key Specifications:
- Weight Limit: Usually ranges from 4 lbs to 35 lbs. Always verify this specific limit for your model!
- Height Limit: Typically up to 32 inches. Again, confirm the exact specification.
- Installation Method: Vehicle seat belt or ISOFIX (LATCH) system.
Understanding the Diagram Symbols
The installation diagram isn't just a pretty picture; it's a technical document packed with valuable information conveyed through standardized symbols. Let's decode some common ones you'll encounter:
- Solid Lines: Represent physical parts or structural elements, such as the seat frame, straps, or vehicle seat.
- Dashed Lines: Indicate the path of the vehicle seat belt or the location of hidden components.
- Arrows: Show the direction of force, movement, or the correct routing of the seat belt. Pay special attention to these!
- Color Coding (If Present): Colors may differentiate between different parts, stages of installation, or safety warnings. For example, red might indicate a step requiring extra caution.
- Icons: Small pictorial representations, such as a padlock indicating a locking mechanism or a child figure indicating proper placement.
How It Works: The Physics of Protection
Understanding how the Doona car seat protects your child allows you to appreciate the importance of correct installation. In a collision, several forces are at play:
- Inertia: Your child's body wants to continue moving at the same speed as the vehicle before the impact.
- Deceleration: The rapid slowing down of the vehicle creates a sudden stop for your child.
- Impact Forces: These forces are transferred to the car seat.
The Doona mitigates these forces through:
- Energy Absorption: The seat's construction and materials are designed to absorb and dissipate impact energy. Think of it like crumple zones in your car.
- Force Distribution: The harness system spreads the impact force over a larger area of the child's body, reducing the concentration of force on any single point.
- Containment: The car seat keeps the child contained within a protected space, preventing ejection from the vehicle or impact with interior components.
Proper installation ensures that the car seat can effectively perform these functions. A loose or improperly routed seat belt, for example, can compromise the seat's ability to absorb energy and distribute forces.
Real-World Use: Basic Troubleshooting
Even with the best instructions, problems can arise. Here are some common issues and troubleshooting tips:
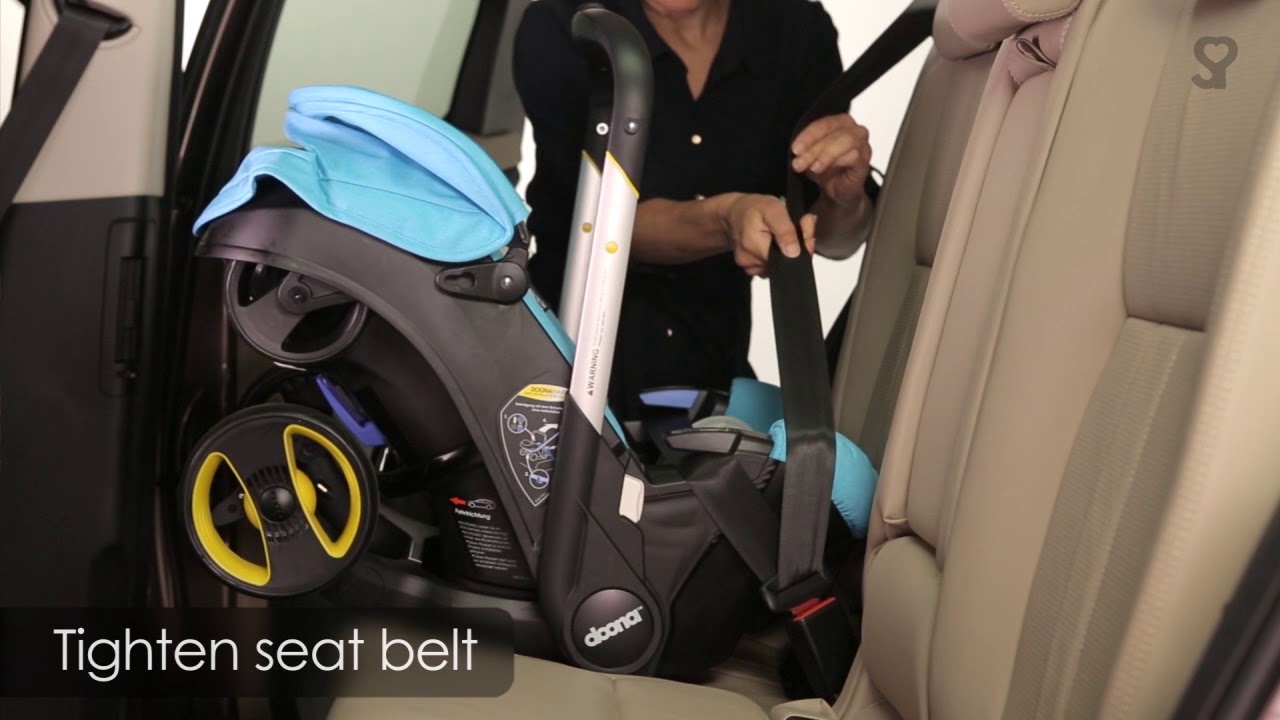
- Loose Installation: The car seat should not move more than 1 inch in any direction when tugged near the belt path. Retighten the vehicle seat belt or ISOFIX connectors. If using a base, ensure it is securely attached to the vehicle.
- Twisted Harness Straps: Untwist the straps! Twisted straps reduce their effectiveness and can cause discomfort.
- Incorrect Harness Height: The shoulder straps should be at or just below the child's shoulders when rear-facing. Adjust the harness height accordingly.
- Leveling Issues: Use the level indicator to ensure the car seat is at the correct angle. Adjust the base (if applicable) or use rolled towels or pool noodles (check your Doona manual first, as some manufacturers explicitly prohibit this) to achieve the correct angle.
- Incompatible Vehicle: Not all vehicles are compatible with all car seats. Consult the Doona's compatibility list and your vehicle's owner's manual.
Safety: Risky Components and Practices
Car seat installation has inherent risks. Here are some areas to pay extra attention to:
- ISOFIX/LATCH System Overload: Never attach two car seats to the same lower anchor bar. These bars are designed to withstand the forces from a *single* car seat. Overloading them can lead to catastrophic failure in a collision.
- Aftermarket Accessories: Avoid using aftermarket accessories that are not specifically approved by Doona. These accessories may interfere with the car seat's performance.
- Second-Hand Car Seats: Avoid using second-hand car seats unless you have a verifiable history of the seat and know it has never been involved in a crash. Car seats that have been in accidents may have hidden damage.
- Incorrect Seat Belt Routing: Follow the diagram *exactly* when routing the vehicle seat belt. Incorrect routing can significantly reduce the seat's effectiveness.
- Forgetting the Top Tether (If Applicable): A top tether adds significant stability to the car seat and helps to prevent rotation in a crash. Always use the top tether if your car seat and vehicle are equipped with it.
Remember, your child’s safety is the priority. If you're unsure about any aspect of the installation, consult a certified Child Passenger Safety Technician (CPST). They can provide hands-on assistance and ensure your car seat is installed correctly.
To further assist you, we have prepared a detailed installation diagram that visually explains the steps outlined above. You can download the diagram here: [Link to Downloadable Diagram Placeholder]. This diagram will be an invaluable resource during your installation process.
Happy and safe travels!