How To Install A Front License Plate Bracket
Let's face it, sometimes you have to add a front license plate bracket to your vehicle. Whether it's a new law in your state, a recent move, or you just want to avoid that pesky "no front plate" ticket, mounting a bracket is often necessary. While it might seem like a simple task, doing it right can save you from damaging your bumper, creating unsightly holes, or having a wobbly plate that attracts unwanted attention. This article will guide you through the process, offering best practices and avoiding common pitfalls.
Understanding Front License Plate Mounting: A Necessary Evil?
For many car enthusiasts, the front license plate is an unwelcome addition to a carefully crafted aesthetic. However, the laws are the laws, and compliance is usually the path of least resistance. Before diving into the technical details, let's discuss the options and implications.
Types of Front License Plate Brackets
The most common type is the OEM (Original Equipment Manufacturer) bracket. These are designed specifically for your vehicle model, ensuring a perfect fit and proper placement. They typically attach to existing mounting points or require minimal drilling. OEM brackets are almost always the preferred choice for a clean and secure installation.
Aftermarket brackets offer more flexibility, particularly for vehicles where an OEM option isn't available or for those seeking a specific look or mounting location. These brackets come in various materials (plastic, metal, carbon fiber) and mounting styles. Some are designed for drilling, while others utilize adhesive or tow hook mounts (more on those later).
No-drill brackets are increasingly popular for obvious reasons. These typically use adhesive pads or existing mounting points, such as the tow hook receiver or the bumper's lower grille. They are a good choice if you want to avoid permanently altering your bumper.
Tow hook brackets screw into the tow hook receiver on your vehicle. While they offer a no-drill solution, they can sometimes obstruct parking sensors or interfere with airflow. Choose one carefully, ensuring compatibility with your vehicle's specific tow hook location and functionality.
The Technical Breakdown: How It Works (and What Can Go Wrong)
The core principle of mounting a front license plate bracket is simple: securing it firmly to the front of your vehicle in a way that's both aesthetically pleasing and structurally sound. The details, however, are where things can get tricky.
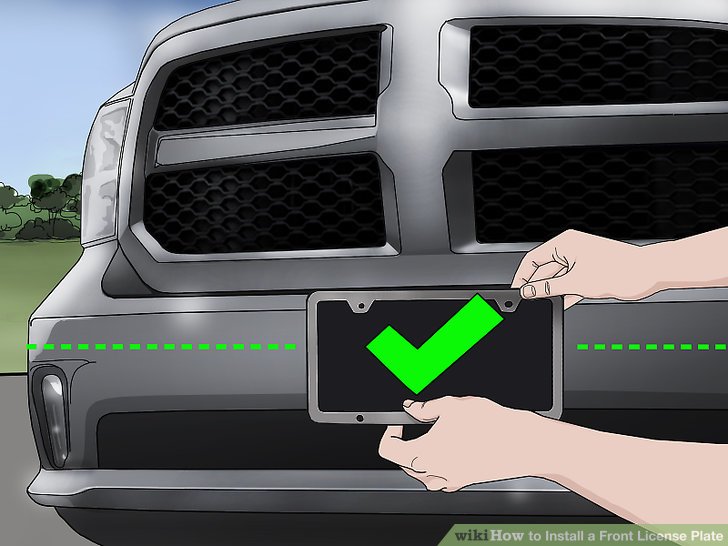
OEM Bracket Installation: This is generally the easiest option. Start by identifying the designated mounting points on your bumper. These might be pre-drilled holes or dimples indicating where screws should go. Use a small drill bit (slightly smaller than the screw size) to create pilot holes if necessary. Attach the bracket using the provided screws, ensuring they are tightened securely but not overtightened. Overtightening can strip the plastic bumper or crack the bracket.
Aftermarket Bracket Installation (Drilling Required): Measure and mark the desired location for the bracket. Use a level to ensure it's straight. Before drilling, double-check the area behind the bumper to avoid damaging any components, such as wiring harnesses or cooling lines. Use a drill bit appropriate for the bumper material (usually plastic or fiberglass). Drill pilot holes, then attach the bracket with screws and washers. Using washers is crucial to distribute the load and prevent the screws from pulling through the bumper.
Aftermarket Bracket Installation (Adhesive): Thoroughly clean the area where the bracket will be mounted using isopropyl alcohol. Apply the adhesive pads according to the manufacturer's instructions. Press the bracket firmly against the bumper and hold it in place for the recommended time. Allow the adhesive to fully cure before attaching the license plate. Note that adhesive mounts may not be as secure as drilled mounts, especially in extreme temperatures or with aggressive driving.
Tow Hook Bracket Installation: Locate the tow hook receiver on your vehicle (usually hidden behind a small cover). Remove the cover and screw in the tow hook bracket. Adjust the bracket to the desired position and tighten the locking nut. Ensure the bracket doesn't obstruct any sensors or airflow.
Common Issues and Maintenance Concerns
Even with careful installation, problems can arise over time. Here are some common issues and how to address them:
Loose Bracket: Screws can loosen due to vibration. Periodically check the tightness of the screws and retighten as needed. Consider using thread-locking compound (such as Loctite) on the screws to prevent them from loosening.
Cracked Bracket: Plastic brackets can become brittle and crack, especially in cold weather. Replace the bracket with a more durable material (such as metal) or consider a bracket with a more flexible design.
Rattling License Plate: License plates can rattle against the bracket. Use foam padding or rubber bumpers to dampen the vibration. License plate frames can also help to reduce rattling.
Adhesive Failure: Adhesive mounts can fail due to poor surface preparation, extreme temperatures, or improper adhesive application. Clean the surface thoroughly, use a high-quality adhesive, and follow the manufacturer's instructions carefully.
Rust or Corrosion: Metal brackets can rust or corrode, especially in areas with harsh weather. Use stainless steel or aluminum brackets and apply a rust-preventative coating.
Do's and Don'ts / Best Practices
Do:
- Research your vehicle's specific requirements and available mounting options.
- Use high-quality hardware (screws, washers, adhesive).
- Measure twice, drill once (if drilling is necessary).
- Clean the mounting surface thoroughly before applying adhesive.
- Use thread-locking compound on screws to prevent loosening.
- Regularly inspect the bracket for looseness or damage.
- Consider using a license plate frame to protect the plate and reduce rattling.
Don't:
- Overtighten screws, as this can damage the bumper or bracket.
- Drill without checking behind the bumper for wires or other components.
- Use cheap or low-quality hardware.
- Ignore rattling or loose brackets.
- Use an adhesive mount in extreme temperature conditions without careful consideration.
- Obstruct sensors or airflow with the bracket placement.
Conclusion: A Properly Installed Front License Plate Bracket for Peace of Mind
Installing a front license plate bracket might not be the most exciting automotive project, but it's often a necessary one. By understanding the different types of brackets, following the proper installation procedures, and addressing common issues, you can ensure a secure, aesthetically pleasing, and legally compliant front license plate. Remember to prioritize OEM brackets when available, and always take your time to ensure a clean and professional installation. A little extra effort upfront can save you from headaches (and tickets) down the road. Now get out there and make sure your plate is straight and secure!