How To Install Aftermarket Door Lock Actuator
Many modern vehicles come equipped with power door locks, offering convenience and security. However, over time, these systems can fail, leaving you with a malfunctioning door lock actuator. Rather than paying potentially exorbitant labor costs at a mechanic, installing an aftermarket door lock actuator can be a manageable and cost-effective DIY project for the experienced car enthusiast. This article will guide you through the process, assuming you have a foundational understanding of automotive electrical systems and basic hand tools.
Understanding the Power Door Lock System
Before diving into the installation, let's establish a fundamental understanding of how a power door lock system operates. The core component is the door lock actuator, an electromechanical device responsible for physically locking and unlocking the door. These actuators are typically small DC motors coupled with a series of gears that translate the motor's rotational motion into linear motion, pushing or pulling the lock mechanism.
System Components
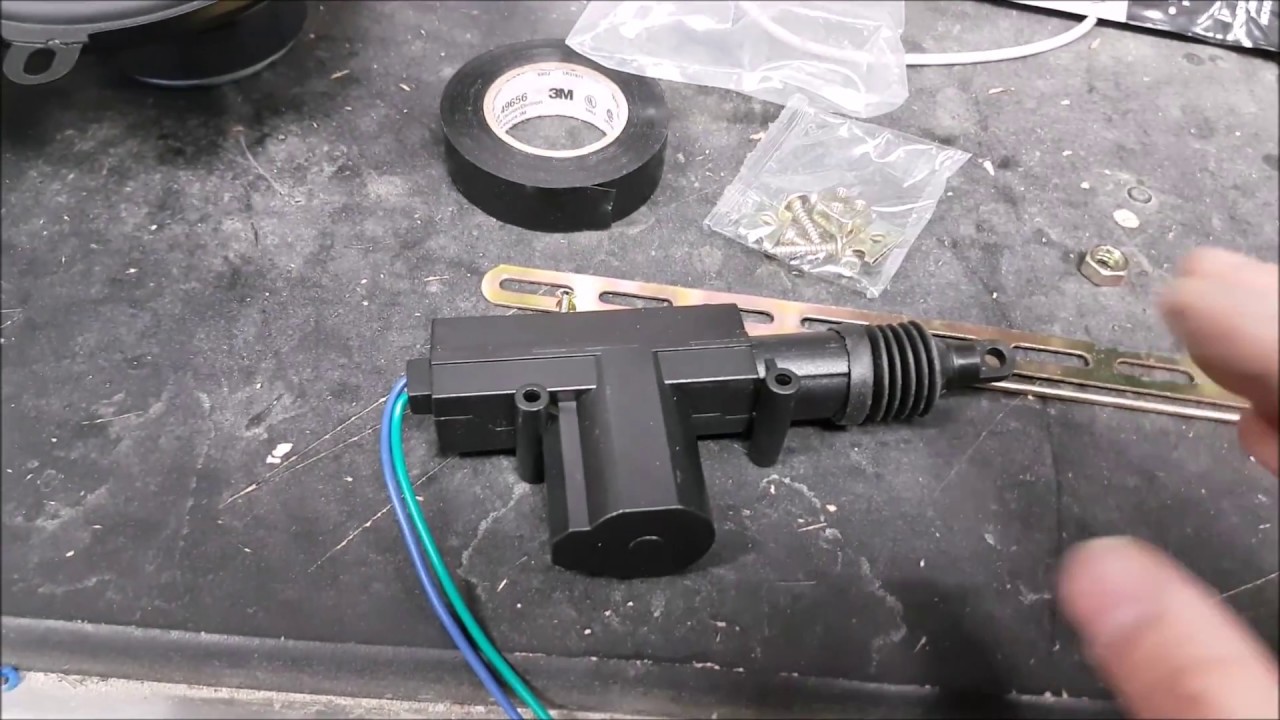
- Actuator Motor: A small DC motor that provides the force to move the lock.
- Gearbox: A series of gears that reduce the motor's speed and increase its torque, providing the necessary force to actuate the lock.
- Linkage: Rods and levers that connect the actuator to the door lock mechanism.
- Door Lock Switch(es): Located on the door panel, these switches send electrical signals to the control module.
- Control Module (typically integrated into the Body Control Module or BCM): This module receives signals from the door lock switches or the keyless entry system and sends power to the appropriate door lock actuator to lock or unlock the doors.
- Wiring Harness: Provides the electrical connections between all the components.
- Fuses/Circuit Breakers: Protect the circuit from overloads.
How it Works: The Electrical Dance
When you press the lock or unlock button on your door panel or key fob, you're essentially completing a circuit. The door lock switch sends a signal to the Body Control Module (BCM), or a dedicated door lock control module if the vehicle is older or simpler. The BCM then interprets this signal and determines which door(s) to lock or unlock. It then sends a specific voltage (usually 12V DC) to the appropriate door lock actuator.
The polarity of the voltage determines the direction of the motor's rotation. A positive voltage might trigger the "lock" position, while reversing the polarity (negative voltage) triggers the "unlock" position. This polarity reversal is usually accomplished by the BCM using relays or transistors to switch the current flow to the actuator.
The actuator motor spins, driving the gearbox. The amplified torque then moves the linkage, which physically pushes or pulls the door lock mechanism into the locked or unlocked position. A limit switch or other feedback mechanism within the actuator may signal to the BCM that the lock has reached its full travel, cutting off power to the actuator and preventing the motor from burning out.
Replacing a Door Lock Actuator: A Step-by-Step Guide
Now, let's get down to the practical part: installing an aftermarket door lock actuator. This guide assumes a front door installation; rear door procedures are generally similar but may have minor variations.
Tools and Materials Required
- New door lock actuator (ensure it's compatible with your vehicle make and model)
- Socket set (metric or SAE, depending on your vehicle)
- Screwdriver set (Phillips and flathead)
- Panel removal tools (plastic pry tools to avoid scratching the door panel)
- Wire stripper/crimper
- Multimeter
- Electrical tape or heat shrink tubing
- Wire connectors (butt connectors or solder and heat shrink)
- Drill with drill bits (if you need to enlarge mounting holes)
- Work light
- Safety glasses
- Gloves
Procedure
- Safety First: Disconnect the negative terminal of your car's battery. This prevents accidental short circuits during the installation process.
- Remove the Door Panel: This is often the trickiest part. Use your panel removal tools to carefully pry the door panel away from the door frame. Start by locating the screws holding the panel in place, usually hidden behind plastic covers or in the armrest. Once the screws are removed, gently pry around the edges of the panel, releasing the plastic clips that hold it in place. Be patient and work your way around the perimeter.
- Disconnect Electrical Connectors: Once the door panel is loose, disconnect all the electrical connectors attached to it. This will include the window switch, door lock switch, speaker wires, and any other accessories. Remember their original positions. It may be helpful to take a picture with your phone.
- Remove the Water Shield: Behind the door panel, you'll find a plastic water shield. Carefully peel this away, as it's often held in place with adhesive. Try to keep the adhesive intact so you can reuse it later. If not, you may need to purchase new adhesive.
- Locate the Door Lock Actuator: The door lock actuator is typically located inside the door, attached to the door lock mechanism. It's usually a small, rectangular plastic housing with wires connected to it.
- Disconnect the Actuator: Disconnect the electrical connector from the actuator.
- Remove the Actuator: The actuator is typically held in place by screws or bolts. Remove these fasteners to release the actuator from the door. You may need to disconnect the linkage rod that connects the actuator to the lock mechanism. Pay attention to how this linkage is connected; you'll need to reconnect it to the new actuator.
- Install the New Actuator: Install the new actuator in the reverse order of removal. Connect the linkage rod, and secure the actuator with the screws or bolts. You may need to slightly adjust the position of the actuator to ensure smooth operation of the lock mechanism. Sometimes, aftermarket actuators have slightly different dimensions or mounting points. You may need to carefully enlarge the mounting holes with a drill. Ensure you don't damage any surrounding components.
- Connect the Electrical Connector: Connect the electrical connector to the new actuator.
- Test the Actuator: Before reassembling the door panel, reconnect the battery and test the new actuator to ensure it's functioning correctly. Use the door lock switch to lock and unlock the door. If it doesn't work, double-check your wiring connections and the actuator's grounding. A multimeter can be helpful in verifying voltage and continuity.
- Reinstall the Water Shield: Carefully reattach the water shield. If the original adhesive is no longer sticky, use new adhesive to secure it.
- Reinstall the Door Panel: Reconnect all the electrical connectors to the door panel. Carefully align the door panel with the door frame and push it back into place, ensuring all the plastic clips are securely fastened. Reinstall the screws.
- Final Test: Test all the door functions (lock, window, speaker, etc.) to ensure everything is working correctly.
Common Issues and Maintenance
- Actuator Failure: The most common issue is the failure of the actuator motor or the gearbox. This can be caused by wear and tear, corrosion, or electrical problems.
- Wiring Problems: Damaged or corroded wiring can prevent the actuator from receiving power. Inspect the wiring harness for any signs of damage.
- BCM Issues: A faulty BCM can also cause door lock problems. This is less common but can occur.
- Linkage Problems: Bent or broken linkage can prevent the actuator from moving the lock mechanism.
Regularly lubricating the door lock mechanism and hinges can help prevent wear and tear and extend the life of the actuator. Also, avoid slamming the doors too hard, as this can put unnecessary stress on the system.
Do's and Don'ts
Do's:
- Do disconnect the battery before starting any electrical work.
- Do use the correct tools for the job.
- Do take pictures or notes as you disassemble the door, so you can remember how everything goes back together.
- Do test the new actuator before reassembling the door panel.
- Do use high-quality electrical connectors and wiring.
- Do properly secure all wiring to prevent chafing or damage.
Don'ts:
- Don't force anything. If something doesn't come apart easily, check for hidden screws or clips.
- Don't cut corners on safety. Wear safety glasses and gloves.
- Don't ignore warning signs. If the actuator is making strange noises or the lock is working intermittently, address the problem before it gets worse.
- Don't overtighten screws or bolts. This can damage the plastic components.
- Don't skip testing. Always test the system after making any changes.
Conclusion
Replacing a door lock actuator is a task that requires patience and a basic understanding of automotive electrical systems. By following these steps and taking the necessary precautions, you can save money and gain a sense of accomplishment. While some vehicles may present unique challenges, the fundamental principles remain the same. If you're uncomfortable working with electrical systems, or if you encounter any difficulties, it's always best to consult a qualified mechanic. However, for the experienced DIYer, this project is well within reach. Choose a reputable aftermarket actuator brand to ensure quality and longevity. With the right tools and a bit of perseverance, you'll have your power door locks working like new again.