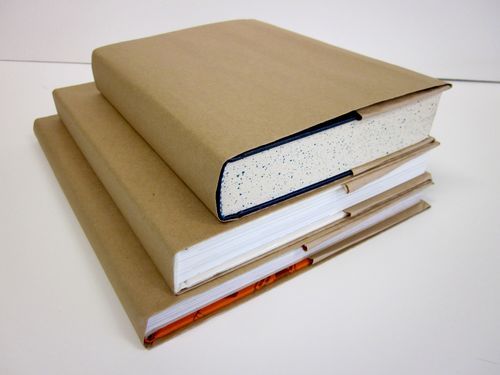
How To Make A Book Cover From A Paper Bag
So, you've got a book, and it needs a little protection, or maybe you just want to give it a more personalized look. Commercial book covers are fine, but where's the fun in that? Let's explore a surprisingly robust, customizable, and eco-friendly alternative: the humble paper bag. We're not just slapping paper on a book; we're going to engineer a bespoke book cover, understanding the forces at play and optimizing for longevity and aesthetics. Consider this not just a craft project, but a miniaturized lesson in materials science and structural integrity.
The Challenge: Protecting a Literary Asset
Imagine your favorite antique car. You wouldn't just leave it exposed to the elements, would you? Dust, scratches, and even the sun can degrade its value and appearance over time. A book faces similar threats: fingerprints, spills, and the wear and tear of repeated handling. The book cover acts as a primary defense, absorbing these impacts and preserving the integrity of the pages and binding. A well-designed book cover also needs to be easily applied and removed, allowing access to the book without causing damage.
The Paper Bag: An Unexpected Protagonist
Why a paper bag? It's readily available, usually free, and surprisingly durable. More importantly, its inherent flexibility allows us to create a custom-fitted protective layer. Think of it as the sheet metal for our literary vehicle. We will be applying the basic principles of origami, tailoring a readily available material to fit the precise contours of our subject.
The Mechanics of Book Cover Construction
The process, while seemingly simple, relies on several key mechanical principles:
- Tension Distribution: The paper cover needs to be taut enough to stay in place but not so tight that it stresses the book's spine.
- Friction Grip: The folded edges of the cover rely on friction to grip the inside covers of the book, preventing slippage.
- Material Strength: The paper itself must be strong enough to withstand normal handling and minor abrasions.
Here’s a step-by-step breakdown of the process:
- Preparation: First, select your paper bag. Grocery bags made from heavier kraft paper are ideal. Ensure the bag is clean and free of any large tears or holes. Think of this as selecting the right gauge of steel for your project. Lighter paper is easier to fold, but sacrifices durability.
- Disassembly (the Surgical Cut): Carefully cut along one of the vertical seams of the bag and along the bottom seam. This will unfold the bag into a single, large sheet of paper. Essentially, we are flattening the raw material into a usable canvas. This process should be done cleanly. A ragged edge means possible tears at the join later on.
- Sizing and Positioning: Lay the flattened bag on a flat surface, printed side down if you want a plain cover. Place the book in the center of the paper. The book should be oriented so that the spine runs parallel to the longer side of the paper sheet. Ensure there is enough excess paper on all sides to wrap around the book covers. This is the crucial moment, like aligning a chassis before welding. Too little paper, and your cover will fail to properly protect. Too much and things get messy.
- Folding the Covers: Fold the left and right edges of the paper over the front and back covers of the book, respectively. The amount of paper to fold over depends on the thickness of the book. Aim for a fold that extends slightly beyond the inside edge of the book cover. This creates the "flap" that will secure the cover. Precise, clean folds are critical for a professional look and robust fit. Consider using a ruler or straight edge to ensure sharp creases.
- Folding the Top and Bottom: Now, fold the top and bottom edges of the paper over the top and bottom edges of the book covers. As with the sides, ensure there is enough excess paper to create a secure flap. The excess should be slightly more than the width of the book's spine. Crease the folds sharply.
- Creating the Flaps: Here's where the magic happens. Carefully tuck the top and bottom flaps into the space between the book's cover and the first page (front and back). This creates the tension that holds the cover in place. The tightness of the flaps determines the fit; tighter flaps mean a more secure cover, but also a greater risk of damaging the book. We are trying to balance fit and force.
- Final Adjustments: Once the flaps are tucked in, smooth out any wrinkles or creases in the paper. Ensure the cover is snug but not overly tight. You should be able to easily open and close the book without the cover slipping or tearing. It's like fine-tuning the suspension on a race car. Small adjustments can make a big difference.
Pros and Cons: The Engineering Trade-Offs
Pros:
- Cost-Effective: Virtually free, especially if you already have paper bags on hand.
- Eco-Friendly: Reuses materials that would otherwise be discarded.
- Customizable: Can be decorated with markers, paint, stamps, or stickers.
- Protective: Offers decent protection against dust, dirt, and minor abrasions.
- Removable: Easily removed and replaced without damaging the book.
Cons:
- Durability: Paper is inherently less durable than plastic or cloth.
- Water Resistance: Offers little to no protection against spills or moisture.
- Aesthetics: May not be as visually appealing as professionally designed covers (unless you put in the effort!).
- Tear Risk: Can tear easily if subjected to excessive stress.
- Not archival: Paper quality degrades over time, particularly if exposed to light.
Use Cases and Manufacturer Examples (of a Sort)
This technique is ideally suited for:
- Protecting library books from everyday wear and tear.
- Covering textbooks to prevent damage and defacement.
- Creating a personalized look for notebooks and journals.
- Disguising books with potentially offensive or controversial covers (a more niche application).
You won't find "manufacturers" of paper bag book covers in the traditional sense. However, schools and libraries often use similar techniques (sometimes with specialized adhesive films) to protect their books. Many online craft communities also offer variations and embellishments on this basic method. Think of these communities as independent tuners, pushing the boundaries of the original design.
Beyond the Basics: Material Selection and Optimization
The type of paper bag you use significantly impacts the cover's performance. Kraft paper, as previously mentioned, is a solid choice due to its strength and tear resistance. However, you can experiment with other materials. Thinner paper bags are easier to fold, making them suitable for smaller, thinner books. Glossy paper bags, while visually appealing, tend to be less durable and more prone to creasing.
Consider reinforcing the cover in high-stress areas. Applying tape (clear packing tape or duct tape) along the spine and edges can significantly increase its lifespan. You can also laminate the cover with clear contact paper for added water resistance and durability. This is akin to adding a roll cage to improve the structural integrity of the vehicle.
Decoration is another area for optimization. Markers, paint, and stamps can be used to create unique and personalized designs. However, be mindful of the ink or paint's impact on the paper's integrity. Heavy applications can weaken the paper and make it more susceptible to tearing. Light coats, and the use of archival-quality materials, is always best.
Real-World Use and Final Recommendations
I've personally used this technique for years to protect my paperback books and notebooks. While it's not a perfect solution, it's a remarkably effective and economical one. A paper bag cover typically lasts for several months of regular use, depending on the book's size and the handling it receives. My biggest recommendation is to take your time and make clean, sharp folds. The more precise your execution, the more durable and aesthetically pleasing the final product will be.
While you can treat this as a simple exercise in upcycling, think of it as an opportunity to learn about materials science and structural design. Understanding the forces at play and making informed decisions about material selection and construction techniques will improve your results and deepen your appreciation for the simple elegance of the paper bag book cover.