How To Make A Car In Cardboard
So, you're looking to build a car... out of cardboard? Excellent! This isn't about getting from A to B, but about understanding the fundamentals of automotive design and construction on a smaller, more manageable (and significantly cheaper) scale. Think of this as a rapid prototyping exercise for vehicle design, a fun project to teach basic engineering principles, or even just a cool decorative piece. We'll break down the process step-by-step, focusing on the key components and techniques involved in creating a structurally sound and visually appealing cardboard car.
Purpose: Cardboard Car Construction - A Learning Experience
Why bother with a cardboard car? The primary purpose isn't transportation. Instead, this project serves several valuable purposes:
- Educational Tool: It's a fantastic way to visualize and understand the basic anatomy of a car, from the chassis to the body panels.
- Prototyping: For aspiring car designers, this allows for rapid iteration on designs without the cost of metal fabrication. You can experiment with different shapes, sizes, and features before committing to more expensive materials.
- DIY Project: It's a fun and engaging project for car enthusiasts of all ages.
- Conceptual Demonstration: Visualize your dream car without the need for expensive tools or materials.
Key Specs and Main Parts: The Cardboard Car Anatomy
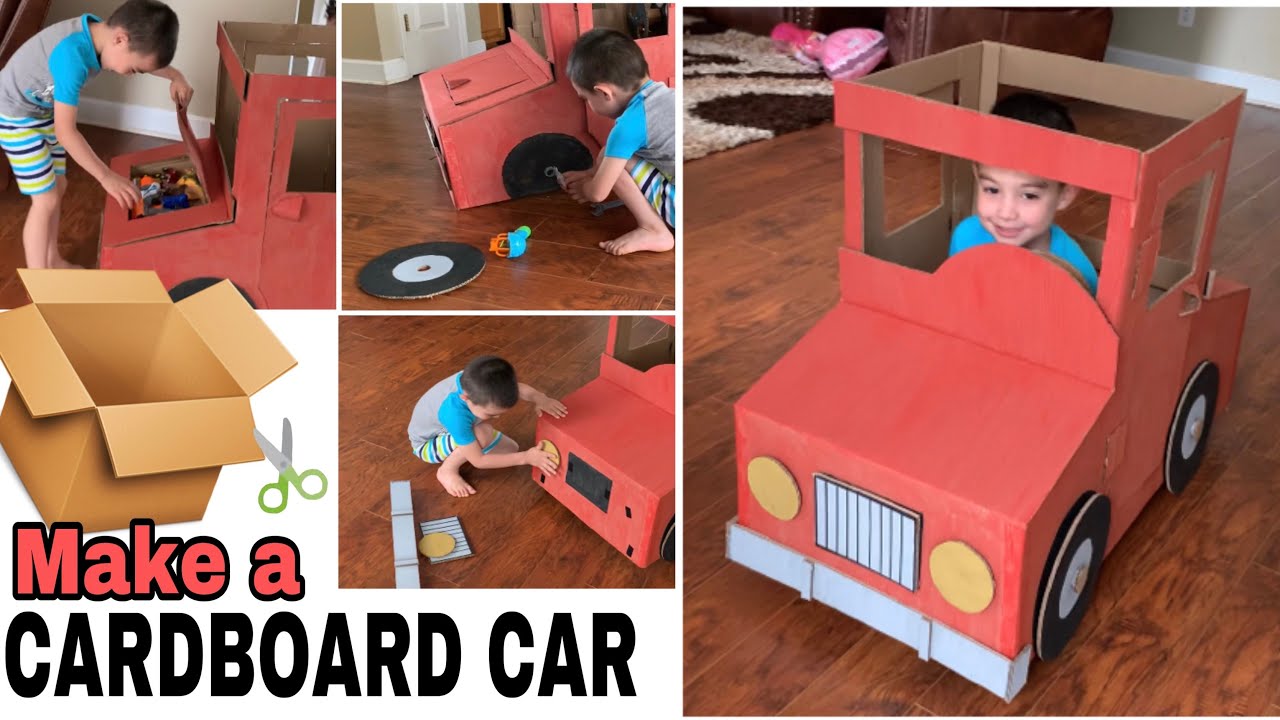
Let's break down the essential parts of our cardboard car and their respective specs. We'll be focusing on a simplified design for ease of construction. While there will be no actual engine, you can certainly design your cardboard car to look like a real car.
1. Chassis (Foundation)
The chassis is the backbone of the car, providing structural support for all other components. It's the equivalent of the frame in a real car.
- Material: Thick, corrugated cardboard is crucial for rigidity. Consider using double-walled cardboard for added strength.
- Design: A simple rectangular frame is a good starting point. You can reinforce it with internal bracing.
- Key Specs: Consider the scale you're aiming for. A 1:10 scale model of a compact car might be a good starting point.
2. Body Panels (Exterior)
The body panels define the shape and aesthetics of the car. These can be made of thinner, more pliable cardboard for easier shaping.
- Material: Single-layer cardboard works well for curves and contours.
- Design: Break the car down into individual panels (hood, doors, roof, fenders). Use templates for accurate cutting and assembly.
- Key Specs: Focus on precise cuts and clean joints for a professional finish.
3. Wheels and Axles (Mobility)
While the car won't be functional in the traditional sense, adding wheels and axles allows for basic movement.
- Wheels: Cardboard circles, plastic bottle caps, or even repurposed toy wheels can be used.
- Axles: Wooden dowels, metal rods, or even thick cardboard tubes can serve as axles.
- Mounting: Secure the axles to the chassis with glue, tape, or by creating cardboard brackets.
4. Interior (Optional)
Adding an interior elevates the realism of the project. Seats, a dashboard, and a steering wheel can all be crafted from cardboard.
- Material: Use thinner cardboard and craft paper for interior details.
- Design: Keep it simple and focus on the essential elements.
Symbols and Conventions (Cardboard Construction)
Since we're not dealing with electrical circuits or fluid dynamics, our "symbols" will focus on construction techniques and material usage. Let's create a small "symbol key":
- Solid Line: Indicates a cut line.
- Dotted Line: Indicates a fold line.
- Hatching: Indicates an area to be reinforced with extra layers of cardboard.
- "G": Indicates a gluing point.
- "T": Indicates a taping point.
- Color Coding (Optional): You could use different colored cardboard to represent different materials (e.g., gray for metal, brown for wood).
How It Works: From Flat Pack to Fabulous!
The basic process involves creating individual components, assembling them, and then adding details. Here's a breakdown:
- Design and Planning: Sketch out your car design. Determine the scale and key dimensions. Create templates for each component.
- Cutting and Shaping: Carefully cut out the cardboard pieces using a sharp utility knife. Score fold lines using a ruler and dull knife.
- Assembly: Start with the chassis. Reinforce it as needed. Attach the body panels, ensuring proper alignment and secure joints.
- Detailing: Add wheels, axles, and interior components. Paint, decorate, and customize your car to your liking.
Real-World Use: Cardboard Car Troubleshooting
Even with careful planning, problems can arise. Here are some common issues and solutions:
- Weak Chassis: If the chassis is sagging, reinforce it with extra layers of cardboard or internal bracing.
- Wobbly Wheels: Ensure the axles are securely attached to the chassis. Use thicker axles or add supports to prevent bending.
- Unstable Body Panels: Use strong glue or tape to secure the body panels to the chassis. Consider overlapping the edges for added strength.
- Difficult Curves: Score the cardboard along the curve to make it easier to bend. Use multiple layers of thinner cardboard to create smoother curves.
Safety First: Cardboard Cutting Precautions
While cardboard might seem harmless, using sharp tools can be dangerous. Here are some safety precautions:
- Utility Knife Safety: Always use a sharp blade. Dull blades require more force and are more likely to slip. Use a cutting mat to protect your work surface.
- Supervision: Children should be supervised when using sharp tools.
- Cutting Direction: Cut away from your body.
- Finger Protection: Be mindful of your fingers and use a cutting glove on the hand holding the cardboard if needed.
- Proper Ventilation: If using spray paint or adhesives, work in a well-ventilated area.
Building a cardboard car is a journey of creativity and problem-solving. Don't be afraid to experiment and learn from your mistakes. With careful planning and execution, you can create a unique and impressive cardboard vehicle. This project allows you to be creative, it enables you to learn about car design and structural design, and most importantly it is inexpensive.
We have a detailed diagram of a basic cardboard car design that you can download and use as a starting point for your project. This diagram includes templates for the chassis, body panels, and wheels, along with step-by-step instructions for assembly. The diagram covers measurements for a 1:10 scale sports car, so you can use this as a jumping off point to create your own design.