How To Make A Paper Bag Book Cover
Making a paper bag book cover is a simple, cost-effective, and eco-friendly way to protect your textbooks, novels, journals, or anything else you want to keep safe from wear and tear. It's a classic DIY project that requires minimal supplies and offers a blank canvas for personalization. This article will guide you through the process step-by-step, ensuring a neat and durable cover for your books.
Why Making a Paper Bag Book Cover Matters
While commercially available book covers exist, crafting one from a paper bag offers several advantages. Primarily, it's incredibly affordable. Reusing a grocery bag that you already have on hand eliminates the need to purchase expensive plastic or fabric covers. Secondly, it's an environmentally conscious choice. Recycling paper bags reduces waste and minimizes your impact on the planet. Thirdly, a paper bag cover provides excellent protection against minor spills, scratches, and dirt, extending the lifespan of your books. Finally, it's a customizable option. You can decorate your paper bag cover with drawings, paintings, stickers, or handwritten notes, making it a unique expression of your personality or the book's contents.
Beyond the practical benefits, making a paper bag book cover can be a fun and creative activity, suitable for both adults and children. It encourages resourcefulness, fosters artistic expression, and provides a tangible connection to the books you read.
How to Choose the Right Paper Bag and Supplies
The success of your paper bag book cover depends on selecting the right materials. Here's a breakdown of what you'll need:
Selecting the Right Paper Bag
Not all paper bags are created equal. When choosing a paper bag for your book cover, consider the following factors:
- Size: The bag needs to be significantly larger than the book you intend to cover. Measure the height and width of your book including the spine. Add at least 4-6 inches to both measurements to ensure you have enough paper to wrap and fold.
- Thickness: Opt for a sturdy paper bag, preferably one made of thicker kraft paper. Thinner bags are more prone to tearing and won't provide adequate protection. Avoid bags that are heavily printed or have a glossy finish, as they may be difficult to fold and crease neatly.
- Cleanliness: Choose a bag that is clean and free of stains, tears, or excessive wrinkles. While minor imperfections can be hidden, major damage will compromise the integrity of the cover.
- Type: Grocery bags are generally ideal. Avoid lightweight lunch bags or very large contractor bags, as these may be too thin or too bulky, respectively.
Essential Supplies
In addition to the paper bag, you'll need a few basic supplies:
- Scissors: A sharp pair of scissors is essential for cutting the bag open and trimming excess paper.
- Tape: Clear tape or masking tape will be used to secure the cover to the book. Clear tape is less visible, while masking tape provides a writable surface for labeling.
- Ruler or Straight Edge: A ruler or straight edge will help you create crisp, clean folds.
- Pencil: A pencil is useful for marking measurements and guidelines.
- Optional: Decorations such as markers, crayons, paint, stickers, or stencils can be used to personalize the cover.
Step-by-Step Instructions: Creating Your Paper Bag Book Cover
Follow these steps to create a durable and attractive paper bag book cover:
- Prepare the Paper Bag: Carefully cut along one of the side seams of the paper bag and along the bottom seam. This will open the bag into a single, large sheet of paper. You should have two connected rectangles if you cut correctly.
- Flatten the Paper: Lay the paper bag flat on a clean, even surface. Use your hands or a ruler to smooth out any wrinkles or creases.
- Position the Book: Place the book in the center of the paper, spine facing down. Make sure you have ample paper extending beyond all edges of the book.
- Fold the Sides: Fold one side of the paper over the front cover of the book. The amount of paper you fold over will determine the width of the flap inside the book. Aim for 1.5 to 2 inches. Crease the fold sharply along the edge of the book. Repeat on the other side, folding the paper over the back cover.
- Fold the Top and Bottom: Fold the top and bottom edges of the paper over the top and bottom of the book. Again, aim for a fold of 1.5 to 2 inches. Crease the folds sharply.
- Remove the Book: Carefully remove the book from the folded paper. The paper should now be creased in the shape of a book cover.
- Secure the Flaps: Open the folded paper. On each side, fold the top and bottom edges inwards, creating a neat, triangular flap. These flaps will add strength and prevent the corners from tearing.
- Slide the Book In: Carefully slide the front cover of the book into the front flap of the paper cover. Repeat with the back cover. Ensure the book is snugly fitted inside the cover.
- Tape (Optional): For added security, you can use tape to secure the flaps to the inside of the book covers. Apply small pieces of tape along the edges of the flaps. Be careful not to tape the paper cover to the actual book! This will make it impossible to remove the cover later.
- Trim Excess Paper (Optional): If there's excess paper extending beyond the edges of the book, you can trim it neatly with scissors. This is mainly for aesthetic purposes.
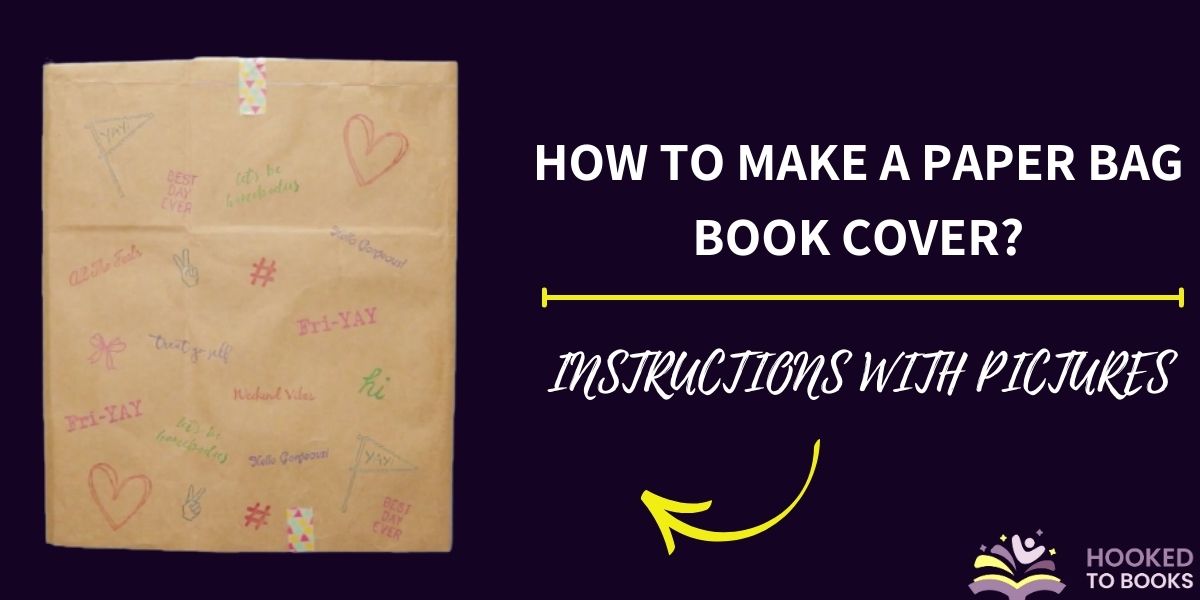
- Decorate: Now comes the fun part! Decorate your paper bag book cover with markers, crayons, paint, stickers, or any other materials you like. You can write the book's title and author on the cover, or create a custom design that reflects the book's theme.
Real-World Owner Experiences and Tips
Many people have successfully used paper bag book covers to protect their books. Here are some insights and tips gleaned from their experiences:
- Reinforce High-Stress Areas: "I found that the corners of the cover tend to wear out quickly," says Sarah, a high school student. "I reinforce them with extra tape, especially if it's a textbook I use every day." Consider using duct tape or packing tape on the corners for enhanced durability.
- Labeling is Key: "I always label my paper bag covers with the book's title and my name," says Mark, a college student. "This helps me keep track of my books and prevent them from getting lost or mixed up with others." Use a permanent marker for labeling to prevent smudging.
- Embrace Imperfection: "Don't strive for perfection," advises Emily, a teacher. "Paper bag covers are meant to be practical and functional. A few wrinkles or imperfections add character." Focus on creating a sturdy and protective cover, rather than worrying about minor aesthetic flaws.
- Consider Lamination: For added protection against spills and stains, consider laminating your decorated paper bag cover. You can use self-adhesive laminating sheets or take it to a professional laminating service.
- Alternative to Tape: Some people prefer to use glue sticks or double-sided tape instead of regular tape. These options can provide a cleaner, more seamless look. However, be careful not to use too much glue, as it can cause the paper to wrinkle.
- Upcycle Other Materials: Don't limit yourself to grocery bags! You can also use brown packing paper, old maps, or even newspaper (for a more rustic look) to create book covers. Just ensure the material is sturdy enough to provide adequate protection.
- Creative Decoration Ideas: Beyond basic coloring, consider using stamps, stencils, decoupage techniques, or even fabric scraps to decorate your paper bag covers. Let your imagination run wild!
Frequently Asked Questions (FAQs)
Here are some common questions people ask about making paper bag book covers:
- Q: How long does a paper bag book cover last?
- A: The lifespan of a paper bag book cover depends on the quality of the paper, the amount of use it receives, and how well it's cared for. With proper care, a well-made paper bag cover can last for an entire school year or longer. Reinforcing the corners and laminating the cover can significantly extend its lifespan.
- Q: Can I use a plastic grocery bag instead of a paper bag?
- A: While technically possible, using a plastic grocery bag is not recommended. Plastic bags are difficult to fold neatly, tend to tear easily, and are not as environmentally friendly as paper bags. They also don't provide as good of a surface for writing or decorating.
- Q: How do I remove a paper bag book cover without damaging the book?
- A: Gently slide the book out of the flaps. If you used tape, carefully peel it away from the flaps, being mindful not to tear the paper. Avoid pulling too hard, as this could damage the book's cover. If the tape is stuck, try using a hair dryer on a low setting to gently warm the adhesive and make it easier to remove.
- Q: My paper bag cover keeps slipping off. What can I do?
- A: Ensure the flaps are folded and secured tightly. You can add extra tape to the inside of the flaps for a more secure fit. Also, make sure the book is snugly fitted inside the cover. If the bag is too large, trim excess paper to create a tighter fit.
- Q: Is it okay to use a paper bag with printing on it?
- A: Yes, you can use a paper bag with printing on it, but be aware that the printing may show through your decorations. If you want a cleaner look, try to find a plain paper bag or use the inside of the printed bag as the outer surface.
- Q: Can I use this method for covering spiral-bound notebooks?
- A: Yes, but you'll need to adjust the folding process. Wrap the paper around the front and back covers, leaving extra paper to fold over the spirals. Secure the paper around the spirals with tape or glue. You may need to cut slits in the paper to allow the spirals to move freely.
Making a paper bag book cover is a rewarding and practical DIY project. By following these instructions and tips, you can create a durable, personalized, and eco-friendly way to protect your books and express your creativity.