How To Make A Paper Textbook Cover
We've all been there: staring down a pristine textbook, knowing it's only a matter of time before it suffers the inevitable abuse of being lugged around in a backpack. Protecting those valuable pages and covers is essential, and while store-bought covers are an option, crafting your own paper textbook cover is a surprisingly satisfying and customizable project. Think of it like applying a custom paint job to your car – it’s about personalization, protection, and a little bit of pride in your work. This article provides a step-by-step guide, drawing parallels to the precision and problem-solving involved in automotive repair and modification.
Background: The Textbook "Chassis" and Cover as "Protective Coating"
Before diving into the how-to, let’s consider the anatomy of our project. The textbook, in this analogy, is akin to your car’s chassis – the foundational structure. It houses all the vital components (the pages with information) and needs to be protected from external elements. The textbook cover acts as the protective coating, much like your car’s paint, clear coat, and even protective films. It shields the inner workings from scratches, dents (creases and tears), and general wear and tear.
Just as you wouldn't slap any old paint on your prized vehicle, you want to choose the right "materials" for your textbook cover. Heavier weight paper, like cardstock or even recycled brown paper bags, offers better durability than standard printer paper. Think of it as the difference between single-stage paint and a multi-layer system. The heavier the "coating," the more protection you get.
Technical Breakdown: Creating Your Paper Textbook Cover
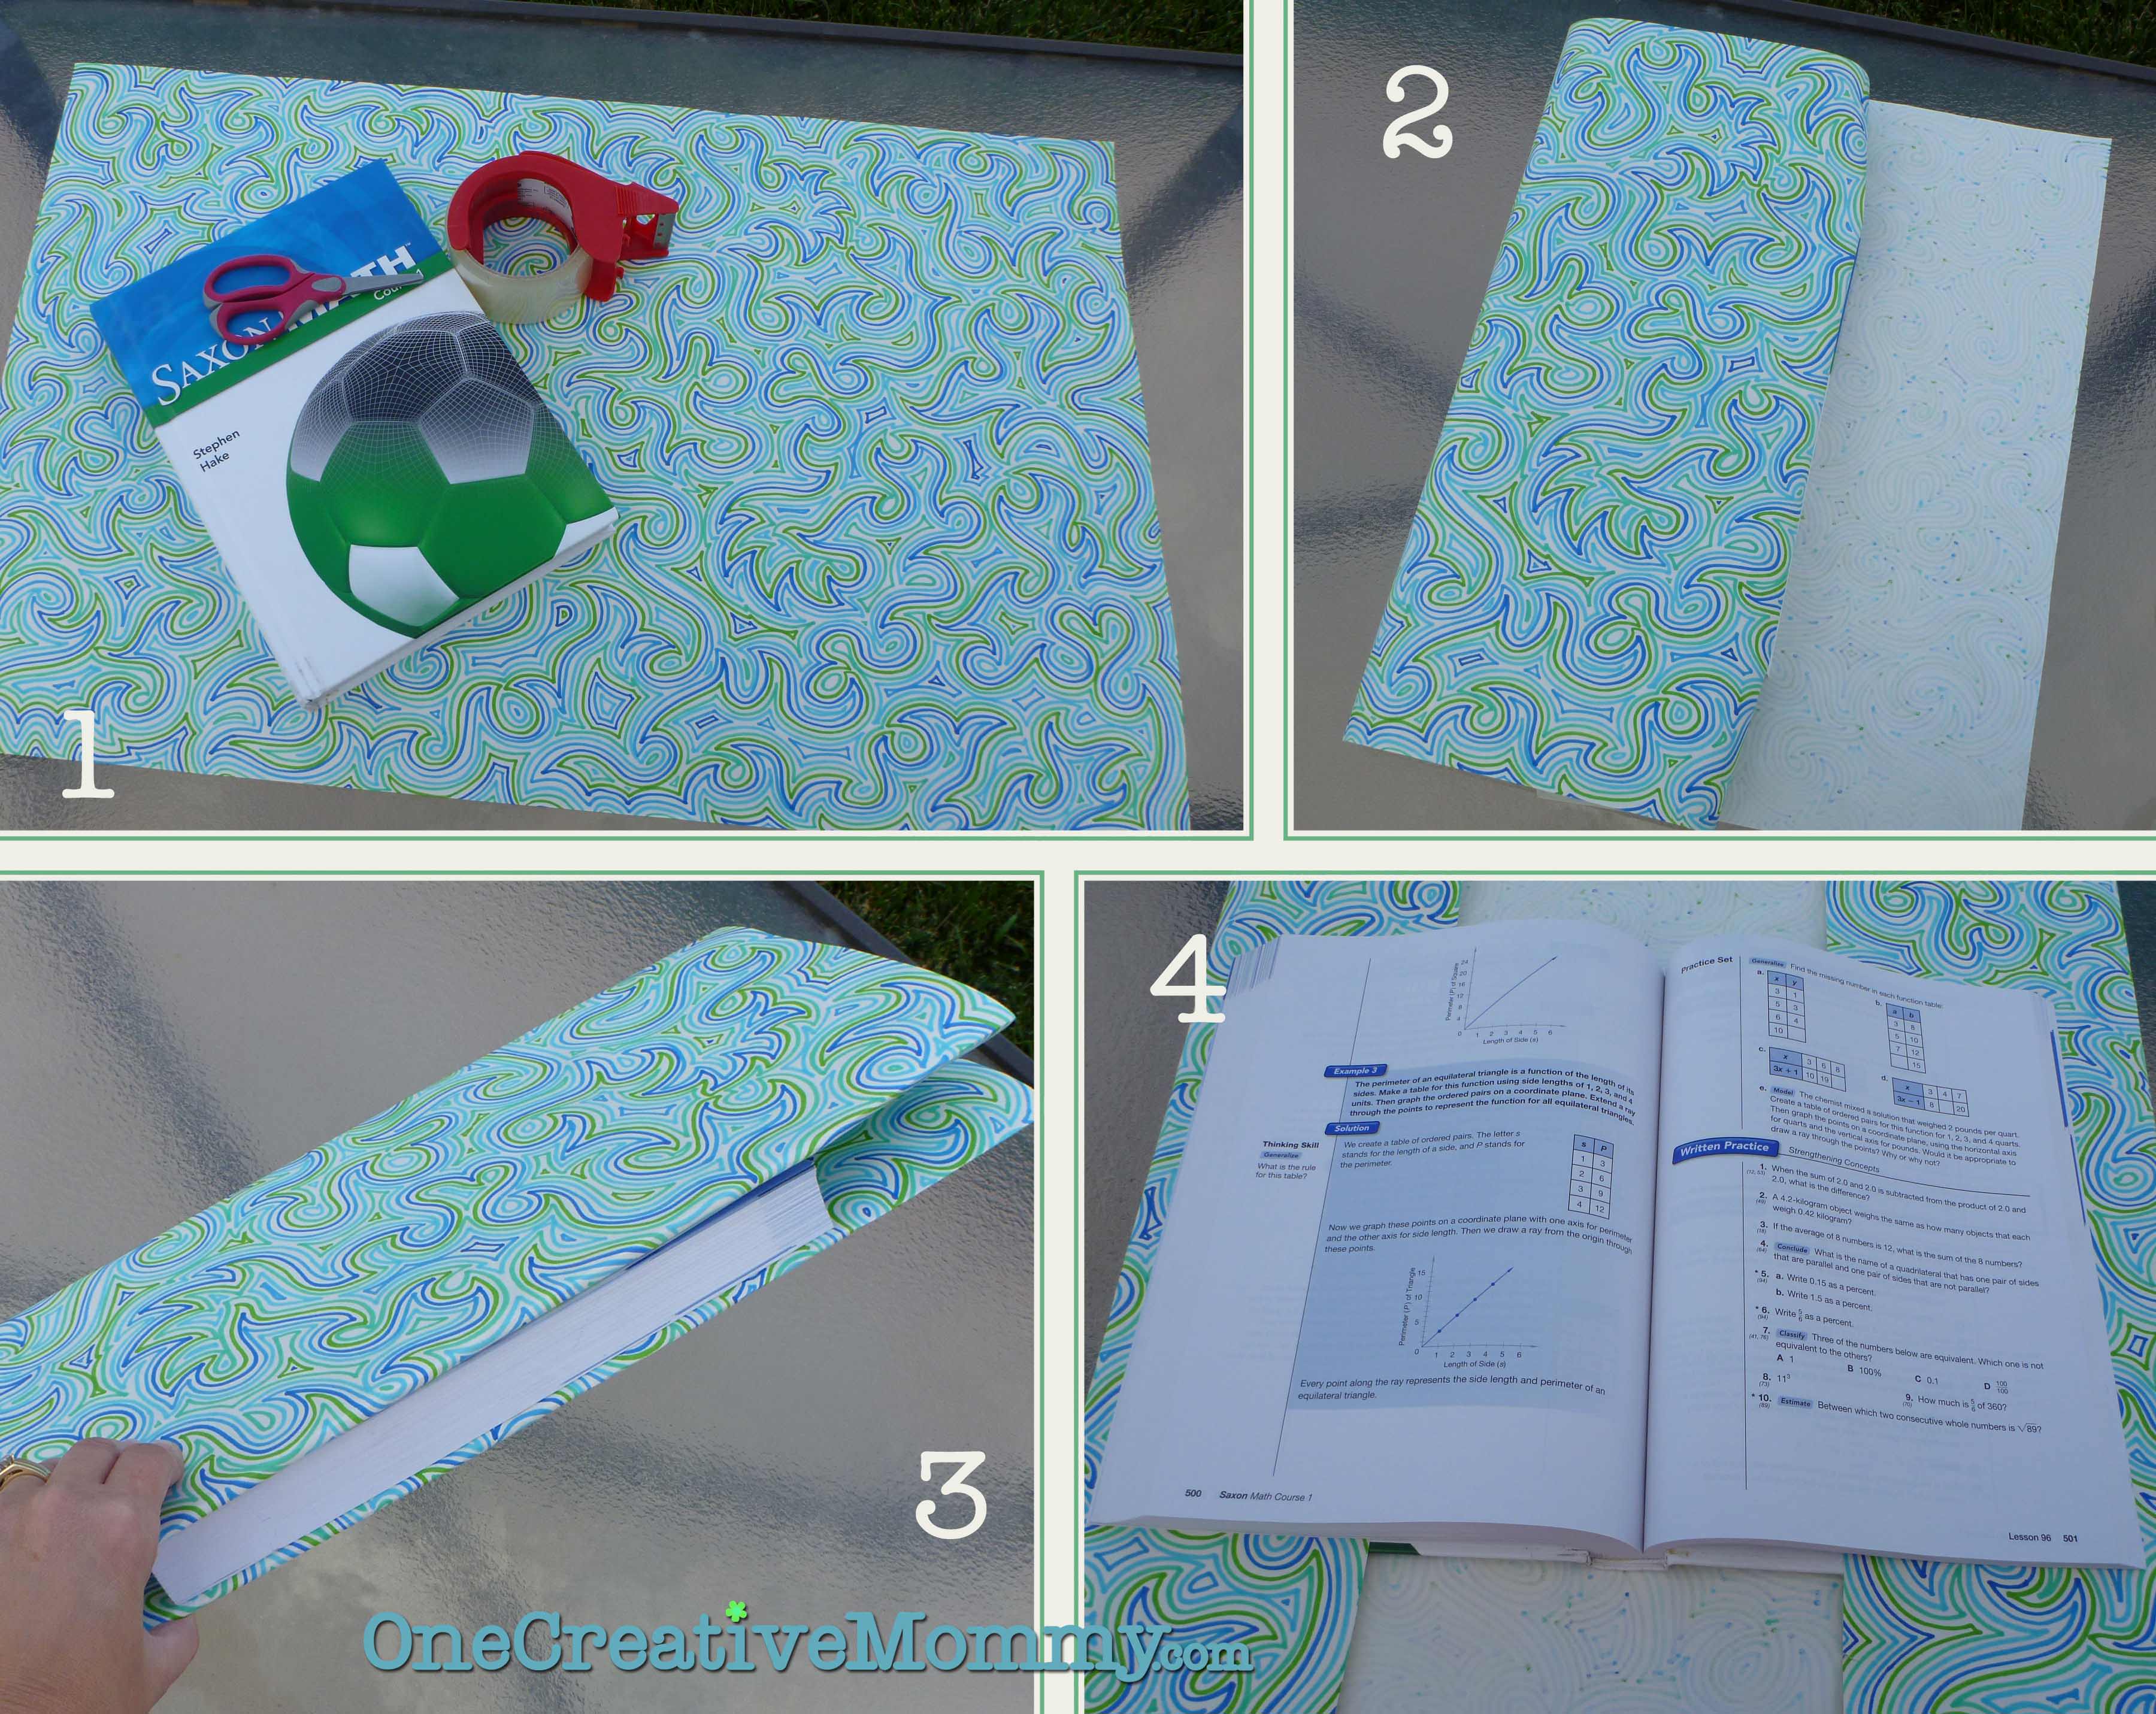
1. Measuring and Cutting: Precision is Key
This is where the measuring tape and your keen eye for detail come into play – just like when you're measuring clearances for engine components. Accurate measurements are crucial for a snug and effective cover. Think of this as blueprinting your engine; precision is everything. You'll need the following dimensions of your textbook:
- Height: The vertical measurement from top to bottom.
- Width: The horizontal measurement across the front cover.
- Thickness: The width of the spine. This is critical for a proper fit.
- Total Width (of unfolded cover): Calculate this by adding the width of the front cover, the spine thickness, and the width of the back cover.
Once you have these measurements, add approximately 4-6 inches to both the height and the total width. This extra material will create the flaps that wrap around the book's covers. This added material is similar to having enough material to work with when welding a patch panel – you’d rather have too much than not enough.
Using a ruler, straight edge, and a sharp utility knife or scissors (think of your cutting tools as your precision grinders or cutting torches), carefully cut your chosen paper to the calculated dimensions. Ensure your cuts are straight and clean. Any ragged edges will weaken the cover and give it an unprofessional look. This is like a sloppy weld – it may hold, but it's not pretty and might fail prematurely.
2. Folding and Creasing: Achieving Structural Integrity
Folding is where your craftsmanship truly shines. This is akin to properly torquing bolts – too little, and it's loose; too much, and you risk damage. You'll be making four primary folds:
- Vertical Flap Folds: On each side of the cut paper, measure in 2-3 inches (adjust based on your initial added length). Fold along these lines to create the flaps that will secure the cover to the book. A bone folder or the back of a spoon can help create sharp, clean creases – think of it as burnishing metal for a smooth finish.
- Book Cover Placement Lines: Lay the textbook on the unfolded paper, aligning its spine with the center of the paper. Carefully trace the edges of the front and back covers onto the paper. These lines are your guides for the final folds that will hold the book. These are your critical alignment marks.
- Final Vertical Folds: Using the traced lines as guides, fold the paper inward along the edges of the book covers. Again, use a bone folder or similar tool to create sharp creases. This step is where the cover starts to take shape, fitting snugly around the book.
3. Securing the Cover: Fit and Finish
Now that the cover is folded, it's time to secure it to the textbook. This is like installing the final trim pieces on your car – it's all about the details.
- Sliding the Book In: Carefully slide the front and back covers of the textbook into the flaps you created. Ensure the fit is snug but not too tight. If the cover is too tight, it can damage the book or tear the paper.
- Fine-Tuning: Adjust the flaps as needed to ensure the cover is properly aligned and secure. You can use small pieces of tape (acid-free tape is recommended to prevent damage to the book over time) to reinforce the flaps or edges, especially if you used thinner paper. Think of this as applying a final sealant to prevent rust.
Common Issues and Maintenance Concerns
Like any good modification, paper textbook covers aren't without their potential issues:
- Tearing: Especially at the corners and along the spine. Using heavier paper and reinforcing with tape can mitigate this. Think of this as using thicker gauge metal for a repair.
- Slipping: If the cover is too loose, it can slide off. This can be addressed by tightening the flaps or using a small amount of adhesive (again, acid-free) to secure the cover to the inside of the book covers.
- Water Damage: Paper is susceptible to water damage. Consider applying a thin layer of clear contact paper for added protection, similar to applying a ceramic coating to your car's paint.
- Over-tight Cover: If you apply your cover too tightly, you may damage the spine or outer pages of the book. Ensure the fit is snug, but there is no undue pressure on the book.
Regular maintenance involves checking for tears and reinforcing them as needed. Also, be mindful of how you handle the book. Avoid placing heavy objects on top of it, which can damage the cover and the book itself. Just like your car, treat your textbook with care and it will last longer.
Do's and Don'ts / Best Practices
Do's:
- Do use heavier weight paper for increased durability.
- Do take accurate measurements to ensure a proper fit.
- Do use a bone folder or similar tool to create sharp, clean creases.
- Do reinforce vulnerable areas with tape (acid-free).
- Do consider adding a layer of clear contact paper for water resistance.
- Do personalize your cover with designs or labels – it's your custom job!
Don'ts:
- Don't use standard printer paper unless you plan to replace the cover frequently.
- Don't make the cover too tight, as this can damage the book.
- Don't use masking tape or other acidic tapes, as they can damage the book over time.
- Don't neglect regular maintenance – check for tears and reinforce them promptly.
- Don't use excessive amounts of adhesive, as this can make the cover difficult to remove.
Conclusion: A Customizable Solution for Textbook Protection
Creating your own paper textbook cover is a simple yet effective way to protect your books and add a personal touch. By following these steps and paying attention to detail, you can create a durable and attractive cover that will withstand the rigors of daily use. Just like performing regular maintenance on your car, taking the time to protect your textbooks will ensure they last longer and remain in good condition. So, grab your measuring tape, paper, and cutting tools, and get ready to create a custom "protective coating" for your valuable textbooks!