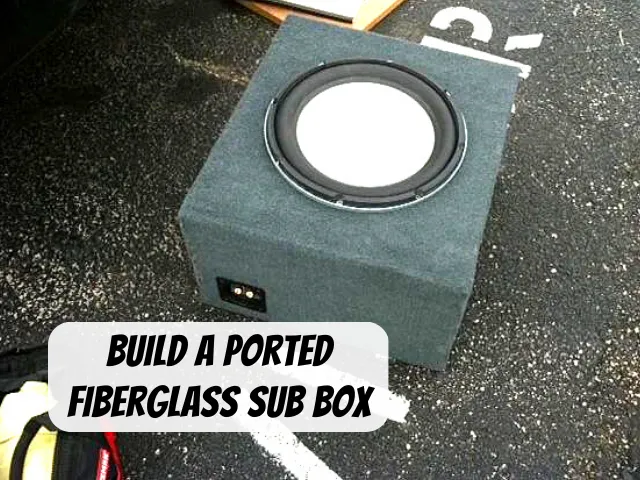
How To Make Fiberglass Sub Enclosure
Creating a custom fiberglass subwoofer enclosure can significantly enhance your car audio experience. A custom enclosure allows you to precisely tailor the subwoofer's performance to your vehicle's acoustics and available space, resulting in deeper bass, improved sound quality, and a professional, integrated look. This article will guide you through the process, from planning and material selection to the actual fabrication of a fiberglass sub enclosure.
Why Make a Fiberglass Subwoofer Enclosure?
There are several compelling reasons to consider building a fiberglass subwoofer enclosure instead of opting for a pre-fabricated box. Understanding these advantages will help you decide if this project is right for you.
- Custom Fit: The primary benefit is the ability to create an enclosure that perfectly conforms to the contours of your vehicle's trunk or interior. This maximizes space utilization and allows for seamless integration.
- Enhanced Sound Quality: A well-designed fiberglass enclosure can provide superior acoustic properties compared to standard MDF (Medium-Density Fiberboard) enclosures. The rigid nature of fiberglass helps minimize unwanted vibrations and resonance, resulting in cleaner, more accurate bass reproduction.
- Strength and Durability: Fiberglass is incredibly strong and resistant to moisture and temperature changes. This ensures your enclosure will withstand the rigors of daily use and last for years.
- Aesthetics: Fiberglass allows for complex shapes and designs, enabling you to create a visually appealing enclosure that complements your car's interior. You can customize the finish with paint, carpet, or vinyl to match your personal style.
Choosing the Right Materials and Tools
Before you begin, gather all the necessary materials and tools. Selecting high-quality materials is crucial for a successful and long-lasting enclosure. Here's a breakdown of what you'll need:
Materials:
- Fiberglass Resin: Choose a high-quality, marine-grade resin for optimal strength and durability. Consider epoxy resin for even greater strength and heat resistance, especially if your subwoofer will be exposed to high temperatures.
- Fiberglass Mat or Cloth: Fiberglass mat is generally easier to work with for beginners, while fiberglass cloth offers superior strength and a smoother finish. Use a combination of both for best results – mat for initial layers and cloth for the final layer.
- Hardener (Catalyst): This is added to the resin to initiate the curing process. Ensure you use the correct ratio of hardener to resin, as specified by the manufacturer.
- Wood or MDF: You'll need wood or MDF to create a base ring for the subwoofer and any internal bracing. MDF is a good choice for its density and ease of cutting.
- Fleece or Stretch Fabric: This will be stretched over the area where the enclosure will be built to create the initial shape. Non-pilling fleece works well.
- Release Agent: Use a release agent (e.g., PVA – Polyvinyl Alcohol) to prevent the fiberglass from sticking to your vehicle's interior or any molds you create. Multiple coats are recommended.
- Bondo (Body Filler): Used to smooth out any imperfections in the fiberglass surface.
- Sandpaper: Various grits (e.g., 80, 120, 220, 400) for sanding the fiberglass and Bondo.
- Finishing Materials: Choose your desired finish – paint, carpet, or vinyl.
Tools:
- Mixing Cups and Sticks: For mixing the resin and hardener. Use disposable cups for easy cleanup.
- Paint Brushes and Rollers: For applying the resin. Disposable brushes are recommended.
- Scissors or Utility Knife: For cutting the fiberglass mat or cloth and fleece.
- Respirator: Essential for protecting yourself from the fumes of the resin and hardener.
- Gloves: Protect your hands from the resin. Nitrile gloves are a good choice.
- Safety Glasses: Protect your eyes from splashes and debris.
- Power Drill: For attaching the base ring and internal bracing.
- Jigsaw or Circular Saw: For cutting the wood or MDF.
- Sander: For sanding the fiberglass and Bondo. An orbital sander is ideal.
- Measuring Tape and Ruler: For accurate measurements.
- Marker or Pen: For marking cut lines.
Step-by-Step Guide to Building a Fiberglass Sub Enclosure
Now, let's walk through the process of building your fiberglass subwoofer enclosure. Remember to work in a well-ventilated area and wear appropriate safety gear throughout the entire process.
- Planning and Preparation:
- Measure and Plan: Carefully measure the space where you want to install the enclosure. Determine the required volume of the enclosure based on your subwoofer's specifications. Many subwoofer manufacturers provide recommended enclosure volumes.
- Protect Your Vehicle: Thoroughly cover the area where you'll be working with plastic sheeting and masking tape. This is crucial to prevent resin from damaging your vehicle's interior.
- Create a Mold (Optional): If you're building a complex shape, consider creating a mold using cardboard, foam, or other materials. This will help you achieve the desired contours.
- Creating the Base:
- Cut the Base Ring: Cut a circular ring from wood or MDF that matches the diameter of your subwoofer.
- Position the Base Ring: Securely attach the base ring to the desired location using screws or adhesive. Consider the angle and orientation of the subwoofer.
- Stretching the Fleece:
- Stretch and Secure: Stretch the fleece or stretch fabric tightly over the area where the enclosure will be built, covering the base ring. Secure it to the surrounding surfaces using staples, tape, or hot glue.
- Shape the Fleece: Use your hands to mold the fleece into the desired shape. Add stuffing (e.g., foam or polyester batting) behind the fleece to create curves and contours.
- Apply Resin to Fleece: Apply several layers of resin to the fleece. This will stiffen the fleece and create the initial form of the enclosure. Allow each layer to cure completely before applying the next.
- Fiberglassing:
- Prepare the Resin: Mix the resin and hardener according to the manufacturer's instructions.
- Apply Fiberglass Mat: Cut the fiberglass mat into manageable pieces. Apply a layer of resin to the fleece, then lay the fiberglass mat on top. Use a brush or roller to saturate the mat with resin, ensuring there are no air bubbles.
- Apply Multiple Layers: Repeat the process, applying multiple layers of fiberglass mat and resin. Overlap the edges of each layer for added strength. Allow each layer to cure completely before applying the next. Typically, 3-4 layers of fiberglass mat are enough, depending on the desired thickness and strength.
- Apply Fiberglass Cloth (Optional): For a smoother finish, apply a final layer of fiberglass cloth over the mat. This will create a more professional look.
- Removing from Vehicle:
- Demold: Once the fiberglass is fully cured, carefully remove the enclosure from your vehicle. This may require some gentle prying. If you used a mold, remove it as well.
- Sanding and Finishing:
- Sanding: Sand the fiberglass surface to smooth out any imperfections and create a uniform texture. Start with a coarser grit sandpaper (e.g., 80 grit) and gradually move to finer grits (e.g., 120, 220, 400).
- Applying Bondo: Apply Bondo to fill any holes or imperfections in the fiberglass. Let it dry completely and then sand it smooth.
- Final Sanding: Perform a final sanding with fine-grit sandpaper to prepare the surface for finishing.
- Finishing: Choose your desired finish – paint, carpet, or vinyl. Apply the finish according to the manufacturer's instructions.
- Mounting the Subwoofer:
- Cut the Subwoofer Hole: If you haven't already, cut the hole for the subwoofer using a jigsaw or router.
- Install the Subwoofer: Carefully mount the subwoofer into the enclosure, ensuring it is securely attached.
- Connect Wiring: Connect the subwoofer wiring to your amplifier.
- Installation:
- Install Enclosure: Place the enclosure back into the vehicle.
- Secure Enclosure: Secure the enclosure to the vehicle's frame or floor using bolts or other fasteners.
Real-World Owner Experiences
Many car audio enthusiasts have successfully built their own fiberglass subwoofer enclosures. Here are a few common experiences and lessons learned:
- Ventilation is Key: Working with fiberglass resin requires excellent ventilation. Always wear a respirator and work in a well-ventilated area to avoid inhaling harmful fumes.
- Patience is a Virtue: Building a fiberglass enclosure is a time-consuming process. Don't rush it. Allow each layer of resin and fiberglass to cure completely before proceeding to the next step.
- Practice Makes Perfect: If you're new to fiberglass work, consider practicing on a small project before tackling the subwoofer enclosure. This will help you get a feel for the materials and techniques.
- Strength Matters: Don't skimp on the number of fiberglass layers. The more layers you apply, the stronger and more durable the enclosure will be.
- Sealing is Crucial: Ensure the enclosure is completely sealed to prevent air leaks. Air leaks can negatively impact the subwoofer's performance.
Frequently Asked Questions (FAQs)
Here are some frequently asked questions about building fiberglass subwoofer enclosures:
- How much does it cost to build a fiberglass sub enclosure?
- The cost can vary depending on the size of the enclosure, the quality of materials used, and the complexity of the design. However, you can typically build a fiberglass enclosure for less than the cost of a comparable pre-fabricated enclosure.
- How long does it take to build a fiberglass sub enclosure?
- The time required can vary depending on your experience and the complexity of the design. A simple enclosure can be built in a weekend, while a more complex enclosure may take several days.
- Can I build a fiberglass sub enclosure without a mold?
- Yes, you can build a fiberglass enclosure without a mold by using the fleece or stretch fabric method described above. However, a mold can help you achieve more complex shapes and designs.
- What is the best type of fiberglass resin to use?
- Marine-grade polyester resin is a good choice for most applications. Epoxy resin offers even greater strength and heat resistance, but it is also more expensive and can be more difficult to work with.
- How do I calculate the correct volume for my subwoofer enclosure?
- Consult your subwoofer's specifications or the manufacturer's website for recommended enclosure volumes. You can also use online enclosure volume calculators.
- How can I prevent air leaks in my fiberglass enclosure?
- Ensure all seams are properly sealed with resin and fiberglass. You can also use silicone sealant or other types of sealant to seal any potential leaks.
Building a fiberglass subwoofer enclosure is a rewarding project that can significantly enhance your car audio system. By following these steps and taking your time, you can create a custom enclosure that perfectly fits your vehicle and delivers exceptional sound quality. Remember to prioritize safety and work in a well-ventilated area. Good luck!