How To Make Rose Gold Color
So, you're looking to achieve that captivating rose gold finish, huh? It's not just for jewelry and fancy phones anymore; rose gold accents can really set off a custom build, whether you're spraying trim pieces, calipers, or even adding subtle pin-striping. This isn't a simple "grab a can of paint and go" situation. Understanding the principles of color mixing, especially with metallic finishes, is crucial. We're going to dive into the technical aspects of creating rose gold, providing a recipe and the know-how to tweak it to your exact liking. Think of this as crafting a precise fuel mixture for optimal performance - the color is your engine here, and we're aiming for smooth running.
The Purpose of Understanding Rose Gold Color Creation
Why bother with this level of detail? Simply put, buying pre-mixed rose gold paint can be limiting and expensive. Understanding the underlying principles allows for:
- Customization: Fine-tune the shade to perfectly match your vision.
- Cost Savings: Mixing your own is generally cheaper than buying pre-mixed.
- Repair/Touch-Up: Accurately recreate the color for seamless repairs.
- Knowledge: Gain a deeper understanding of color theory and how it applies to practical applications like auto painting.
Essentially, knowing how to mix rose gold gives you the flexibility and control that any serious DIYer craves. Think of it as mastering the art of timing advance - knowing the intricacies allows you to push the boundaries within safe parameters.
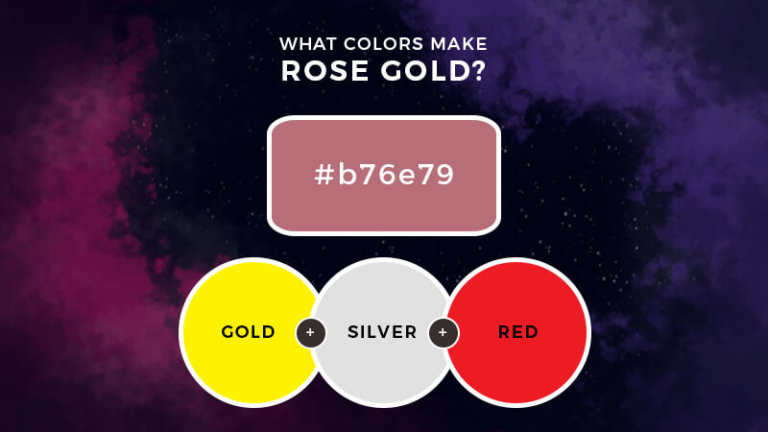
Key Specs and Main Components (The Color Palette)
Creating rose gold involves careful blending of a few key base colors. We'll primarily be working with automotive-grade paints. Using high-quality materials is paramount for durability and finish quality.
- Gold Base: This provides the primary metallic shimmer and warmth. Look for a fine metallic particle size for a smoother finish.
- Copper/Bronze Toner: This is essential for introducing the reddish hues characteristic of rose gold.
- Red/Magenta Tint: While copper adds a reddish tone, a touch of magenta can enhance the "rose" aspect of the color. Use this sparingly.
- Silver/Aluminum Base: This can be used to lighten the mix without desaturating the metallic effect. It adds brightness and helps control the final shade.
- Clear Coat: An automotive-grade clear coat is crucial for protecting the color and providing a durable, glossy finish. Choose a 2K clear coat for superior chemical resistance and UV protection.
- Reducer: A reducer is used to thin the paint to the proper viscosity for spraying. Follow the manufacturer's recommendations for the specific paint you are using.
- Hardener (for 2K paints): The hardener activates the chemical reaction that allows the paint to cure and harden. Use the correct ratio of hardener to paint as specified by the manufacturer.
The specific ratios will vary depending on the intensity of the base colors and the desired shade of rose gold. However, a starting point might be:
Starting Ratio (by volume): 8 parts Gold, 2 parts Copper/Bronze, 0.5 parts Red/Magenta, 1 part Silver. Adjust to taste.
This is just a guideline. Experimentation and careful observation are key. Always test small batches before committing to a larger project.
The "Diagram" - Understanding Color Ratios and Blending
Instead of a traditional wiring diagram, think of this as a color blending "recipe card." Each color represents a component, and the ratio represents its contribution to the final mixture. We can visualize this as a simple pie chart, with each color occupying a slice proportional to its percentage in the mix. Changes to these ratios will directly affect the final color. Increase the Copper/Bronze, and you'll get a more reddish, coppery rose gold. Reduce the Silver, and the color will become richer and deeper.
The "lines" in our diagram are the ratios themselves – think of them as the fuel lines delivering each component to the engine (the final color). The "colors" in our diagram are the paints themselves. The icons, if we were to use them, would represent mixing tools (stir sticks, measuring cups, spray guns), and safety equipment.
How It Works: The Chemistry of Color
The creation of rose gold relies on the subtractive color model. In painting, you're starting with white (or light-reflective metallic particles) and then adding pigments that absorb certain wavelengths of light. The remaining wavelengths are what we perceive as color. The gold base provides the yellow-orange metallic shimmer. The copper/bronze adds reddish-brown tones, pushing the color towards the rose spectrum. A touch of magenta amplifies the "rose" effect. The silver acts as a diluent, lightening the overall color without muddying the metallic effect.
The key to a successful rose gold finish is uniform distribution of the metallic particles. This is achieved through proper mixing and atomization during spraying. Without proper atomization, the metallic flakes will clump together, resulting in an uneven, blotchy finish. This is analogous to a poorly tuned carburetor - the mixture isn't properly atomized, leading to poor performance.
Real-World Use: Troubleshooting & Adjustment
Here are some common issues you might encounter and how to address them:
- Too Yellow: Add more Copper/Bronze or a touch of Red/Magenta.
- Too Red/Pink: Add more Gold and a touch of Silver.
- Not Metallic Enough: Ensure your Gold and Silver bases are high quality and well-mixed. Consider using a higher quality clear coat to enhance the metallic effect.
- Dull Finish: Ensure proper surface preparation (sanding, priming). Use a high-quality clear coat and apply it correctly (proper layering, flash times).
- Blotchy Finish: Poor atomization during spraying. Adjust your spray gun settings (air pressure, fluid output) and ensure proper technique.
- Color Mismatch: Always create a test panel and compare it to your desired shade under the same lighting conditions. Adjust the recipe accordingly.
Remember, small adjustments can make a big difference. Document your changes so you can recreate the color later.
Safety First: Handling Paints and Solvents
Working with automotive paints and solvents requires caution. These materials often contain volatile organic compounds (VOCs) that can be harmful if inhaled or absorbed through the skin. Always work in a well-ventilated area and wear appropriate personal protective equipment (PPE), including:
- Respirator: A respirator with organic vapor cartridges is essential to protect your lungs from harmful fumes.
- Gloves: Nitrile gloves are resistant to most solvents and paints.
- Eye Protection: Safety glasses or a face shield will protect your eyes from splashes and fumes.
- Protective Clothing: Coveralls or long sleeves and pants will protect your skin from contact with paints and solvents.
Proper disposal of waste materials is also crucial. Check your local regulations for proper disposal methods for paints, solvents, and rags. Do not pour these materials down the drain.
The most risky components are the 2K hardeners. These contain isocyanates, which are highly reactive and can cause severe respiratory sensitization. Avoid skin contact and inhalation. If exposed, seek immediate medical attention.
Creating a stunning rose gold finish is achievable with the right knowledge, materials, and techniques. By understanding the underlying principles of color mixing and following safety precautions, you can add a touch of elegance and sophistication to your next automotive project.
To help you further, we've put together a more detailed breakdown of specific paint brands and suggested starting ratios, alongside a downloadable PDF with a color blending guide and troubleshooting tips. Let us know if you want that file, and we'll send you the link!