How To Make Tan With Paint
So, you're looking to create the perfect tan color with paint. Maybe you're touching up your vintage Bronco, customizing a set of rims, or even just adding a unique accent to your garage. Whatever the reason, mixing paint to achieve a specific shade is a fundamental skill in automotive customization and repair. This article will break down the process, providing you with a solid understanding of color theory and the practical steps involved. We'll treat this like creating a *recipe* for a specific color, focusing on achieving a consistent and repeatable result.
Purpose: Why Master Tan Paint Mixing?
Understanding how to mix tan paint goes beyond simply slapping colors together. It's about achieving:
- Seamless Color Matching: Essential for collision repair, touching up existing paintwork, or blending custom panels.
- Customization: Allows you to create unique and personalized looks, from subtle beige to deep earthy tones.
- Cost Savings: Mixing your own paint can be more economical than purchasing pre-mixed colors, especially for larger projects or unique shades.
- Control: You have complete control over the final color, allowing for fine-tuning and experimentation.
Key Specs and Main Parts (Ingredients!)
Think of your paint mixing process as a chemical reaction. The "parts" are your paints, and the "specs" are the proportions you use.
Base Paints: The Foundation
The base paints are the primary colors you'll use. For tan, you'll typically need:
- White: The *tinting base*, used to lighten the overall color. Crucial for achieving lighter shades of tan. Use a high-quality automotive-grade white.
- Brown: The core of your tan. Choose a raw umber, burnt umber, or a similar earth tone. Note that different brands of brown can vary significantly in their *undertones* (warmth, coolness).
- Yellow: Adds warmth and brightness. Ochre or a cadmium yellow can be useful.
- Black: Use sparingly to deepen the tan and control the chroma (intensity). Too much black will quickly turn your tan muddy.
- Red: A touch of red, like a burnt sienna, can add warmth and complexity to the tan, particularly if you're aiming for a "rusty" or earthy tone.
Additives and Modifiers
These enhance the paint's performance and application:
- Reducer: Thins the paint to the correct viscosity for spraying or brushing. Choose a reducer compatible with your paint type (e.g., urethane, acrylic lacquer).
- Hardener (Activator): Essential for two-part paints (like urethanes). The *catalyst* that initiates the chemical reaction for curing. Use the correct ratio specified by the paint manufacturer.
- Flex Agent: Added to paint when painting flexible parts (bumpers, trim) to prevent cracking.
Mixing Ratios: The Recipe
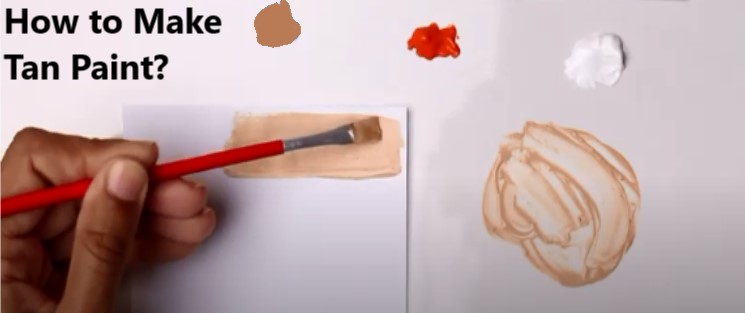
Getting the ratios right is paramount. While precise formulas vary, a starting point for a basic tan could be:
White: 80%
Brown: 15%
Yellow: 5%
This is just a starting point! The actual ratios will depend on the specific shades of your base paints and the desired final color. Accurate measurement is vital. Use measuring cups or graduated cylinders designed for paint mixing.
Symbols: Understanding the Visual Language
While there aren't "symbols" in the traditional diagrammatic sense, here's how to interpret the "visual language" of paint mixing:
- Color Chips/Swatches: Represent the *target color* you're trying to achieve. Compare your mixes to these swatches under good lighting.
- Proportions (Percentages or Ratios): Indicate the relative amounts of each base paint. Pay close attention to these.
- Mixing Logs: Document your mixes! Note the exact proportions and any adjustments you make. This is crucial for recreating the color later.
- "Delta E" (ΔE): In professional color matching, ΔE represents the color difference between two samples. Lower ΔE values indicate a closer match.
How It Works: The Color Theory in Action
Mixing paint is based on subtractive color mixing. Unlike light, where adding colors creates white, with paint, adding colors creates darker colors. Here's the breakdown:
- Start Light: Begin with your lightest color (usually white) as the base. It's easier to darken a light color than to lighten a dark one.
- Add Colors Gradually: Introduce the darker colors (brown, black, yellow) in small increments. Mix thoroughly after each addition.
- Observe the Undertones: Pay attention to the warmth or coolness of the tan as you mix. If it's too cool (grayish), add a touch of yellow or red. If it's too warm (orange-ish), add a touch of black or blue (a tiny amount!).
- Test, Test, Test: Apply a small amount of the mixed paint to a test panel (ideally the same material you'll be painting). Let it dry completely. Wet paint looks different from dry paint.
- Iterate: Adjust the mix based on the test panel. Record your changes in your mixing log.
Real-World Use: Troubleshooting the Tan
Here are common problems and solutions:
- Tan is too light: Add more brown. A little yellow can deepen it, too.
- Tan is too dark: Add more white.
- Tan is too gray/cool: Add a touch of yellow or red.
- Tan is too orange/warm: Add a touch of black or blue (use sparingly).
- Paint isn't covering well: Ensure the paint is properly thinned (reduced) for the application method. The color may also need another coat.
- Color doesn't match after drying: This is common. Adjust the wet paint to compensate for the color shift during drying. Experience is key!
Safety: Handle with Care
Paint mixing involves potentially hazardous materials:
- Respirator: Always wear a properly fitted respirator when spraying or mixing paints, especially those containing isocyanates (common in urethanes). Isocyanates can cause severe respiratory problems.
- Gloves: Wear chemical-resistant gloves to protect your skin from solvents and paints.
- Eye Protection: Safety glasses or a face shield are essential.
- Ventilation: Work in a well-ventilated area to avoid inhaling fumes. A spray booth with proper ventilation is ideal.
- Flammability: Most paint solvents are highly flammable. Keep away from heat, sparks, and open flames.
- Material Safety Data Sheets (MSDS): Always consult the MSDS for each paint and additive you use. The MSDS provides critical information about hazards, handling, and first aid.
Mixing paint is a skill that improves with practice. Don't be afraid to experiment and keep detailed records of your mixes. With time and dedication, you'll be able to create the perfect tan for any project.
We've put together a more detailed table of mixing ratios and troubleshooting tips in a downloadable document. This document provides a starting point for creating various shades of tan and beige, along with potential issues you might encounter and how to address them. Contact us if you are interested in accessing this detailed guide to paint mixing.