How To Make The Colour Beige
So, you want to mix up a batch of beige? It might sound simple, but achieving that perfect, nuanced shade – the one that complements your classic car's interior or provides the ideal canvas for a custom paint job – requires a bit more finesse than just slapping some white and brown together. Think of this article as your paint mixing diagram, breaking down the process into manageable steps, just like tracing a wiring diagram to diagnose an electrical fault. We'll explore the components, the ratios, and the techniques involved in creating the ideal beige.
The Art and Science of Beige
Beige, at its core, is a desaturated yellow-brown. The key word here is desaturated. It's not about just diluting brown; it's about carefully manipulating the hue, saturation, and lightness (HSL) of your base colors. Understanding these three properties is crucial for consistent and predictable results.
- Hue: This refers to the dominant color family – red, yellow, blue, green, etc. In our case, we're aiming for a hue that leans towards yellow-brown.
- Saturation: This describes the intensity of the color. A highly saturated color is vibrant and pure, while a desaturated color is muted and closer to gray. Beige requires low saturation.
- Lightness (or Value): This determines how light or dark the color is. Beige is typically a mid-tone, neither extremely light nor extremely dark.
Think of it like adjusting the carburetor on a finely tuned engine. You're not just randomly twisting screws; you're making precise adjustments to the fuel/air mixture to achieve optimal performance. Similarly, we'll be making precise adjustments to our color mix to achieve optimal beige.
Key Specs and Main Parts (The Color Palette)
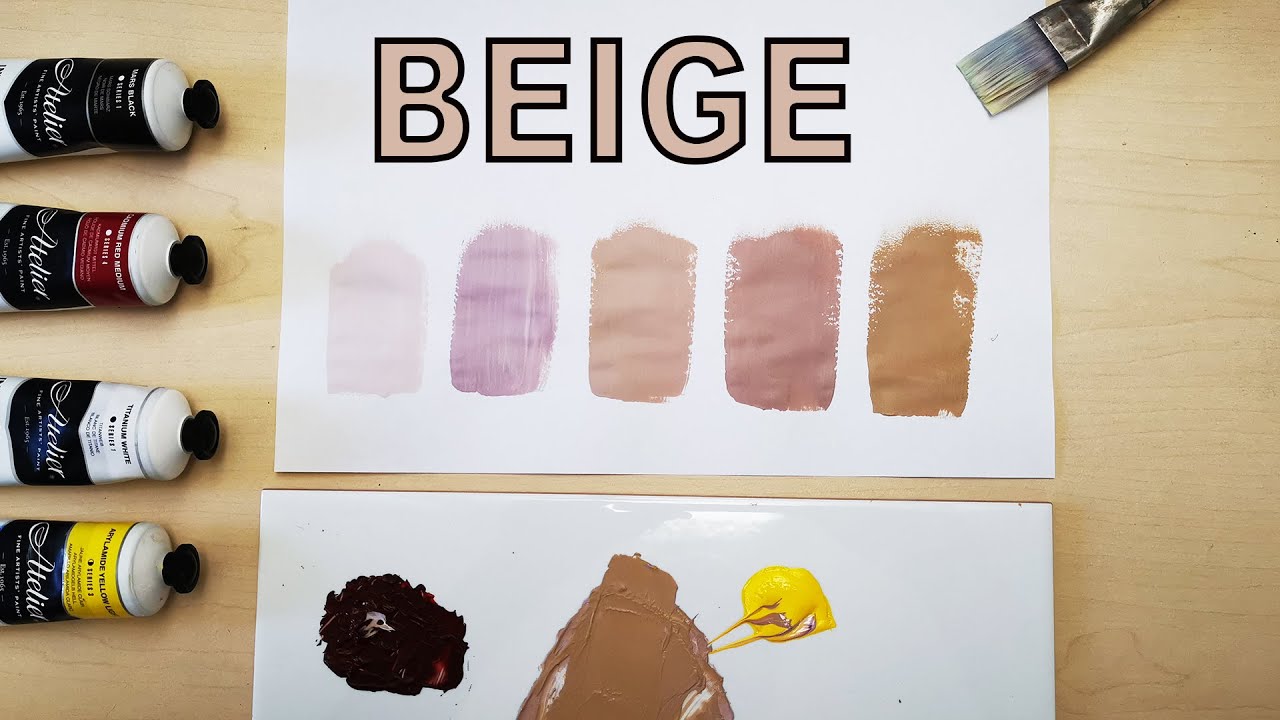
Our "color palette" is our selection of paints. While you *can* technically make beige from just white and brown, the results are often muddy and unpredictable. A more sophisticated approach involves using several colors to fine-tune the final shade. Here’s a typical starting point:
- Titanium White: This is our base, providing the lightness and opacity. Choose a high-quality titanium white for the best coverage.
- Yellow Ochre: A warm, earthy yellow that forms the foundation of the beige hue.
- Burnt Umber: A rich, deep brown with reddish undertones. This adds depth and complexity.
- Raw Sienna: A lighter, more transparent brown with yellow undertones. Used for subtle adjustments.
- (Optional) Lamp Black: Use *extremely* sparingly to darken the mixture and add subtle coolness. Black is a powerful color and can easily overpower the other pigments.
- (Optional) Red Oxide: Introduce warmth and counteract potential green undertones. Again, use cautiously.
The "specs" are the ratios of these colors. There's no single "perfect" beige recipe, as it depends on the specific pigments you're using and the desired final shade. However, a good starting point is:
Approximately 90% Titanium White, 5% Yellow Ochre, 3% Burnt Umber, 2% Raw Sienna. Adjust as needed.
Consider this your base timing – you can then use a timing light to fine-tune it.
Symbols (and Ratios)
In the context of color mixing, "symbols" represent the relative proportions of each color. While we don't have literal symbols like a wiring diagram, think of it this way:
- Large area of White: High proportion of Titanium White.
- Small dot of Yellow Ochre: Small addition of Yellow Ochre.
- Tiny speck of Burnt Umber: Extremely small addition of Burnt Umber.
The "lines" in our diagram are the mixing motions. Thorough and consistent mixing is vital to avoid streaks and uneven color distribution. Think of it like bleeding your brakes – you need to ensure all the air bubbles are removed for proper function. Use a palette knife (or similar tool) to thoroughly combine the pigments. A good technique is to fold the pigments together, scraping the mixture across your palette.
Consider that each "line" represents a mixing step. Add a small amount of pigment, mix thoroughly, and then assess the color before adding more. Patience is key!
How It Works (The Mixing Process)
The goal is to gradually introduce the color pigments into the white base, constantly monitoring the resulting shade. Start with the white and then add the yellow ochre, mixing thoroughly. The mixture will begin to take on a pale, yellowish tint.
Next, introduce the burnt umber. Remember to add it in tiny increments, as burnt umber is a strong pigment. Mix thoroughly after each addition. The mixture will start to develop a brownish tone. If it becomes too brown too quickly, add more white to lighten it.
Finally, add the raw sienna. This will add warmth and depth to the color. Again, add in small increments and mix thoroughly. The raw sienna will help to round out the beige color.
If the beige appears too cool (leaning towards gray or blue), add a *tiny* touch of red oxide. If it appears too warm (leaning towards orange or red), add a *tiny* touch of lamp black. These adjustments require extreme care and precision.
Ultimately, you're trying to achieve a balance where the yellow and brown tones are subtle and muted, not overpowering. Think of it as adjusting the air/fuel ratio – you're looking for the "sweet spot" where the engine runs smoothly and efficiently.
Real-World Use (Troubleshooting Beige)
Here are some common problems and their solutions:
- Beige is too dark: Add more Titanium White.
- Beige is too yellow: Add a touch of Burnt Umber.
- Beige is too brown: Add more Titanium White and a touch of Yellow Ochre.
- Beige is too gray/cool: Add a touch of Red Oxide.
- Beige is too orange/warm: Add a *tiny* touch of Lamp Black (extremely cautiously!).
- Beige looks muddy: You've likely overmixed the colors or used too much black. Start over with a fresh batch.
Remember that the perceived color can change under different lighting conditions. Always check your mixed beige under the lighting conditions where it will ultimately be used (e.g., sunlight, fluorescent light, incandescent light). Just like diagnosing an intermittent electrical problem, test your color in relevant conditions.
Document your mixtures. When you find a winning formula, record the proportions of each color you used. This will allow you to replicate the color consistently in the future. Consider keeping a color journal, similar to a mechanic’s log of repairs and settings.
Safety (Pigment Hazards)
While most modern paints are relatively safe, it's always good to be aware of potential hazards. Some older pigments contain heavy metals like lead or cadmium. Avoid using very old paints, especially if you don't know their composition. If you're working with unknown paints, wear gloves and a respirator. The risk may be low, but it's always best to err on the side of caution – just like wearing safety glasses when grinding metal. Ensure adequate ventilation in your workspace to prevent inhalation of dust or fumes. Dispose of paint waste properly according to local regulations.
Always read the manufacturer's safety data sheet (SDS) for each paint you use.
Mixing the perfect beige is a journey, not a destination. Experiment with different color combinations and proportions until you find the shade that suits your needs. Like any skill, it takes practice and patience. Once you master the fundamentals, you'll be able to create a wide range of beige variations to perfectly complement your automotive projects.
And now, for your convenience, we have compiled the key steps and ratios into a printable "beige mixing diagram" file (PDF format) that you can download and keep in your workshop. It's like having a quick reference guide for common repairs – always there when you need it.