How To Perform An Oil Change
So, you're ready to tackle an oil change? Excellent! It's one of the most fundamental maintenance tasks you can perform on your car, and doing it yourself not only saves you money but also gives you a deeper understanding of your vehicle. This article will walk you through the process, covering everything from the necessary tools and materials to the nitty-gritty details of actually performing the change. We'll be using technical terms, but I'll define them as we go. Think of this as a friendly conversation with your mechanic, but in written form. Let's get started.
Purpose of an Oil Change
Before we dive in, let's quickly recap why changing your oil is so important. Your engine oil's primary functions are:
- Lubrication: Reducing friction between moving parts to prevent wear and tear.
- Cooling: Absorbing heat from the engine and dissipating it.
- Cleaning: Suspending contaminants like dirt, debris, and combustion byproducts.
- Sealing: Helping to seal the piston rings against the cylinder walls.
- Corrosion Prevention: Protecting engine components from rust and corrosion.
Over time, oil degrades due to heat, pressure, and contamination. It loses its lubricating properties, becomes less effective at cooling, and can even turn acidic, leading to engine damage. Regular oil changes replace this degraded oil with fresh oil, ensuring your engine continues to operate smoothly and efficiently. Neglecting oil changes can lead to serious problems, including premature engine wear, reduced performance, and even catastrophic engine failure. Prevention is always better (and cheaper) than a cure!
Key Specs and Main Parts
Here's a breakdown of the components and specifications you'll need to know:
- Engine Oil: The lifeblood of your engine. Use the correct grade and type specified in your owner's manual. Common viscosities include 5W-30, 10W-30, and 5W-20. The 'W' stands for Winter, and the numbers indicate the oil's viscosity at different temperatures. Using the wrong oil can negatively impact performance and longevity.
- Oil Filter: Removes contaminants from the oil. Use a quality oil filter that matches your vehicle's make and model. Filter specifications like thread size and gasket diameter are crucial.
- Oil Pan Drain Plug: Located at the bottom of the oil pan, allowing you to drain the old oil. These usually have a crush washer.
- Crush Washer: A sealing washer that sits between the drain plug and the oil pan. Always replace it with a new one to ensure a proper seal and prevent leaks.
- Oil Filter Wrench: Used to loosen and tighten the oil filter. Come in various sizes and designs.
- Wrench for Drain Plug: Usually a socket wrench or box-end wrench of the correct size.
- Torque Wrench: To tighten the drain plug to the specified torque. Crucial to prevent leaks or stripping the threads.
- Drain Pan: To collect the old oil.
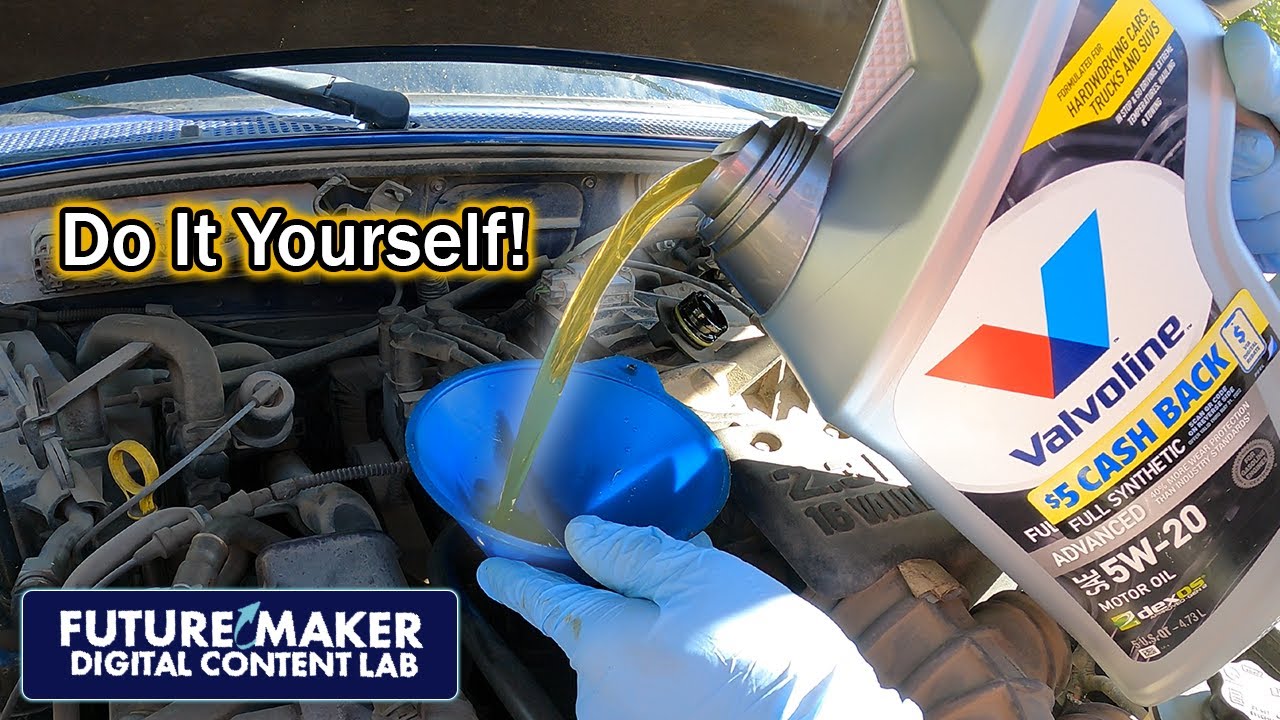
- Funnel: To pour the new oil into the engine.
Step-by-Step Guide: The Oil Change Process
- Gather Your Supplies: Make sure you have all the necessary tools, oil, and filter before you begin. Double-check the oil grade and filter compatibility with your vehicle.
- Warm Up the Engine: Run the engine for a few minutes to warm the oil. Warm oil flows more easily, but be careful not to overheat it. You want it warm, not scalding.
- Secure the Vehicle: Park the vehicle on a level surface. Engage the parking brake. Use jack stands if you need more clearance underneath the car; never work under a vehicle supported only by a jack.
- Locate the Drain Plug: Find the oil pan drain plug on the bottom of the engine. It's usually the lowest point on the oil pan.
- Position the Drain Pan: Place the drain pan directly underneath the drain plug.
- Remove the Drain Plug: Using the appropriate wrench, carefully loosen the drain plug. Once it's loose, remove it by hand, being prepared for the oil to start flowing. Be careful, the oil might be hot.
- Allow the Oil to Drain Completely: Let the oil drain completely. This may take 15-30 minutes.
- Remove the Old Oil Filter: Locate the oil filter. Use the oil filter wrench to loosen it. Have a rag ready to catch any spilled oil. Unscrew the filter completely by hand.
- Prepare the New Oil Filter: Lightly lubricate the rubber gasket on the new oil filter with fresh oil. This helps create a good seal.
- Install the New Oil Filter: Screw the new oil filter onto the engine by hand until the gasket makes contact, then tighten it an additional ¾ to 1 turn. Do not overtighten.
- Install the Drain Plug: Once the oil has completely drained, clean the drain plug and install a new crush washer. Tighten the drain plug to the manufacturer's specified torque using a torque wrench. Overtightening can damage the oil pan.
- Add New Oil: Locate the oil filler cap on top of the engine. Remove the cap and use a funnel to pour in the correct amount of new oil. Refer to your owner's manual for the correct capacity.
- Check the Oil Level: Use the dipstick to check the oil level. Add more oil as needed to reach the "full" mark.
- Start the Engine: Start the engine and let it run for a few minutes. Check for any leaks around the drain plug and oil filter.
- Recheck the Oil Level: After the engine has run for a few minutes, turn it off and let it sit for a few minutes. Recheck the oil level and add more oil if necessary.
- Dispose of the Old Oil Properly: Take the used oil and filter to a recycling center or auto parts store for proper disposal.
Real-World Use – Basic Troubleshooting Tips
Even with careful planning, things can sometimes go wrong. Here are a few common issues and how to address them:
- Drain Plug Stuck: If the drain plug is stuck, try using a penetrating oil and letting it soak for a while. Avoid using excessive force, as you could strip the threads.
- Oil Filter Stuck: Similar to the drain plug, use a penetrating oil and a good quality oil filter wrench.
- Leaking Drain Plug: Ensure the drain plug is properly tightened to the correct torque with a new crush washer. If it continues to leak, the oil pan threads may be damaged, requiring repair or replacement.
- Low Oil Pressure Light: If the low oil pressure light comes on after an oil change, immediately turn off the engine. Check the oil level and look for leaks. If the oil level is correct and there are no leaks, there may be a problem with the oil pump or another engine component.
Safety – Highlight Risky Components
Safety is paramount when working on your car. Here are a few key safety considerations:
- Hot Oil: Be extremely careful when draining the oil, as it can be very hot and cause burns. Wear gloves and eye protection.
- Jacking Up the Vehicle: Always use jack stands to support the vehicle after jacking it up. Never work under a vehicle supported only by a jack.
- Exhaust System: The exhaust system can be extremely hot, even after the engine has been off for a while. Avoid touching it.
- Electrical Components: Avoid working near any electrical components, especially the battery. Disconnect the negative battery cable if you're concerned about accidental electrical shorts.
- Proper Ventilation: Work in a well-ventilated area to avoid inhaling exhaust fumes.
Torque Specifications
Torque specifications are critical for properly tightening bolts and nuts, especially the oil drain plug. Refer to your vehicle's service manual for the correct torque value. Using a torque wrench ensures that the fastener is tightened to the precise tension, preventing leaks and damage to components. Common torque ranges for oil drain plugs are between 15 and 30 lb-ft, but this can vary. The oil filter should be hand-tightened, typically ¾ to 1 full turn after the gasket contacts the engine block.
For those interested in diagrams of the oiling system and related components, we have a detailed technical diagram available for download. This diagram provides a visual representation of the oil flow path and the location of key components. It can be helpful for understanding how the system works and troubleshooting potential problems. It includes the oil pan, oil pump, oil filter, oil pressure sensor, and oil galleries.