How To Put A Front License Plate On
Having a front license plate is a requirement in many states and provinces, but sometimes vehicles don't come pre-drilled for one. Putting a front license plate on your car might seem daunting, but with the right tools and a little patience, it's a relatively straightforward task. This guide provides a clear, step-by-step process for mounting your front license plate, whether you need to drill new holes or utilize existing ones.
Why This Matters: Legal Compliance and Aesthetics
The primary reason for installing a front license plate is legal compliance. Many jurisdictions require vehicles to display both front and rear license plates. Driving without a front license plate in these areas can result in fines and potential headaches with law enforcement. Ignoring this regulation can lead to repeated offenses and increased penalties.
Beyond the legal aspect, there's also the matter of aesthetics. While some find front license plates unsightly, they are a necessary part of vehicle identification and, when properly mounted, can maintain a clean and orderly look. A crooked or missing plate can detract from your car's appearance.
Consider the scenario where you are trying to sell your car in the future. A missing front license plate, particularly if the buyer is from a state that requires them, could raise concerns about your compliance with local regulations. Having a front license plate installed correctly can enhance the perceived value of your vehicle.
How to Choose the Right Mounting Method and Hardware
Before you begin, you need to determine the best method for attaching your front license plate. The ideal solution depends on whether your car already has pre-drilled holes in the bumper. If it does, the process is much simpler.
Vehicles with Pre-Drilled Holes:
If your bumper has pre-drilled holes, you'll primarily need the following:
- Screws: Obtain the correct size and type of screws for your vehicle's bumper. Stainless steel screws are recommended to prevent rust. Check your owner's manual or a local auto parts store for the correct specifications.
- Screwdriver: A Phillips-head or flathead screwdriver, depending on the type of screws.
- License Plate Frame (Optional): A frame can add a touch of style and protect the edges of your license plate.
- License Plate Mounting Hardware (Optional): Some frames come with mounting hardware but it's a good idea to double check the length and material of the screws.
Vehicles Without Pre-Drilled Holes:
If your bumper lacks pre-drilled holes, you have a few options:
- Self-Tapping Screws: These screws create their own threads as you drive them into the bumper. Choose high-quality self-tapping screws made from stainless steel to resist corrosion.
- License Plate Bracket: This bracket provides a stable mounting surface and helps distribute the stress, especially on plastic bumpers. Look for brackets that are compatible with your vehicle's make and model.
- Adhesive Mounting Strips: While not as secure as screws, heavy-duty adhesive mounting strips can be a temporary solution, or a more permanent solution when used in combination with screws in specific locations. They're best suited for flat bumper surfaces.
- Drill (with appropriate drill bits): If you choose to drill holes, you'll need a drill and drill bits that are appropriate for your bumper material (plastic or metal). Start with a small pilot hole and gradually increase the size.
- Measuring Tape and Level: Ensure proper placement and alignment of the license plate.
- Safety Glasses: Always wear safety glasses when drilling.
Choosing the Right Screws: It's crucial to select screws of the correct length. Screws that are too long can damage the bumper or interfere with components behind it. Screws that are too short won't provide a secure hold.
License Plate Frame Considerations: If you choose to use a license plate frame, make sure it doesn't obstruct any information on the license plate, such as the state name or registration stickers. Some states have specific regulations regarding license plate frames.
Step-by-Step Guide to Mounting Your Front License Plate
Step 1: Gather Your Supplies
Before you start, make sure you have all the necessary tools and hardware within reach. This will prevent frustration and delays during the installation process.
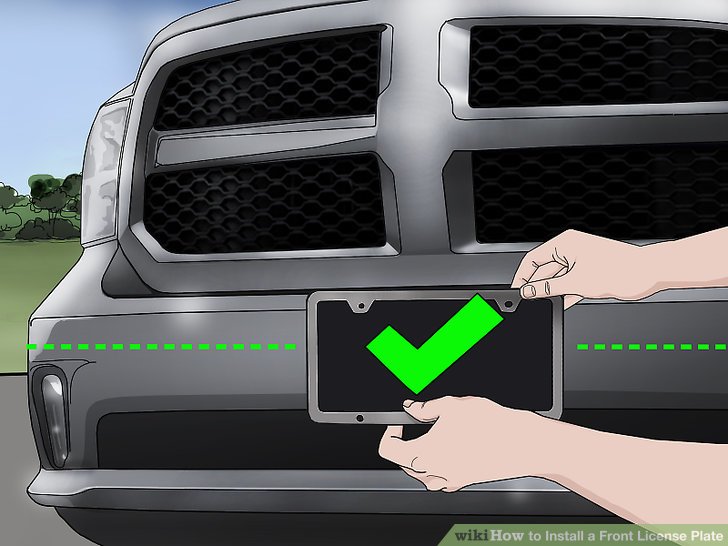
Step 2: Determine the Mounting Location
Decide where you want to mount the license plate. It should be in a prominent and easily visible location on the front of the vehicle. Ensure that the chosen location doesn't obstruct any headlights, sensors, or other essential vehicle components.
Step 3A: Mounting with Pre-Drilled Holes (Simple Method)
- Align the license plate (or the license plate frame, if using one) with the pre-drilled holes.
- Insert the screws through the license plate and into the holes.
- Tighten the screws with a screwdriver until the plate is snug but not overtightened. Overtightening can damage the bumper.
Step 3B: Mounting Without Pre-Drilled Holes (Drilling Method)
- Mark the Hole Locations: Use a measuring tape and level to accurately mark the locations for the mounting holes on the bumper. Use the license plate or bracket as a template.
- Drill Pilot Holes: Using a drill bit slightly smaller than the diameter of your screws, drill pilot holes at the marked locations.
- Enlarge the Holes (If Necessary): If using self-tapping screws, you may need to enlarge the pilot holes slightly to make them easier to drive in.
- Attach the License Plate or Bracket: Align the license plate or bracket with the drilled holes.
- Secure with Screws: Insert the screws through the license plate or bracket and into the holes. Tighten the screws until the plate is snug but not overtightened.
Step 3C: Mounting Without Pre-Drilled Holes (Adhesive Method)
- Clean the Bumper Surface: Thoroughly clean the area where you'll be applying the adhesive with rubbing alcohol to remove any dirt, grease, or wax.
- Apply the Adhesive Strips: Attach the adhesive strips to the back of the license plate or bracket, following the manufacturer's instructions.
- Align and Attach: Carefully align the license plate or bracket with the desired location on the bumper. Press firmly for the recommended amount of time to ensure a strong bond.
- Consider Additional Reinforcement: For added security, especially in areas with extreme weather conditions, consider using a combination of adhesive and a small number of screws.
Step 4: Check Alignment and Security
Once the license plate is mounted, double-check that it is straight and securely attached. Give it a gentle tug to ensure it doesn't wobble or come loose.
Real-World Owner Experiences
Many car owners have shared their experiences with mounting front license plates. Here are a few common themes:
- Importance of Quality Hardware: Using cheap screws can lead to rust and corrosion, making it difficult to remove the license plate in the future. Invest in stainless steel screws for long-lasting durability.
- Difficulty with Plastic Bumpers: Plastic bumpers can be challenging to drill into. Take your time and use a slow speed to avoid cracking or damaging the bumper.
- Adhesive Failures: Adhesive mounting strips can fail over time, especially in extreme temperatures. Regular inspection and replacement may be necessary.
- Bracket Benefits: License plate brackets provide a more secure and professional-looking installation, especially on vehicles with curved bumpers.
- Seek Professional Help: If you're uncomfortable drilling into your car's bumper, consider having a professional mechanic or auto body shop install the license plate for you.
One owner shared, "I tried using adhesive strips at first, but the plate fell off after a few weeks. I ended up drilling holes and using screws, and it's been rock solid ever since." Another owner said, "I was nervous about drilling into my new car's bumper, but I followed the instructions carefully and it turned out great. The bracket made it much easier."
Frequently Asked Questions (FAQs)
Q: What if my state only requires a rear license plate?
A: If your state doesn't require a front license plate, you're not obligated to install one. However, if you plan to travel to states that do require front license plates, you may want to consider installing one temporarily.
Q: Can I get a ticket for not having a front license plate?
A: Yes, in states that require front license plates, you can be ticketed for driving without one. The fine amount varies by state and municipality.
Q: Can I use zip ties to attach my front license plate?
A: While zip ties might seem like a quick and easy solution, they are not recommended. They are not as secure as screws or brackets and can be easily cut or broken. This could lead to your license plate falling off or being stolen.
Q: How do I remove a rusted screw from my license plate?
A: Apply penetrating oil to the rusted screw and let it sit for a few minutes. Then, use a screwdriver with a good grip and apply steady pressure while turning. If the screw is severely rusted, you may need to use a screw extractor tool.
Q: Can I customize my license plate frame?
A: Yes, there are many options for customizing your license plate frame. However, make sure that the frame doesn't obstruct any information on the license plate, such as the state name or registration stickers.
Q: What if I damage my bumper while drilling?
A: If you accidentally damage your bumper while drilling, consult with an auto body repair shop. They can assess the damage and provide you with repair options.
By following these instructions and taking the necessary precautions, you can successfully install your front license plate and ensure compliance with local regulations. Remember to prioritize safety and take your time to achieve the best possible result.