How To Remove A Car Relay
The unsung hero of your car's electrical system, the relay, often lurks in the shadows, silently switching circuits and enabling vital functions. From turning on your headlights to activating the fuel pump, these electromechanical devices play a crucial role. But what happens when a relay fails? Knowing how to safely and correctly remove a car relay is a fundamental skill for any aspiring automotive DIYer. This guide will walk you through the process, the mechanics behind it, and offer insights to help you diagnose and manage relay-related issues.
Solving the Problem: Relay Removal 101
Let's say your car's horn suddenly stops working. After checking the fuse, you suspect the horn relay might be the culprit. You need to remove it to test it or replace it. What do you do? Simply yanking it out might seem like the quickest solution, but it's a recipe for disaster. You could damage the relay socket, nearby components, or even the relay itself, making testing impossible. A methodical approach is key.
The Right Tools for the Job
Before you even think about touching the relay, gather the necessary tools. Generally, you'll need:
- Relay Puller Pliers: These are specifically designed to grip the relay body securely and evenly, allowing for a straight, controlled pull. This is highly recommended.
- Small Flathead Screwdriver: Useful for gently prying if the relay puller isn't available or if the relay is particularly stubborn. Caution: Use extreme care to avoid damaging the socket.
- Needle-Nose Pliers (Optional): Can be helpful for gripping the relay if it's in a difficult-to-reach location.
- Work Gloves: Protect your hands and provide a better grip.
- Safety Glasses: Protect your eyes from debris.
Step-by-Step Removal Process
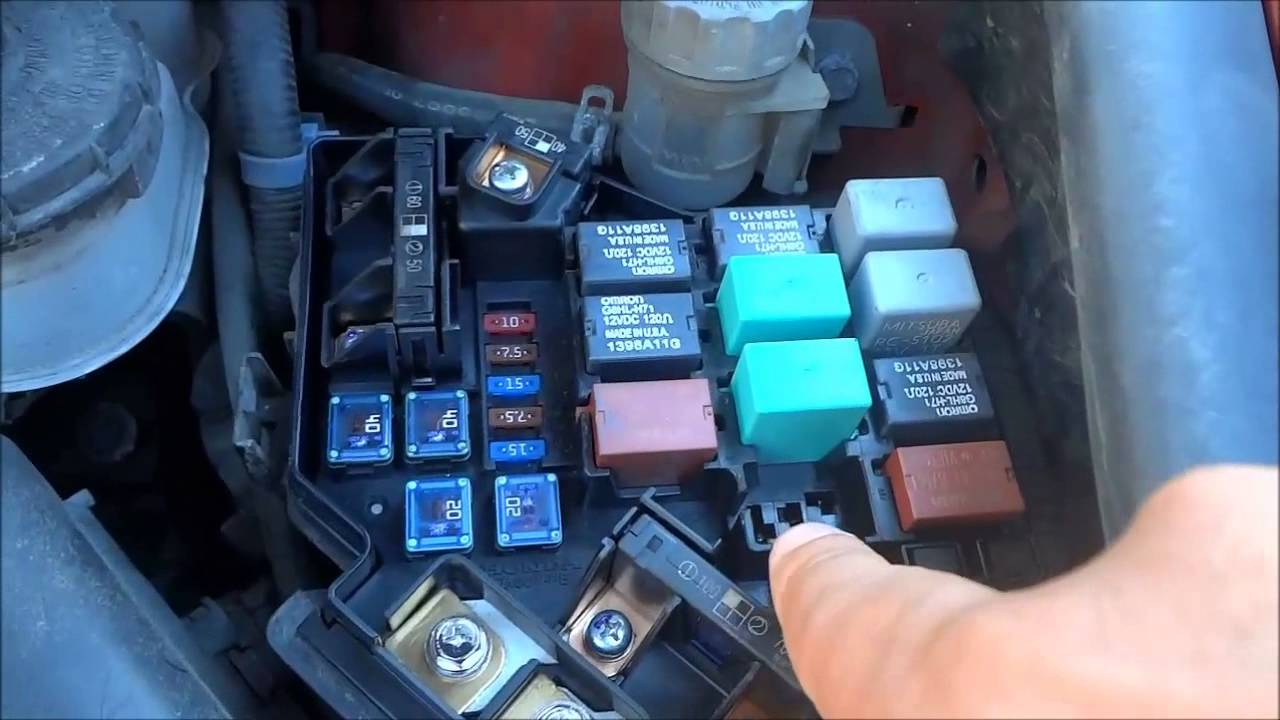
- Locate the Relay: Refer to your car's owner's manual or a wiring diagram to identify the correct relay. Relay boxes are usually located under the hood, in the passenger compartment (often under the dashboard), or in the trunk. The lid of the relay box often has a diagram showing the function of each relay.
- Disconnect the Battery (Recommended): While not always strictly necessary, disconnecting the negative terminal of the battery provides an extra layer of safety, preventing accidental shorts or electrical damage.
- Inspect the Relay: Before attempting to remove it, visually inspect the relay and the surrounding socket for any signs of damage, corrosion, or loose connections.
- Use the Relay Puller: If you have a relay puller, position the jaws of the puller around the relay body, ensuring a firm grip. Squeeze the handles of the puller to gently and evenly pull the relay straight out of the socket. Avoid twisting or rocking the relay.
- Use a Screwdriver (If Necessary): If you don't have a relay puller, carefully insert the tip of the small flathead screwdriver between the relay body and the socket. Gently pry upwards, working your way around the relay to loosen it evenly. Do not force it. Alternate between opposite sides to avoid binding.
- Inspect the Socket: Once the relay is removed, inspect the socket terminals for any damage, corrosion, or bent pins. Clean the terminals with a contact cleaner if necessary.
The Relay: An Electromechanical Switch
To appreciate the process of removing a relay, it's helpful to understand what it does and how it works. Imagine a high-powered spotlight. You wouldn't want to use a flimsy light switch directly connected to the battery to control it. The switch would likely melt or burn out. That's where a relay comes in. A relay acts as an intermediary, using a small control current to switch a larger power circuit.
Mechanical Breakdown
Inside a typical automotive relay, you'll find:
- Coil: When a small current flows through the coil, it creates an electromagnetic field.
- Armature: This is a pivoting lever that is attracted to the electromagnet when the coil is energized.
- Contacts: These are the electrical contacts that switch the main circuit. There are typically two types: normally open (NO) and normally closed (NC). When the relay is de-energized, the NO contacts are open, and the NC contacts are closed. When the coil is energized, the armature moves, closing the NO contacts and opening the NC contacts.
- Spring: This returns the armature to its original position when the coil is de-energized.
In essence, the small control current activates the electromagnet, which pulls the armature, which then closes (or opens) the contacts in the high-power circuit. This allows a low-current circuit (e.g., a switch on the dashboard) to control a high-current circuit (e.g., the headlights).
Pros, Cons, Use Cases, and Examples
Pros of Using Relays:
- Low Current Control: Allows low-current circuits to control high-current circuits.
- Isolation: Isolates the control circuit from the power circuit, protecting sensitive components.
- Switching Multiple Circuits: Some relays can switch multiple circuits simultaneously.
- Amplification: Can be used to amplify a signal.
Cons of Using Relays:
- Mechanical Device: Relays are mechanical devices and are subject to wear and tear.
- Relatively Slow Switching Speed: Compared to solid-state switches, relays have a relatively slow switching speed.
- Can Generate Noise: The movement of the armature can generate electrical noise.
- Bulky: Can be bulky compared to solid-state switches.
Use Cases:
- Headlights: Relays are used to switch the high-current circuit for headlights.
- Fuel Pump: A relay controls the power to the fuel pump.
- Starter Motor: A relay activates the starter motor solenoid.
- Air Conditioning Compressor: A relay controls the power to the AC compressor clutch.
- Electric Fans: Relays are used to control electric cooling fans.
Manufacturer Examples:
- Bosch: Bosch is a major manufacturer of automotive relays, known for their reliability and durability.
- Tyco Electronics (TE Connectivity): TE Connectivity offers a wide range of relays for automotive applications.
- Omron: Omron is another reputable manufacturer of automotive relays.
Real-World Insights and Recommendations
While the process of removing a relay seems straightforward, here are some real-world considerations:
- Corrosion: In harsh environments, relay sockets can corrode, making relay removal difficult. Use a contact cleaner and a small wire brush to clean the socket before attempting removal.
- Heat: Over time, heat can cause the relay plastic to become brittle, making it more prone to cracking during removal. Be extra careful in these situations.
- Relay Types: There are different types of relays (e.g., standard, mini, micro), so make sure you have the correct replacement relay. Using the wrong relay can damage your car's electrical system.
- Testing Relays: Before replacing a relay, test it to confirm that it's actually faulty. You can use a multimeter to check the coil resistance and the continuity of the contacts. A simple test involves applying voltage to the coil and listening for a click, indicating that the armature is moving.
- Preventative Maintenance: Regularly inspect your car's relays for signs of damage or corrosion. Replace any relays that show signs of wear.
Recommendation: Investing in a quality relay puller is a worthwhile investment. It will make relay removal much easier and safer, reducing the risk of damage to the relay and the socket. Furthermore, familiarize yourself with your car's electrical system. Knowing the location and function of each relay can save you time and frustration when troubleshooting electrical problems.
By understanding the role of relays and following a careful removal process, you can confidently tackle relay-related issues and keep your car running smoothly. Remember, patience and precision are your allies in the world of automotive electrical systems.