How To Remove A Relay From A Car
Relays: those little black (or sometimes colorful) boxes that play a crucial role in your car's electrical system. You might need to remove one to troubleshoot a problem, replace a faulty unit, or even for some modifications. While seemingly simple, yanking on them haphazardly can lead to damage. This article provides a comprehensive guide to safely and effectively removing relays from your car, assuming you already possess a decent understanding of basic automotive concepts.
Understanding Relays and Their Role
Before diving into the removal process, let's recap what a relay is and why it's important. A relay is essentially an electrically operated switch. It allows a low-current circuit to control a high-current circuit. Think of it as a bouncer guarding the door to a VIP room (the high-current circuit). The low-current circuit is the instruction for the bouncer to either open or close the door (the high-current circuit). This is vital in automotive systems because it protects sensitive components (like the ECU – Engine Control Unit) from being overloaded by high-current demands of things like the starter motor, headlights, fuel pump, and cooling fans.
The relay itself consists of a coil, a set of contacts (usually normally open or normally closed, or both), and an armature. When a small electrical current flows through the coil, it creates a magnetic field. This magnetic field pulls the armature, which then moves the contacts, either closing or opening the high-current circuit. When the current is removed from the coil, the magnetic field collapses, and a spring returns the armature to its original position, thus switching the high-current circuit back to its default state.
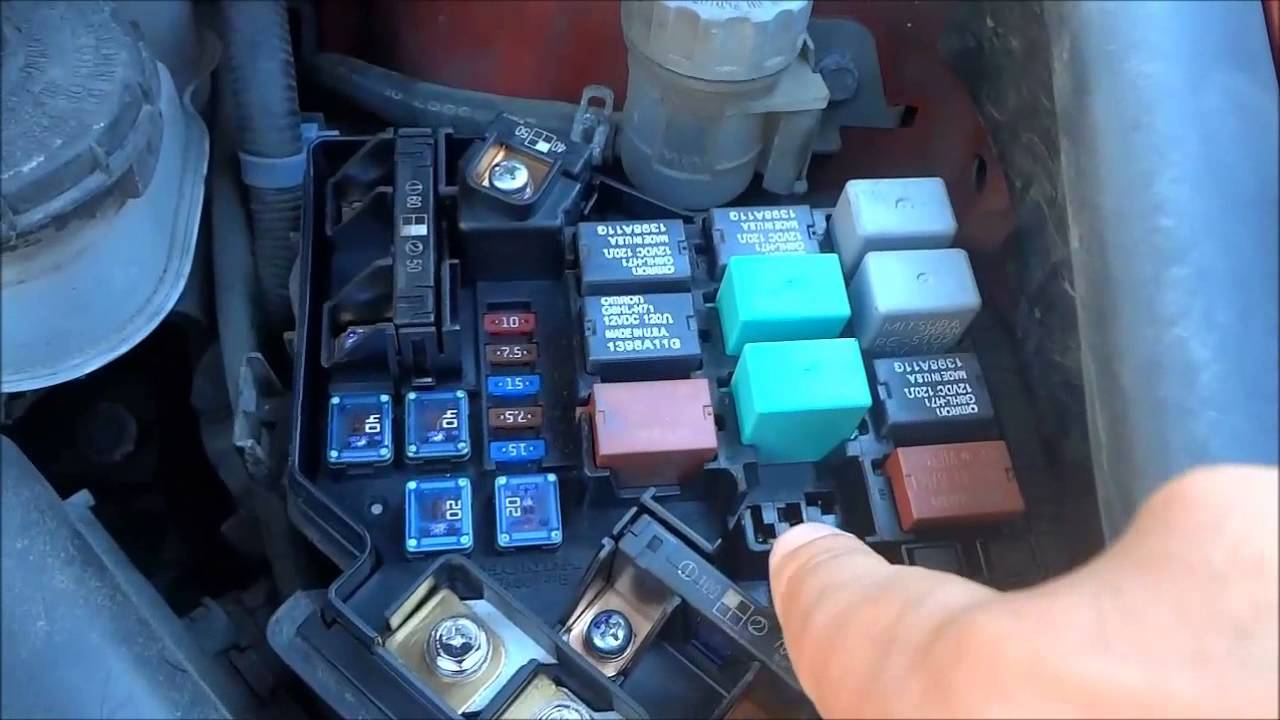
Relays are typically housed in a relay box or distribution box, often located in the engine compartment or under the dashboard. These boxes provide a convenient and organized way to manage the various electrical circuits in the vehicle. Each relay in the box is usually designated for a specific function.
The Technical Breakdown: How Relays Work in Context
To understand relay removal, it’s helpful to visualize how they integrate into the overall electrical system. Consider the headlight circuit. Without a relay, the headlight switch would need to handle the full current draw of the headlights. This would require a much larger and more robust switch, and it would also mean routing high-current wiring through the passenger compartment, which is undesirable from a safety standpoint.
With a relay, the headlight switch only needs to supply a small current to the relay's coil. This energizes the coil, which then closes the contacts, allowing battery voltage to flow directly to the headlights through heavier-gauge wiring. The relay acts as an intermediary, isolating the low-current control circuit (the headlight switch) from the high-current load (the headlights).
The wiring diagram for a typical automotive relay will show four or five terminals. The standard arrangement is: Terminal 30: Battery positive (or a fused battery positive). Terminal 85: Ground for the coil. Terminal 86: Switched positive (the low-current signal from the switch). Terminal 87: Output to the device (e.g., headlights). Terminal 87a (optional): Normally closed contact – provides an alternative circuit when the relay is not energized.
Step-by-Step Relay Removal
Now, let's get to the actual removal process. Here's a breakdown of the steps:
- Safety First: Disconnect the Negative Battery Terminal. This is absolutely crucial to prevent electrical shorts and potential damage to the vehicle's electrical system. Use a wrench to loosen the nut on the negative battery terminal and carefully remove the cable. Tuck it away so it doesn't accidentally reconnect.
- Locate the Relay. Consult your vehicle's owner's manual or a wiring diagram to identify the specific relay you need to remove. The relay box will often have a diagram printed on the inside of the lid, indicating the function of each relay. Look for the relay that corresponds to the circuit you're working on.
- Inspect the Relay Box. Check for any signs of corrosion or damage around the relay box and the surrounding wiring. This can indicate underlying electrical problems that need to be addressed.
- Use a Relay Puller (Recommended). A relay puller is a specialized tool designed to grip the relay firmly and extract it straight up from the socket. This is the preferred method because it minimizes the risk of damaging the relay or the socket. Simply slide the jaws of the puller around the relay and gently squeeze the handles to grip it. Then, pull straight up with a smooth, even motion.
- Alternative Method (Without a Relay Puller – Use with extreme caution!): If you don't have a relay puller, you can try using a pair of needle-nose pliers or a small flat-head screwdriver. However, this method requires extreme care to avoid damaging the relay or the socket. Gently pry the relay from side to side, working it loose a little at a time. Be extremely careful not to apply excessive force or twist the relay, as this can break the plastic housing or damage the pins. Never use metal tools to force the relay out.
- Inspect the Socket. Once the relay is removed, inspect the socket for any signs of corrosion, damage, or bent pins. If you find any problems, address them before installing a new relay. Use a small brush or contact cleaner to clean the socket, if necessary.
Common Issues and Maintenance Concerns
Relays, like any other component, can fail over time. Common issues include:
- Corroded Contacts: Moisture and humidity can cause corrosion on the relay's contacts, leading to poor electrical connection and intermittent operation.
- Burned-Out Coil: Overloading the circuit or prolonged use can cause the relay's coil to burn out, rendering the relay inoperative.
- Mechanical Failure: The internal mechanical components of the relay can wear out or break, preventing the relay from switching properly.
- Socket Damage: Repeated removal and installation of relays can damage the socket, leading to loose connections and unreliable operation.
Regularly inspect your relay boxes for signs of corrosion or damage. If you suspect a faulty relay, you can test it using a multimeter. Check for continuity across the coil terminals when voltage is applied. Also, check for continuity between the appropriate output terminals when the relay is energized.
Preventative maintenance includes using dielectric grease on the relay pins before installation. This helps to prevent corrosion and ensures a good electrical connection. If you live in a humid environment, consider using a weatherproof relay box.
Do’s and Don’ts / Best Practices
Here's a summary of do's and don'ts to keep in mind:
Do’s:
- Do disconnect the negative battery terminal before starting any electrical work.
- Do use a relay puller whenever possible.
- Do consult your vehicle's owner's manual or a wiring diagram to identify the correct relay.
- Do inspect the socket for damage or corrosion.
- Do use dielectric grease on the relay pins.
- Do test the relay with a multimeter if you suspect it's faulty.
Don’ts:
- Don't force the relay out of the socket.
- Don't use metal tools to pry the relay.
- Don't ignore signs of corrosion or damage.
- Don't work on the electrical system without proper knowledge or training.
- Don't install a relay with a higher or lower current rating than specified.
Conclusion
Removing a relay is generally a straightforward task, but it's essential to approach it with care and attention to detail. Using the proper tools and following the correct procedures can prevent damage to the relay, the socket, and the vehicle's electrical system. Remember to prioritize safety by disconnecting the battery before starting any electrical work. If you're unsure about any aspect of the removal process, it's always best to consult a qualified mechanic. Using a relay puller is highly recommended to avoid damaging the sensitive components.