How To Remove A Wheel Locking Nut Without The Key
Wheel locking nuts, also known as locking lug nuts, are a common theft deterrent designed to prevent your wheels and tires from being stolen. They replace one of the standard lug nuts on each wheel and require a specific key for removal. But what happens when you lose that key? Don't panic! While it's certainly inconvenient, removing a locking lug nut without the key is possible. This article will guide you through several techniques, explaining the pros, cons, and risks associated with each method.
Background: Wheel Locking Nut Design & Function
Before we dive into removal techniques, it's essential to understand how wheel locking nuts work. The principle is relatively simple: they feature a unique pattern or shape on their exterior that only a matching key can engage. This key, often referred to as a locking lug nut adapter, fits over the locking nut and allows you to apply the necessary torque to loosen or tighten it. The shapes and patterns used are typically complex and less common than standard lug nut designs, making it difficult for thieves to remove them with regular tools.
These nuts are typically made from hardened steel, often with a chrome or other protective finish. They are designed to withstand the same torque as regular lug nuts, ensuring they don't compromise the wheel's secure attachment to the vehicle. There are several different types of locking lug nuts available, including:
- Patterned Locking Nuts: These have a unique groove or ridge pattern on the outside that the key must precisely match.
- Splined Locking Nuts: These feature multiple splines, or teeth, around the circumference that interlock with the key.
- Rotating Collar Locking Nuts: These have a freely spinning outer collar that makes gripping the nut directly with tools difficult.
Technical Breakdown: Methods for Removal
Several methods can be employed to remove a wheel locking nut without the key. Each method has its advantages and disadvantages in terms of effectiveness, potential for damage, and required tools.
1. Using a Lug Nut Removal Tool (Nut Splitter)
A lug nut removal tool, often called a nut splitter or nut cracker, is a hardened steel tool designed to cut into the side of a nut, weakening it until it can be broken off. This is an aggressive method and carries a higher risk of damage to the wheel if not used carefully. However, it can be very effective.
How it works: The nut splitter is positioned around the locking nut, and a hardened steel chisel or blade is tightened against the nut's surface using a screw mechanism. As the blade is tightened, it cuts into the nut, weakening its structure. Eventually, the nut will crack, allowing it to be removed.
Pros: Can be effective on severely stuck or damaged locking nuts.
Cons: High risk of damaging the wheel, requires careful positioning, and may require multiple attempts.
Technical Considerations: When using a nut splitter, always wear safety glasses to protect your eyes from flying debris. Ensure the splitter is properly positioned to avoid damaging the wheel's lug nut seat. Apply slow, steady pressure to the screw mechanism to prevent the blade from slipping or shattering the nut unexpectedly. A small amount of penetrating oil can help the blade cut more cleanly. Be aware of the material of your wheels. Aluminum wheels are much softer than steel and are significantly more prone to damage.
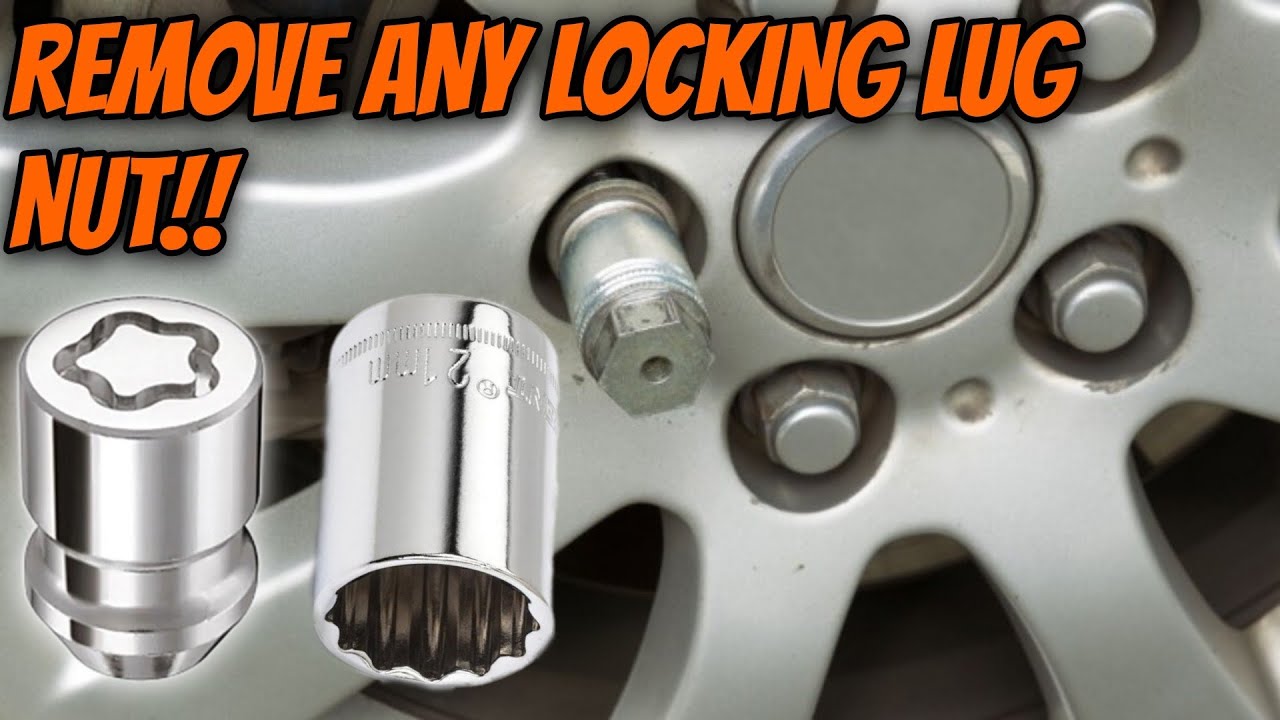
2. Using a Universal Lug Nut Removal Socket
These sockets, often marketed as "turbo sockets" or "lug nut remover sockets," are designed with a reverse thread or aggressive teeth on the inside. When hammered onto the locking nut, these features grip the outside and allow you to apply torque.
How it works: The socket is typically slightly smaller than the locking nut. It's hammered onto the nut, and the reverse threads or aggressive teeth bite into the locking nut's surface. Once firmly attached, a breaker bar or impact wrench can be used to loosen the nut.
Pros: Relatively simple to use, less likely to damage the wheel compared to a nut splitter.
Cons: May not work on all types of locking nuts, especially those with rotating collars or hardened surfaces.
Technical Considerations: Choose a socket that's slightly smaller than the locking nut to ensure a tight grip. Use a heavy hammer and apply firm, even blows to drive the socket onto the nut. Once the nut is removed, the socket will likely be stuck. You'll typically need to use a punch and hammer to drive the nut out of the socket. Wear safety glasses during this process.
3. Welding a Nut to the Locking Nut
This method involves welding a standard lug nut to the face of the locking nut. This provides a secure connection point for applying torque.
How it works: A standard lug nut with a similar thread size is cleaned and positioned flush against the locking nut. A welder is then used to create a strong, continuous weld around the circumference of the two nuts. Once the weld has cooled, a socket and breaker bar can be used to remove the now-combined nut assembly.
Pros: Highly effective, provides a strong connection for removing even the most stubborn locking nuts.
Cons: Requires welding equipment and expertise, significant risk of damaging the wheel or hub if not done properly, potential for fire.
Technical Considerations: This method should only be attempted by experienced welders. Proper preparation is crucial. Clean both the locking nut and the standard lug nut thoroughly with a wire brush to remove any rust or debris. Shield the wheel and hub from sparks and heat using a welding blanket or other protective material. Use a MIG or TIG welder with appropriate settings for welding steel. Apply a continuous, strong weld around the entire circumference of the nuts. Allow the weld to cool completely before attempting to remove the nut. Quenching the weld with water will weaken it. Ensure proper grounding to avoid damaging the vehicle's electrical system.
4. Contacting a Professional
If you're uncomfortable attempting any of these methods, or if they prove unsuccessful, the best option is to contact a professional mechanic or tire shop. They have specialized tools and experience in removing locking lug nuts without causing damage.
Pros: Safe and reliable, minimizes the risk of damage to the wheel or vehicle.
Cons: Can be more expensive than DIY methods.
Common Issues and Maintenance Concerns
Corrosion: Locking lug nuts, like regular lug nuts, are susceptible to corrosion, especially in areas with harsh winters or coastal environments. Corrosion can make removal difficult, regardless of whether you have the key or not. Regularly inspecting and cleaning your lug nuts, and applying a thin coat of anti-seize compound to the threads, can help prevent corrosion.
Over-Torquing: Over-torquing lug nuts can damage the threads on both the nut and the wheel studs. Always use a torque wrench and tighten the lug nuts to the manufacturer's specified torque value. Over-torquing a locking lug nut can also damage the key, making it difficult or impossible to use.
Lost or Damaged Key: The most common issue is losing the key. Store your key in a safe and memorable location, such as the glove compartment or the owner's manual. If the key is damaged, you may be able to order a replacement from the manufacturer, provided you have the key's identification number. It's a good practice to record that number for future use.
Do's and Don'ts / Best Practices
Do:
- Wear safety glasses when attempting any of these methods.
- Use penetrating oil to help loosen stubborn nuts.
- Start with the least aggressive method first.
- Take your time and be patient.
- Consider professional assistance if you're uncomfortable or unsuccessful.
Don't:
- Use excessive force, which can damage the wheel or hub.
- Use heat on aluminum wheels, as it can weaken the metal.
- Attempt to weld if you are not an experienced welder.
- Forget to properly torque the lug nuts after reinstalling the wheel.
- Drive the vehicle with loose lug nuts.
Conclusion and Recommendation
Removing a wheel locking nut without the key can be a challenging task, but it's certainly achievable with the right tools and techniques. The universal lug nut removal socket is generally the first method to attempt, as it presents the least risk of damage. The nut splitter can be effective but requires extreme caution. Welding is a powerful option but should only be performed by experienced welders. Ultimately, if you're unsure or uncomfortable, contacting a professional is always the best and safest option. Furthermore, always replace the locking lug nuts with standard lug nuts after removal to avoid future issues with lost keys. While they provide a deterrent, the inconvenience they cause when the key is misplaced often outweighs their security benefits for most drivers.