How To Remove Gear Shift Cover
So, you’re looking to remove your gear shift cover? Maybe you’re upgrading your interior, replacing a worn-out boot, or tackling a deeper repair within the transmission linkage. Whatever the reason, understanding how to safely and effectively remove this component is crucial to avoiding damage and ensuring a smooth workflow. This guide will walk you through the process, covering the necessary precautions and best practices to get the job done right.
Background: The Gear Shift Mechanism
Before diving into the removal procedure, let's take a moment to understand the basics of the gear shift mechanism. This mechanism is essentially the driver's interface for selecting gears within the transmission. The transmission itself is a complex assembly that uses gears of varying sizes to multiply engine torque and provide the appropriate wheel speed for different driving conditions. The gear shift lever, located in the vehicle's cabin, connects to the transmission via a linkage system. This linkage can be comprised of rods, cables, or a combination of both, depending on the vehicle's make, model, and year.
The gear shift cover, also sometimes referred to as the gear shift surround or boot, serves several important purposes:
- Aesthetic Appeal: It provides a clean and finished look to the interior, concealing the underlying mechanical components.
- Dust and Debris Protection: It helps prevent dust, dirt, and other debris from entering the cabin through the opening around the gear shift lever.
- Noise Reduction: It can contribute to reducing noise and vibration transmitted from the transmission into the cabin.
- Gear Indication: Some covers incorporate the gear shift pattern (e.g., "P, R, N, D, 2, 1" or a similar configuration for manual transmissions) to help the driver select the correct gear.
Different types of gear shift covers exist, ranging from simple rubber boots to elaborate plastic or metal consoles. Their attachment methods also vary significantly, impacting the removal procedure. Understanding these variations is key to a successful and damage-free removal.
Technical Breakdown: Removing the Gear Shift Cover
Now, let's get into the practical steps of removing the gear shift cover. Keep in mind that the exact procedure will vary based on your vehicle. Always consult your vehicle's service manual for specific instructions tailored to your make and model. However, the following steps outline a general approach applicable to most vehicles:
1. Preparation and Safety
Safety First! Before starting any work on your vehicle, ensure it is parked on a level surface, the parking brake is engaged, and the engine is turned off. Disconnect the negative (black) battery cable. This will prevent accidental electrical shorts during the removal process. Gather the necessary tools:
- Screwdrivers (Phillips head and flat head)
- Trim removal tools (plastic pry bars)
- Socket set
- Pliers (optional)
- Work gloves
- Shop towels
2. Identifying Attachment Methods
Carefully examine the gear shift cover to determine how it is attached. Common attachment methods include:
- Screws: These are often located around the perimeter of the cover, sometimes concealed beneath small plastic caps.
- Clips: Plastic clips are frequently used to secure the cover to the console or surrounding trim. These clips can be fragile and easily broken if forced.
- Snap-Fit: Some covers simply snap into place, relying on a tight friction fit to hold them in position.
- Retaining Rings or Collars: Particularly common on manual transmissions, a retaining ring or collar may secure the shift knob or boot to the lever.
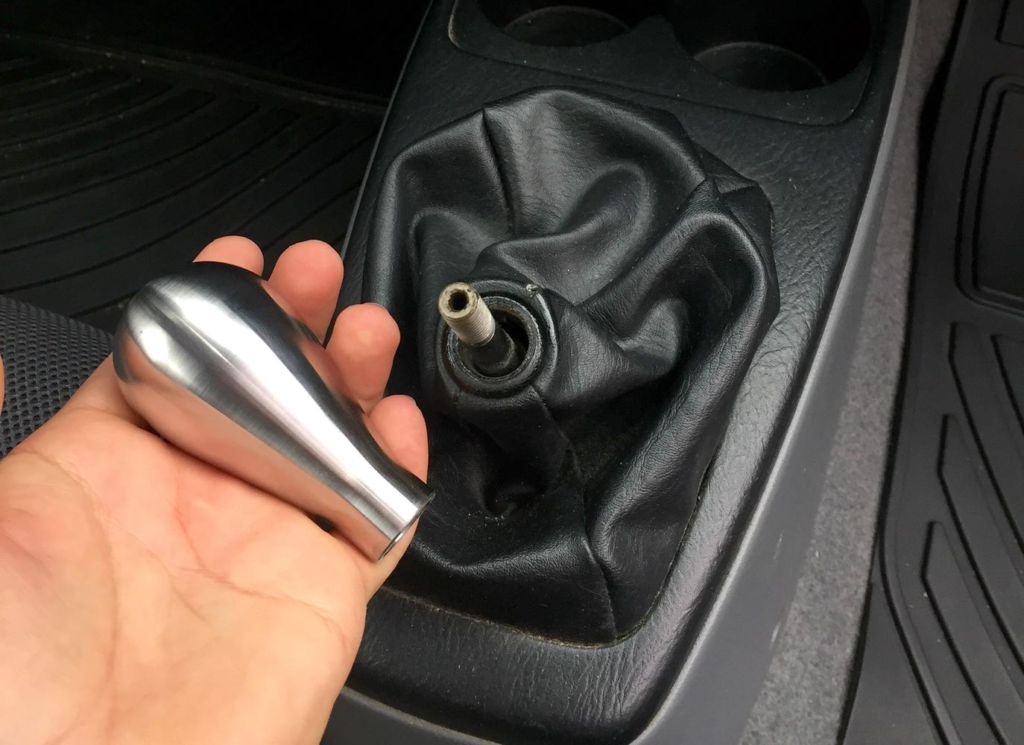
3. Removing the Shift Knob (If Necessary)
In many cases, removing the shift knob is required before the gear shift cover can be removed. The method for removing the shift knob varies widely:
- Threaded Knob: Simply unscrew the knob by turning it counterclockwise.
- Set Screw: Some knobs are secured with a small set screw, typically located on the side of the knob. Loosen the set screw with an Allen wrench or small screwdriver.
- Clip or Button: Some knobs have a clip or button that needs to be depressed or released to allow the knob to be pulled off.
Important: When removing a threaded knob, be careful not to damage the threads on the shift lever. If the knob is stuck, try using a rubber strap wrench for added grip.
4. Removing the Cover
Once the shift knob is removed (if necessary) and the attachment method identified, carefully begin removing the gear shift cover. Here's a breakdown of common scenarios:
- Screws: Remove all visible screws using the appropriate screwdriver.
- Clips: Use trim removal tools (plastic pry bars) to gently pry the cover away from the console or surrounding trim. Work your way around the perimeter of the cover, releasing the clips one at a time. Avoid using excessive force, as this can break the clips or damage the surrounding trim. If a clip is particularly stubborn, try gently wiggling the cover back and forth to help release it.
- Snap-Fit: Similar to clip removal, use trim removal tools to carefully pry the cover loose. Apply even pressure to avoid cracking the cover.
- Retaining Ring/Collar: If a retaining ring is present, use pliers or a specialized retaining ring tool to remove it. If a collar is present, it may need to be unscrewed or compressed to release the boot.
5. Disconnecting Electrical Connectors (If Applicable)
Some gear shift covers may have integrated electrical components, such as switches for overdrive or traction control. Before completely removing the cover, carefully disconnect any electrical connectors. Always disconnect the negative battery terminal before disconnecting any electrical connectors in the vehicle!
6. Final Removal and Inspection
Once all attachments and electrical connectors have been disconnected, carefully remove the gear shift cover. Inspect the cover, clips, and surrounding trim for any damage. Note the orientation and location of any components that were removed to aid in reinstallation.
Common Issues and Maintenance Concerns
Several common issues can arise during gear shift cover removal:
- Broken Clips: Plastic clips can become brittle over time and are prone to breaking, especially in older vehicles. Replacements are usually readily available online or at auto parts stores.
- Damaged Trim: Using excessive force when prying can damage the surrounding trim. Always use trim removal tools and apply even pressure.
- Stripped Screws: Overtightened or corroded screws can be difficult to remove and may strip. Use the correct size screwdriver and apply penetrating oil if necessary.
- Electrical Connector Damage: Forcing or improperly disconnecting electrical connectors can damage them. Be gentle and ensure the connector is properly disengaged before pulling it apart.
Regular maintenance can help prevent these issues. Periodically cleaning the gear shift cover and surrounding area can prevent the buildup of dirt and debris that can accelerate wear and tear. Lubricating the shift linkage can also help ensure smooth operation and reduce stress on the cover and its attachment points.
Do's and Don'ts / Best Practices
Do's:
- Do consult your vehicle's service manual for specific instructions.
- Do use the correct tools for the job.
- Do work in a well-lit area.
- Do take your time and be patient.
- Do label and organize any removed parts.
- Do disconnect the negative battery cable.
- Do wear work gloves to protect your hands.
Don'ts:
- Don't use excessive force.
- Don't pry against painted or delicate surfaces without protection.
- Don't ignore warning signs, such as resistance or unusual noises.
- Don't work on your vehicle if you are tired or distracted.
- Don't forget to reconnect electrical connectors.
- Don't overtighten screws or bolts during reinstallation.
Conclusion
Removing a gear shift cover, while seemingly simple, requires a careful and methodical approach. By understanding the underlying mechanics, identifying the attachment methods, and employing the proper tools and techniques, you can successfully remove the cover without damaging your vehicle. Always prioritize safety and consult your vehicle's service manual for specific instructions. If you encounter any difficulties or are unsure about any aspect of the procedure, it's always best to consult a qualified mechanic. With a little patience and attention to detail, you can confidently tackle this task and move forward with your project.