How To Remove Manual Window Crank Without Tool
So, you're trying to roll down your window and that good ol' manual crank just isn't cooperating? Or maybe you need to remove the door panel for a speaker upgrade or repair, but that darn window crank is stubbornly stuck in place? You're not alone! Many drivers find themselves in this situation. The problem is clear: you need to remove the manual window crank without the proper tool. The solution? A little ingenuity and household items can sometimes get the job done. Successfully removing the crank allows you to access door components for repairs, replacements, or upgrades, preventing further damage or inconvenience. A stuck window is a frustrating issue, and addressing it quickly is important.
Symptoms of a Stuck or Difficult-to-Remove Window Crank
Recognizing the symptoms of a problem is the first step to solving it. Here’s what you might be experiencing:
- Crank Won't Budge: This is the most obvious symptom. The crank spins freely, but the window doesn't move, or the crank is completely stuck.
- Crank Feels Loose or Wobbly: This indicates potential wear or damage to the retaining clip or the crank mechanism itself.
- Rattling or Clicking Noise When Turning the Crank: This could point to a dislodged or broken retaining clip.
- Difficulty Rolling Window Up or Down: You might have to use excessive force to move the window, indicating friction or obstruction within the mechanism.
- Door Panel Removal Required: You need to remove the door panel to access the window regulator, speaker, or other components, and the crank is blocking your progress.
- Visible Damage to the Crank Handle: Cracks, breaks, or other physical damage can make removal difficult.
Understanding the Root Cause: Why is the Window Crank Stuck?
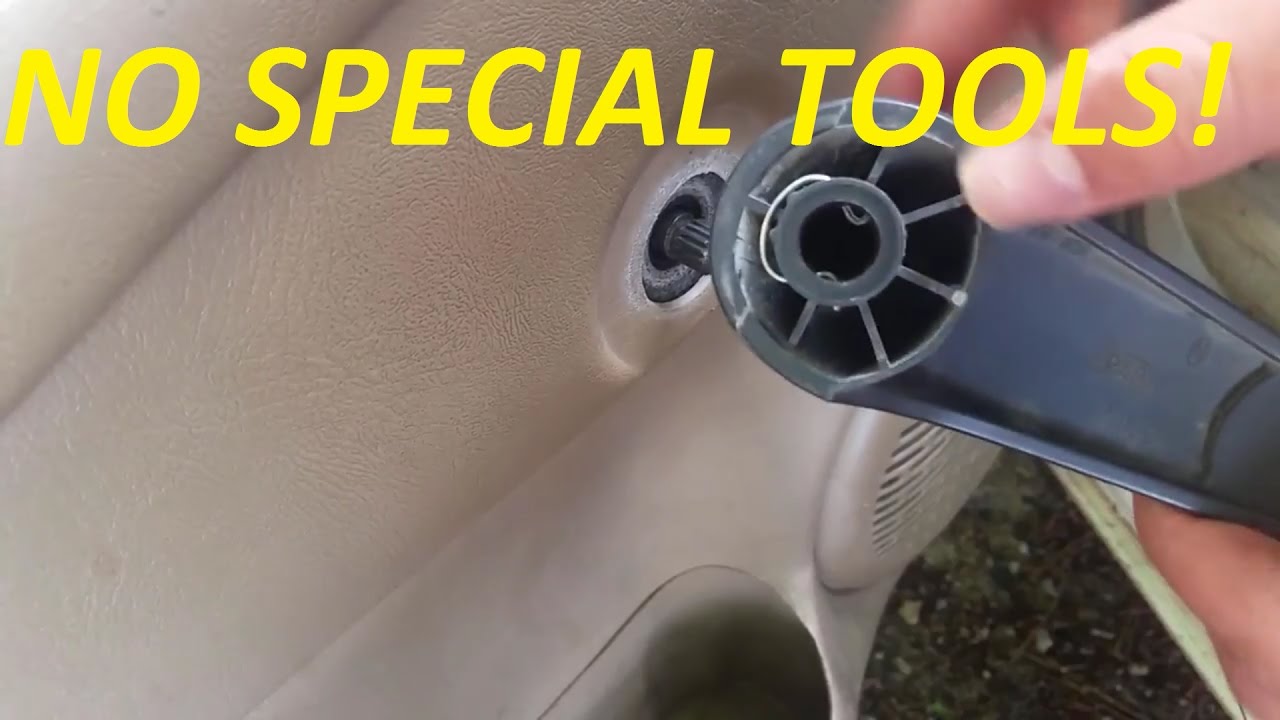
The most common culprit is the retaining clip, also known as a horseshoe clip or a C-clip. This small, springy piece of metal sits in a groove on the window regulator shaft, holding the crank handle in place. Over time, this clip can become:
- Rusty or Corroded: Exposure to moisture and temperature changes can cause corrosion, making the clip difficult to compress and remove.
- Brittle and Broken: Age and repeated use can weaken the metal, causing the clip to break into pieces.
- Dislodged or Misaligned: The clip might have partially slipped out of its groove, creating friction and preventing the crank from turning smoothly or being removed.
- Covered in Grime: Accumulated dirt and grease can make it hard to see and manipulate the clip.
Other potential causes for a stuck window crank include:
- Damage to the Crank Handle: The handle itself may be cracked or deformed, preventing it from properly engaging with the regulator shaft.
- Damage to the Window Regulator: If the regulator mechanism is damaged or seized, it can put excessive strain on the crank, making it difficult to turn or remove.
- Dried-Out Lubrication: The internal components of the window regulator rely on lubrication to operate smoothly. Over time, this lubrication can dry out, causing friction and making the crank harder to turn.
What Happens If You Ignore a Stuck Window Crank?
Ignoring a stuck window crank can lead to several problems:
- Inability to Open or Close the Window: This is the most obvious consequence, limiting ventilation and security.
- Damage to the Window Regulator: Forcing the crank can damage the regulator mechanism, leading to more extensive and costly repairs.
- Damage to the Door Panel: Attempting to pry off the crank improperly can damage the surrounding door panel.
- Security Risks: A window stuck in the open position creates a security vulnerability.
- Further Corrosion: If the retaining clip is exposed and rusty, ignoring it will only allow the corrosion to worsen.
- Increased Repair Costs: Delaying repairs can allow minor issues to escalate into major problems.
Recommended Fixes: Removing the Window Crank Without a Tool
Alright, let's get that crank off! Since you don't have a specialized window crank removal tool, we'll use a few common items you likely have at home. Safety first! Wear gloves to protect your hands, and be careful not to damage the door panel.
- Preparation:
- Gather Your Supplies: You'll need a thin, stiff cloth (like a shop rag or sturdy microfiber), a small flat-head screwdriver or putty knife (optional, for gentle prying), and potentially some lubricant like WD-40 (optional, but helpful).
- Inspect the Crank: Look closely at the base of the crank, where it meets the door panel. You should see a small gap. This is where the retaining clip is located.
- The Cloth Method: This is the most common and generally safest method.
- Thread the Cloth: Fold the cloth into a narrow strip. Carefully insert the strip into the gap between the crank handle and the door panel.
- Slide and Saw: Use a sawing motion, working the cloth behind the crank handle. The goal is to catch the retaining clip and either push it off the shaft or work it loose.
- Pull and Twist: Once you feel the clip disengage slightly, try gently pulling the crank handle while continuing to twist the cloth. Be patient; it might take a few tries.
- The Screwdriver/Putty Knife Method (Use with Caution!): This method carries a higher risk of damaging the door panel.
- Wrap the Tip: Wrap the tip of the screwdriver or putty knife with a thin piece of cloth to protect the door panel.
- Locate the Clip: Carefully insert the wrapped tip into the gap between the crank handle and the door panel. Try to locate the retaining clip.
- Gentle Prying: Gently pry the crank handle away from the door panel. Be extremely careful not to apply too much force, as this can damage the door panel or break the crank handle. If you feel significant resistance, stop and try the cloth method.
- Lubrication (Optional but Recommended):
- Apply Lubricant: If the crank is particularly stubborn, try spraying a small amount of lubricant (like WD-40) into the gap between the crank handle and the door panel. Let it sit for a few minutes to penetrate the retaining clip.
- Repeat the Process: After lubricating, try either the cloth or screwdriver method again. The lubricant can help loosen the clip and make removal easier.
- Post-Removal Inspection:
- Inspect the Clip: Once the crank is removed, inspect the retaining clip. Is it broken, rusty, or missing? If so, you'll need to replace it. Auto parts stores sell replacement clips.
- Inspect the Crank and Shaft: Check the crank handle and the regulator shaft for any signs of damage.
Important Considerations:
- Patience is Key: Don't rush the process. Forcing the crank can damage the door panel or the crank handle.
- Protect the Door Panel: Use caution to avoid scratching or damaging the door panel.
- If in Doubt, Seek Professional Help: If you're uncomfortable with any of these methods, or if you're concerned about damaging your vehicle, it's best to take it to a qualified mechanic.
Cost Estimates and Shop Advice
Removing a window crank is typically a very inexpensive task. If you're able to do it yourself, the only cost involved is for replacement retaining clips, which usually cost just a few dollars at any auto parts store.
If you decide to take your vehicle to a mechanic, the labor cost will likely depend on their hourly rate. Many shops will likely include the cost to remove the crank as part of another service, such as door panel removal or window regulator repair. A shop might charge $25-$75 for this task if it’s the only task needed, but always ask for a detailed estimate before authorizing any work.
Important Note about TSBs and Common Failures: While there isn't a specific TSB (Technical Service Bulletin) addressing *only* window crank removal, window regulator issues are a common problem across many vehicle makes and models, especially those with manual windows. You might find TSBs related to window regulator repair or replacement that indirectly cover crank removal. Also, online forums specific to your car’s make and model may have threads detailing the best techniques for removing the window crank on your specific vehicle.
Good luck with your repair! With a little patience and the right approach, you should be able to remove that stubborn window crank and get your window working again.