How To Remove The Tail Light
So, you've decided to tackle a seemingly simple automotive task: removing a tail light. Perhaps a bulb has burned out, the lens is cracked, or you're delving into some custom modifications. Whatever the reason, understanding the process and the underlying mechanics is crucial. This guide will provide a deep dive into the anatomy of a tail light assembly and equip you with the knowledge to safely and effectively remove it.
The "Why" Behind the Task: A Practical Scenario
Imagine this: You're driving home late one evening when you notice a fellow motorist flashing their lights at you. Pulling over, you discover that your right rear tail light is completely dark. A quick check confirms a blown bulb. While simply replacing the bulb is usually straightforward, sometimes accessing it requires removing the entire tail light assembly. Knowing how to do this yourself can save you time, money, and the potential hassle of a trip to the mechanic. Even if it's just for bulb replacement, familiarizing yourself with the process avoids accidental damage to surrounding body panels or the light itself. Consider it preventive maintenance education.
Anatomy of a Tail Light: More Than Just a Lightbulb
Before we get our hands dirty, let's understand what we're dealing with. A tail light assembly is more than just a bulb in a plastic housing. It's a carefully engineered system designed for visibility, safety, and durability. Key components typically include:
- Lens: This is the colored plastic cover that protects the internal components and directs the light output. Lenses are typically made from polycarbonate or acrylic, offering impact resistance and UV protection.
- Housing: The housing provides structural support for all the internal components and often serves as a mounting point to the vehicle's body. Materials vary, from durable plastics to metal alloys.
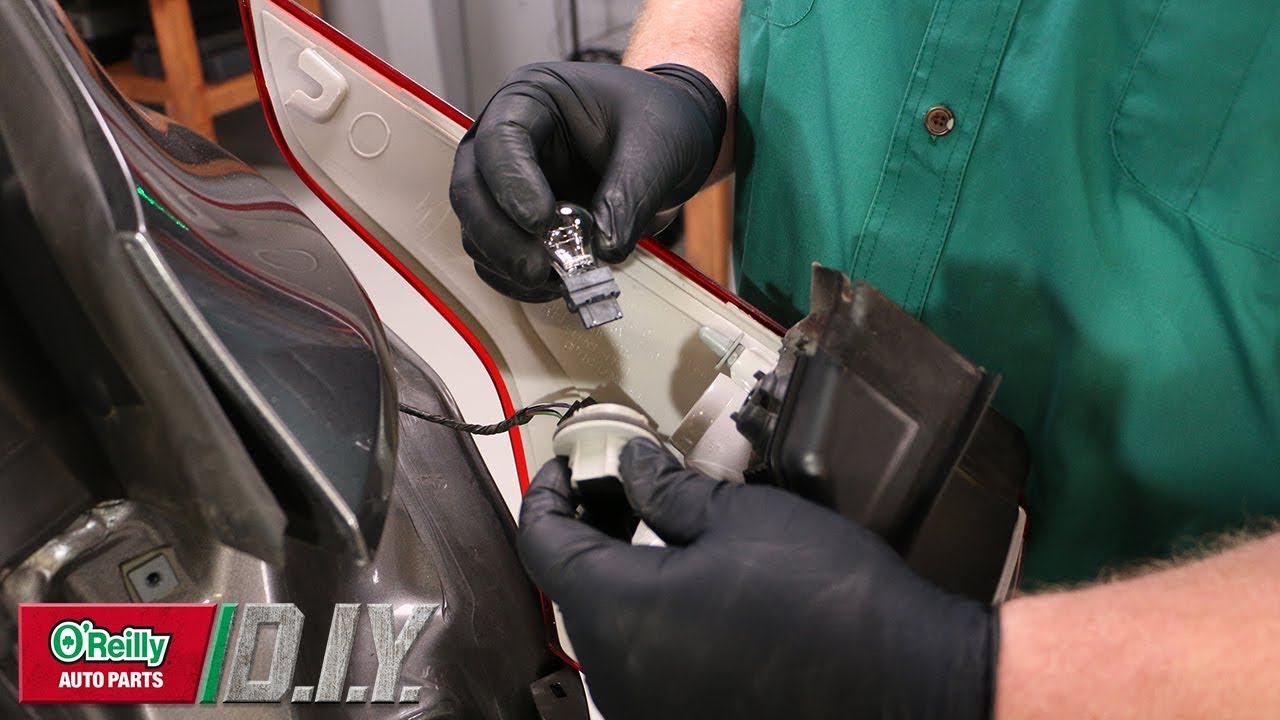
- Bulb Sockets: These hold the various bulbs (brake lights, turn signals, running lights, and sometimes reverse lights) in place and provide the electrical connection.
- Wiring Harness: This bundle of wires connects the tail light assembly to the vehicle's electrical system, providing power to the bulbs. Connectors are used for easy installation and removal.
- Reflectors: Strategically placed reflectors amplify the light output and ensure visibility even when the bulbs are not illuminated. They're crucial for passive safety.
- Seals and Gaskets: These prevent water and debris from entering the assembly, protecting the internal components from corrosion and damage.
- Mounting Hardware: Screws, bolts, clips, and brackets secure the assembly to the vehicle's body. These vary significantly depending on the vehicle's make and model.
The Mechanics of Removal: A Step-by-Step Guide
The exact removal procedure varies depending on the vehicle. However, the general principles remain the same. Here's a breakdown of a typical process:
- Safety First: Disconnect the negative terminal of the battery. This prevents accidental shorts and potential electrical damage.
- Locate the Mounting Hardware: This is the key to the entire operation. Mounting points are usually located inside the trunk, behind interior trim panels, or directly on the exterior of the vehicle. Refer to your vehicle's repair manual for specific locations.
- Access the Mounting Points: This might involve removing interior trim panels using a trim removal tool to avoid scratching or damaging the plastic. Patience is key here. For external access, you may only need a screwdriver.
- Remove the Mounting Hardware: Using the appropriate tools (screwdrivers, sockets, wrenches), carefully remove the screws, bolts, or clips securing the assembly. Keep track of all the hardware to ensure you can reassemble it correctly. Consider taking pictures as you disassemble to help with reassembly.
- Disconnect the Wiring Harness: Once the mounting hardware is removed, gently pull the tail light assembly away from the vehicle's body. Be careful not to force it, as the wiring harness is still connected. Locate the connector(s) and disconnect them. Most connectors have a locking mechanism that needs to be released before they can be separated. Again, refer to your vehicle's repair manual for specific instructions.
- Removal: With the wiring harness disconnected, the tail light assembly should now be free to remove. Carefully pull it away from the vehicle, being mindful of any remaining clips or obstructions.
Pros and Cons of DIY Tail Light Removal
Pros:
- Cost Savings: Avoid labor charges from a mechanic.
- Convenience: Perform the task at your own pace and on your own schedule.
- Knowledge and Understanding: Gain a deeper understanding of your vehicle's systems.
- Control: Ensure the job is done to your satisfaction.
Cons:
- Time Investment: It can take longer to do it yourself, especially if you're unfamiliar with the process.
- Potential for Damage: Incorrect procedures can lead to damage to the tail light assembly, wiring, or surrounding body panels.
- Tool Requirements: You'll need to have the appropriate tools on hand.
- Complexity: Some vehicles have complex tail light assemblies that are difficult to remove.
Use Cases: Beyond Bulb Replacement
While bulb replacement is a common reason for tail light removal, there are other scenarios where this knowledge comes in handy:
- Repairing a Cracked Lens: While a completely shattered lens requires replacement, minor cracks can sometimes be repaired with specialized adhesives. This requires removing the tail light for access.
- Upgrading to LED Tail Lights: Many aftermarket LED tail lights require removing the original assembly for installation.
- Custom Modifications: Enthusiasts often remove tail lights for painting, tinting, or other custom modifications.
- Accident Repair: If your vehicle has been in an accident, removing the damaged tail light is often necessary for bodywork repairs.
- Diagnosing Electrical Issues: Removing the tail light assembly can provide access to the wiring harness for testing and troubleshooting electrical problems.
Manufacturer Examples: Design Variations and Challenges
The design and complexity of tail light removal vary significantly between manufacturers and models. For instance:
- Japanese Manufacturers (Toyota, Honda, Nissan): Often feature relatively simple designs with easily accessible mounting hardware, often located behind interior trim panels in the trunk.
- European Manufacturers (BMW, Mercedes-Benz, Audi): May have more complex designs with multiple mounting points and integrated wiring harnesses. Access can sometimes be more challenging, requiring the removal of multiple trim pieces. Some models even have hidden access panels.
- American Manufacturers (Ford, Chevrolet, Dodge): Can vary widely depending on the model. Some trucks and SUVs may have externally mounted tail lights with easy access, while sedans and coupes may have more complex designs.
Knowing the general design philosophy of the manufacturer can give you a head start in understanding the removal process for your specific vehicle. Always consult your vehicle's repair manual for model-specific instructions.
Real-World Insights and Recommendations
Based on practical experience, here are some additional tips and recommendations:
- Invest in a Good Trim Removal Tool Set: These tools are specifically designed to remove interior trim panels without causing damage. They're an essential investment for anyone who works on their vehicle's interior.
- Take Pictures as You Disassemble: This is invaluable for reassembly, especially if you're working on a complex tail light assembly.
- Keep Track of All Hardware: Use labeled containers to store the screws, bolts, and clips. This prevents confusion during reassembly.
- Don't Force Anything: If something isn't coming apart easily, double-check that you've removed all the mounting hardware and that you're releasing any locking mechanisms correctly. Forcing things can lead to damage.
- Use a Multimeter to Test Electrical Connections: If you're removing the tail light to diagnose an electrical problem, use a multimeter to test the wiring and connectors for continuity and voltage.
- Apply Dielectric Grease to Connectors: Before reassembling the wiring harness, apply a small amount of dielectric grease to the connectors. This helps prevent corrosion and ensures a good electrical connection.
- Test the Tail Light After Reassembly: Before you hit the road, test all the functions of the tail light (brake lights, turn signals, running lights, and reverse lights) to ensure that everything is working properly.
Wrapping Up: Empowered Automotive DIY
Removing a tail light is a task that, while seemingly simple, involves understanding the anatomy of the assembly, the mechanics of its attachment, and the potential pitfalls along the way. By following this guide, you'll be better equipped to tackle this task safely and effectively, saving yourself time and money while gaining a deeper appreciation for the engineering that goes into your vehicle. Remember to always consult your vehicle's repair manual for specific instructions, and don't be afraid to ask for help if you get stuck. With a little patience and the right knowledge, you can confidently add this skill to your DIY automotive repertoire.