How To Repair A Door Lock Actuator
The dreaded *thwack* of the door lock button failing to elicit the expected response. We’ve all been there. You mash the button on your key fob, or the interior door switch, and instead of the satisfying *click* of the locks engaging or disengaging, you're met with an unresponsive door – or worse, an intermittent, struggling action. Chances are, your door lock actuator is on its way out. But before you rush to the mechanic, let's dive into how these actuators work, what can go wrong, and whether it's a repair you can tackle yourself.
The Case of the Lazy Latch: A Familiar Scenario
Imagine this: You're running late for a meeting, juggling your briefcase and a coffee. You hit the 'lock' button on your key fob as you walk away from your car. You *think* you heard the telltale *clunk* of the locks engaging, but something feels off. You double-check, pressing the button again, and this time, nothing. The driver's side door remains stubbornly unlocked. Now you're faced with the dilemma of manually locking the door (risking coffee spillage) or leaving your car vulnerable. This is precisely the kind of frustrating situation a failing door lock actuator can create. It's an inconvenience at best, and a security risk at worst.
Unlocking the Mystery: How Door Lock Actuators Work
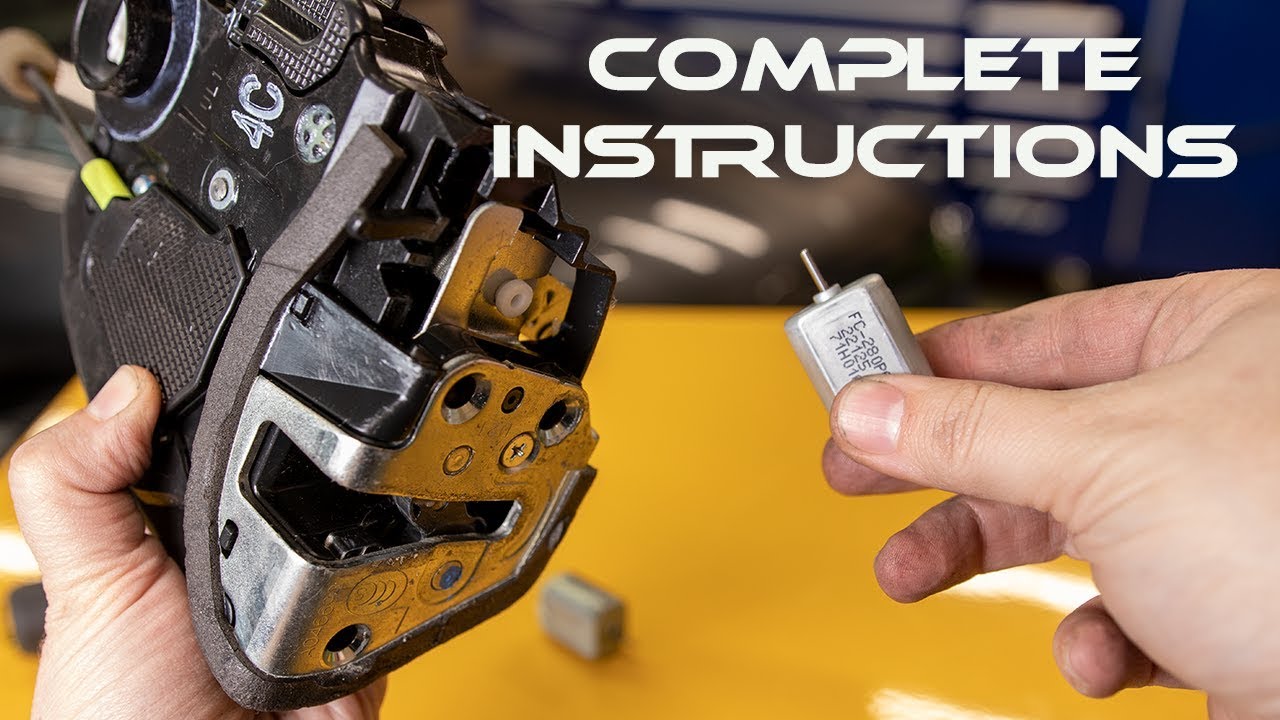
At its core, a door lock actuator is a small electric motor-driven gearbox that translates an electrical signal into the mechanical motion needed to lock or unlock your car door. Think of it as a tiny, powerful robot inside your door. When you press the lock or unlock button, you're sending an electrical signal to the actuator. This signal energizes the motor, which then spins a series of gears. These gears are carefully designed to reduce the motor's high-speed, low-torque output into a low-speed, high-torque movement. This amplified torque is then used to move a rod or lever, which in turn operates the door locking mechanism.
The actuator system usually consists of these components:
- Electric Motor: The source of the mechanical movement. Typically a small DC motor.
- Gearbox: A series of gears that reduce speed and increase torque. This is crucial for providing the force needed to move the locking mechanism.
- Linkage: A system of rods and levers that connect the gearbox to the door lock mechanism.
- Electrical Connector: Allows the actuator to receive power and control signals from the car's electrical system.
- Housing: A protective enclosure that holds all the components together and mounts to the door.
To understand the system better, visualize a power window motor. Both systems use a similar principle. A small electric motor spins, which is geared down to increase its torque output. This allows it to move the window up and down, or in the case of the actuator, lock and unlock the door.
Modern vehicles increasingly integrate the door lock actuator into a larger central locking system. In these systems, a central control module (often the body control module or BCM) manages all the door locks based on input from the key fob, interior switches, and even security system sensors. This allows for features like automatic door locking when the car reaches a certain speed, or remote locking/unlocking via a smartphone app. This integration means that diagnosing a door lock issue can sometimes be more complex than simply replacing the actuator itself, as the problem could lie with the control module or the wiring harness.
Common Culprits: What Causes Actuators to Fail?
Several factors can contribute to door lock actuator failure. Understanding these factors can help you diagnose the problem and potentially prevent future issues:
- Wear and Tear: Like any mechanical component, actuators are subject to wear and tear over time. The constant cycling of the motor and gears can eventually lead to failure.
- Electrical Issues: Corrosion, loose connections, or damaged wiring can prevent the actuator from receiving the necessary power or control signals.
- Moisture Intrusion: Water and humidity can damage the motor and gears, leading to corrosion and eventual failure. This is particularly common in vehicles that are exposed to harsh weather conditions.
- Mechanical Damage: Impacts, such as those from a car accident, can damage the actuator housing or internal components.
- Cheap Components: Some manufacturers use lower-quality components in their actuators, which can lead to premature failure. This is often the case with aftermarket replacement parts.
Actuator Adventures: Pros and Cons of DIY Repair
So, can you fix a door lock actuator yourself? The answer is: it depends. It's a moderately challenging task that requires patience, basic mechanical skills, and a few specialized tools. Let's weigh the pros and cons:
Pros:
- Cost Savings: Replacing an actuator yourself can save you a significant amount of money compared to taking it to a mechanic. You'll only need to pay for the replacement part and any tools you might need.
- Learning Experience: Repairing your car yourself is a great way to learn about how it works. You'll gain a deeper understanding of the vehicle's systems and improve your mechanical skills.
- Control Over Parts: You have the freedom to choose the quality of the replacement part. You can opt for a high-quality OEM part or a reputable aftermarket brand.
Cons:
- Time Commitment: Replacing an actuator can take several hours, depending on your experience and the complexity of the vehicle's door panel design.
- Potential for Damage: If you're not careful, you could damage the door panel, wiring, or other components during the repair process.
- Specialized Tools: You may need some specialized tools, such as trim removal tools, a multimeter, and a socket set.
- Warranty Issues: If your vehicle is still under warranty, attempting to repair the actuator yourself could void the warranty on that component.
Use Cases: A DIY repair is best suited for individuals with some mechanical experience who are comfortable working on cars. If you've replaced other car parts before, like a headlight or a spark plug, you're probably capable of tackling a door lock actuator. However, if you're completely unfamiliar with automotive repair, it's best to leave it to a professional.
Manufacturer Examples: The process of replacing a door lock actuator can vary significantly depending on the make and model of the vehicle. For example, some Ford vehicles have actuators that are relatively easy to access and replace, while some Honda vehicles require more extensive disassembly of the door panel. Always consult your vehicle's repair manual or a reputable online resource for specific instructions for your car.
Step-by-Step: A Simplified Repair Guide
While the exact steps vary, here's a general overview of the door lock actuator replacement process:
- Gather your tools and parts: You'll need a replacement actuator, trim removal tools, a socket set, a screwdriver set, a multimeter (optional), and safety glasses.
- Disconnect the battery: This is crucial to prevent electrical shorts during the repair process.
- Remove the door panel: Use trim removal tools to carefully pry off the door panel. Be mindful of any hidden screws or clips.
- Locate the actuator: The actuator is usually located inside the door, near the door lock mechanism.
- Disconnect the wiring harness: Disconnect the electrical connector from the actuator.
- Remove the actuator: Remove any screws or bolts that are holding the actuator in place.
- Install the new actuator: Install the new actuator in the reverse order of removal.
- Reconnect the wiring harness: Reconnect the electrical connector to the actuator.
- Test the actuator: Reconnect the battery and test the actuator to make sure it's working properly.
- Reinstall the door panel: Reinstall the door panel, making sure all the clips and screws are properly secured.
A Few Critical Considerations:
- Wiring inspection: Before installing the new actuator, carefully inspect the wiring harness and connector for any signs of damage or corrosion. Repair or replace any damaged wiring.
- Lubrication: Apply a small amount of lithium grease to the linkage and moving parts of the actuator to ensure smooth operation and prevent premature wear.
- Testing: After installing the new actuator, test it multiple times to ensure it's working reliably. Pay attention to the sound and feel of the locking mechanism.
Real-World Insights and Recommendations
Based on practical experience, there are a few key takeaways to consider when dealing with door lock actuators:
- Prevention is key: Regularly lubricate the door lock mechanism and hinges to prevent excessive wear and tear on the actuator.
- Quality matters: When purchasing a replacement actuator, opt for a reputable brand or an OEM part. Cheaper aftermarket parts may not last as long.
- Don't ignore the symptoms: If you notice that your door locks are becoming intermittent or sluggish, address the problem promptly. Delaying the repair can lead to further damage and more costly repairs.
- Diagnosis is crucial: Before replacing the actuator, make sure the problem isn't caused by a faulty wiring harness, a bad fuse, or a malfunctioning control module. Use a multimeter to check for voltage and continuity.
- Seek professional help when needed: If you're not comfortable working on your car or if you're unsure about the diagnosis, don't hesitate to seek professional help from a qualified mechanic.
In conclusion, while a failing door lock actuator can be a frustrating problem, understanding how these devices work and the factors that contribute to their failure can empower you to make informed decisions about repair. Whether you choose to tackle the repair yourself or leave it to a professional, remember to prioritize safety, quality, and thorough diagnosis to ensure a long-lasting solution.