How To Repair A Nail In Tire
So, you’ve picked up a nail. It happens to the best of us. Before you resign yourself to a costly tire replacement, let's walk through how to safely and effectively repair a nail puncture in your tire. This guide assumes you have a basic understanding of automotive maintenance and possess the necessary tools. We're focusing here on DIY repairs suitable for certain types of punctures, not the kind that require professional attention. Knowing when not to attempt a repair is just as crucial as knowing how.
Purpose: Understanding Tire Repair & When to DIY
Understanding the process of tire repair is valuable for several reasons. First, it empowers you to assess the severity of the damage and determine if a DIY repair is even feasible. Second, knowing the steps involved allows you to intelligently evaluate the work of a professional if you choose to go that route. Finally, successful DIY repair can save you money and time, especially if the puncture is in a safe, repairable area of the tire. But remember, safety is paramount. Improperly repaired tires can fail catastrophically, leading to accidents and injuries. This guide is for informational purposes only, and you assume all risks associated with attempting these repairs.
This article, accompanied by the detailed diagram we're providing (download link below), will outline the process from start to finish. The diagram clarifies each step visually, making the procedure easier to follow.
Key Specs and Main Parts: What You'll Need
Before diving into the process, let's gather the necessary tools and materials. These include:
- Tire repair kit: This typically includes a reaming tool (also known as a rasp or spiral probe), an insertion tool, and self-vulcanizing repair plugs (or strings).
- Pliers or vice grips: For removing the offending nail or screw.
- Tire pressure gauge: To ensure proper inflation after the repair.
- Air compressor or portable inflator: To re-inflate the tire.
- Utility knife or razor blade: To trim excess plug material.
- Safety glasses: Eye protection is essential.
- Gloves: To protect your hands.
- Wheel chocks: To prevent the vehicle from rolling.
- Jack and lug wrench: For removing the tire if necessary (strongly recommended for better access).
- Soapy water in a spray bottle: To check for leaks after the repair.
The tire repair kit is the heart of this operation. The reaming tool roughs up the inside of the puncture hole, preparing it to accept the repair plug. The insertion tool is used to push the plug into the hole. Self-vulcanizing plugs are coated with a sticky compound that bonds to the tire rubber, creating a seal. These plugs come in various sizes, so choose one appropriate for the puncture size.
Symbols: Understanding the Diagram's Visual Language
The accompanying diagram uses a visual language to represent the repair process. Here's a breakdown of common symbols you might encounter:
- Solid Lines: Typically indicate the physical shape of the tire, tools, or repair materials.
- Dashed Lines: May indicate the path of motion for a tool or the direction of force.
- Arrows: Indicate direction of movement or force. For example, arrows pointing inward might show how to insert the repair plug.
- Color Coding: Different colors might be used to distinguish between different tools or steps. For example, the reaming tool might be colored differently from the insertion tool.
- Icons: Small icons might represent specific actions, such as inflating the tire or checking for leaks.
- Cross-Sections: The diagram might include cross-sectional views of the tire to show the internal structure and how the repair plug is positioned.
Understanding these symbols allows you to interpret the diagram effectively and follow the repair steps accurately.
How It Works: The Tire Repair Process, Step-by-Step
Now, let's break down the actual repair process:
- Safety First: Park the vehicle on a level surface, engage the parking brake, and use wheel chocks to secure the wheels that are not being worked on.
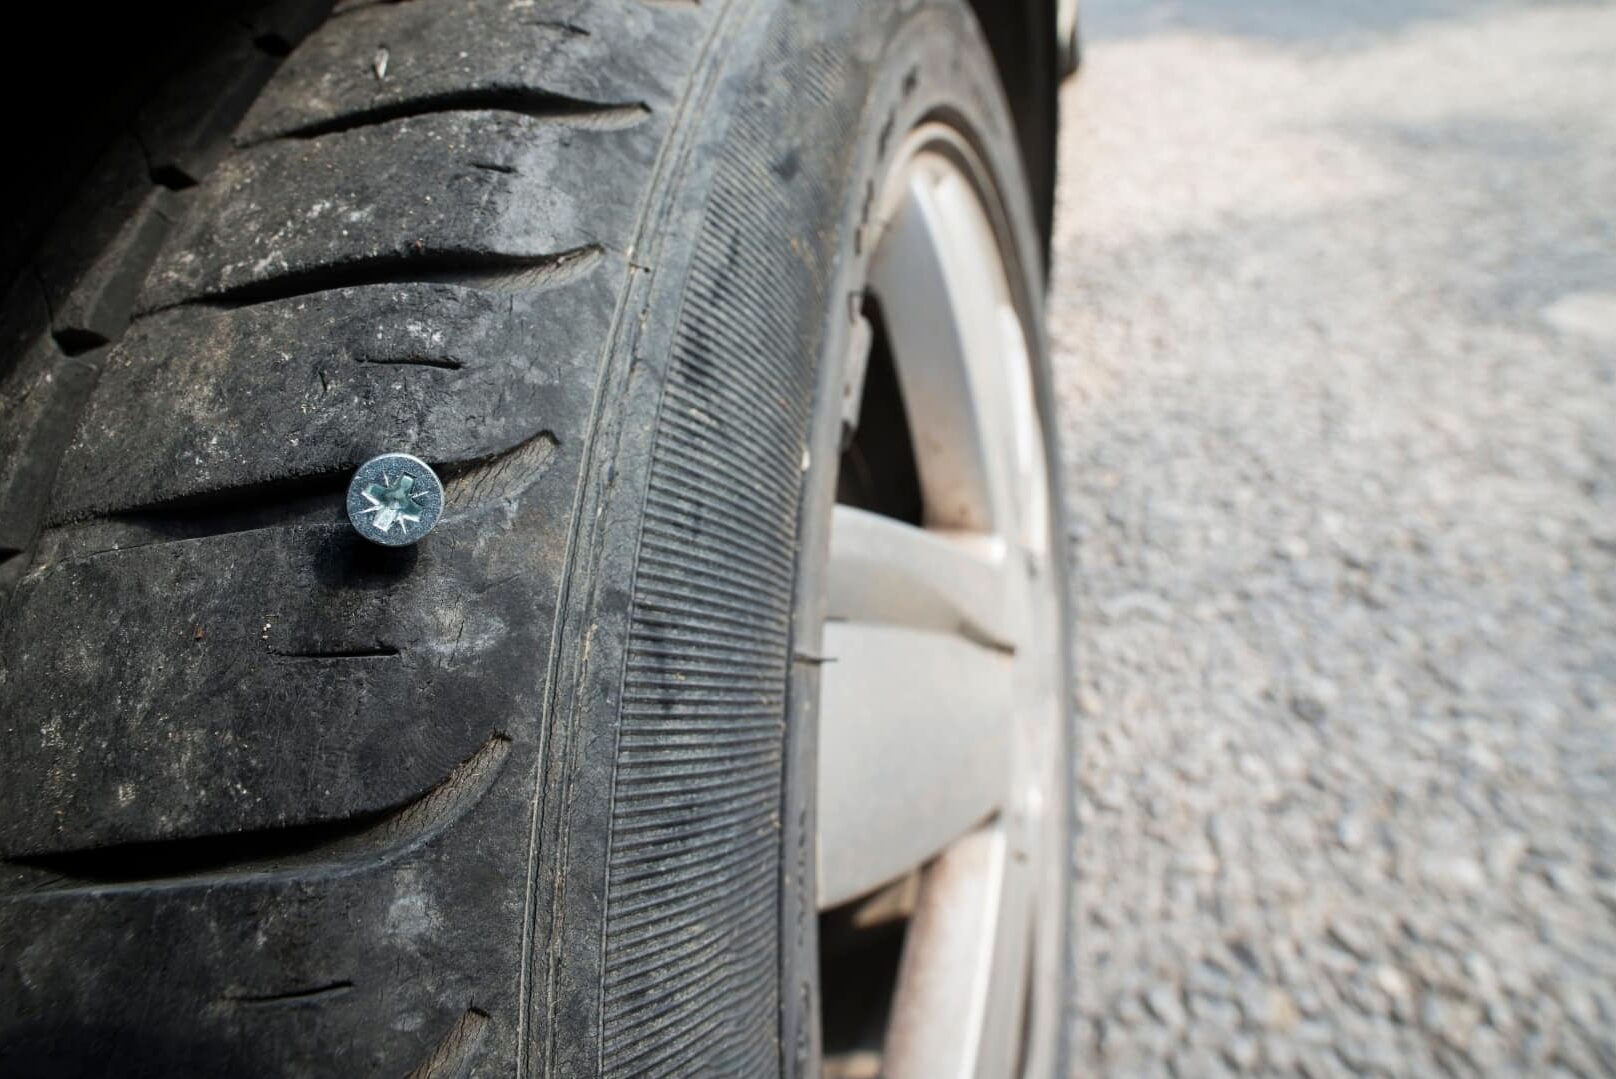
- Locate the Puncture: Examine the tire carefully to find the nail or screw. If it's not immediately visible, you can try inflating the tire slightly and listening for hissing air.
- Remove the Object: Use pliers or vice grips to carefully remove the nail or screw. Note the direction of entry, as this will be important for the repair.
- Prepare the Hole: Insert the reaming tool into the puncture hole and work it in and out to clean and enlarge the hole. This step is crucial for creating a good bond with the repair plug. Use firm, even pressure and follow the angle of the original puncture.
- Insert the Plug: Thread the self-vulcanizing plug through the eye of the insertion tool. Push the insertion tool into the prepared hole with the plug. Push firmly until about half an inch of the plug remains outside the tire.
- Remove the Insertion Tool: Pull the insertion tool straight out, leaving the plug in place. The plug should now be securely embedded in the tire.
- Trim the Excess: Use a utility knife or razor blade to trim the excess plug material, leaving about 1/4 inch protruding from the tire. Be careful not to cut the tire itself.
- Re-Inflate the Tire: Inflate the tire to the manufacturer's recommended pressure, which can be found on the tire placard (usually located on the driver's side doorjamb) or in the owner's manual.
- Check for Leaks: Spray the repaired area with soapy water. If bubbles appear, the repair is leaking and needs to be redone or professionally addressed.
Important Note: This repair method is only suitable for punctures in the tread area of the tire, away from the sidewall. Sidewall punctures are generally irreparable and require tire replacement.
Real-World Use: Basic Troubleshooting Tips
Even with careful execution, problems can arise. Here are a few troubleshooting tips:
- Plug Won't Insert: The hole may not be large enough. Re-ream the hole more aggressively.
- Repair Leaks: If the repair leaks, the plug may not be properly seated or the hole may not have been adequately prepared. Try removing the plug, re-reaming the hole, and inserting a new plug. If the leak persists, the tire may be irreparable.
- Difficulty Removing the Object: WD-40 or similar penetrating oil can help loosen rusted or corroded nails or screws.
Safety: Risky Components and Considerations
Tires are critical safety components. Here are some important safety considerations:
- Sidewall Damage: As mentioned earlier, sidewall punctures are almost always irreparable. The sidewall flexes constantly, and a repair in this area is unlikely to hold. Do not attempt to repair sidewall damage.
- Large Punctures: Punctures larger than 1/4 inch in diameter may be too large for a plug repair. Consult a professional.
- Angle of Puncture: If the nail or screw entered at a sharp angle, the repair may be difficult or impossible. The plug needs a straight path to seal properly.
- Proximity to Edge: Punctures near the edge of the tread are more prone to failure and should be professionally inspected.
- Run-Flat Tires: Special care is required for run-flat tires. Consult the manufacturer's recommendations before attempting any repairs.
- After Repair: After performing a DIY repair, it is highly recommended to have the tire professionally inspected as soon as possible. Also, monitor the tire pressure regularly.
Remember, if you are unsure about any aspect of the repair process, it is always best to consult a qualified tire professional. Your safety and the safety of others on the road depend on it.
We have the diagram file ready for you. Please click here to download. The file is in SVG format.