How To Repair The Rear Window Defroster
The rear window defroster is one of those unsung heroes of automotive comfort, especially during those frosty mornings or foggy evenings. When it fails, the frustration is palpable, impacting visibility and safety. Fortunately, repairing a rear window defroster is often within the realm of a skilled DIYer. This guide will provide you with the technical knowledge and practical steps to diagnose and repair common rear window defroster issues.
Background: The Rear Window Defroster System
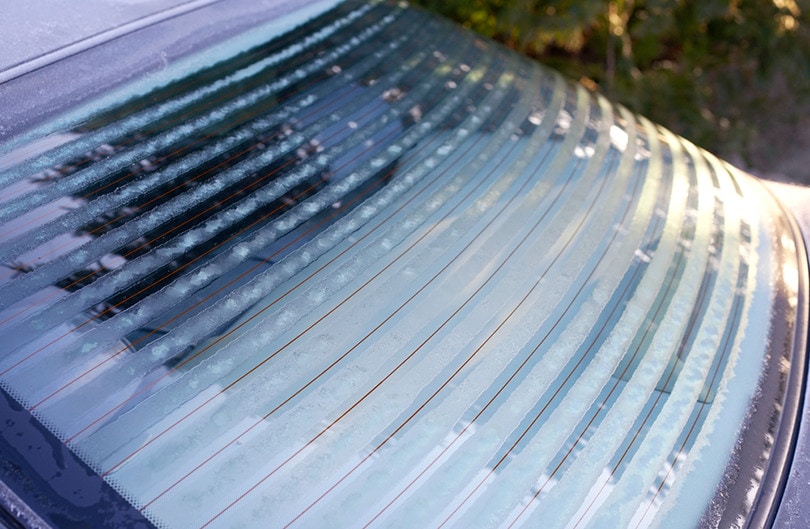
The rear window defroster system isn't overly complex. Its primary function is to rapidly clear condensation, ice, or frost from the rear window, improving visibility for the driver. It operates by generating heat through a series of thin, conductive grid lines that are bonded to the inside surface of the rear window. These grid lines act as resistors, converting electrical energy into thermal energy when a current is passed through them.
The defroster system typically consists of the following components:
- Defroster Grid Lines: The thin, electrically conductive lines on the rear window. They are usually made of a silver-based ceramic material.
- Electrical Connectors: Tabs on either side of the window where the electrical current enters and exits the grid.
- Relay: A relay acts as an electrical switch, controlled by the defroster button on your dashboard. It allows a small current from the switch to control a larger current to the defroster grid.
- Switch: The defroster button on your dashboard.
- Timer (Often Integrated): Many systems have a timer that automatically shuts off the defroster after a set period (e.g., 10-20 minutes) to prevent overheating and conserve battery power. This timer is often integrated within the Body Control Module (BCM).
- Wiring Harness: The wires that connect all the components together.
- Fuse: A fuse protects the defroster circuit from overcurrent, preventing damage to the components.
Technical Breakdown: How it Works
The defroster system operates on a simple principle: Joule heating. When you activate the defroster switch, it signals the relay to close, completing the circuit. This allows a large electrical current to flow from the vehicle's battery, through the fuse, into the wiring harness, and finally to the electrical connectors on the rear window.
The current enters the grid lines on one side of the window, travels through each line, and exits on the other side. Because the grid lines are thin and have a specific resistance, they heat up as the current passes through them. The heat generated melts the ice or evaporates the condensation on the window. The timer then automatically shuts off the system to prevent overheating and battery drain.
Here's a more detailed look at the electrical aspects:
- Voltage: The system typically operates at the vehicle's standard voltage (12V-14V DC).
- Current: The current draw can be significant, often in the range of 10-20 amps, depending on the size of the window and the design of the grid. This is why a dedicated fuse and relay are used.
- Resistance: The resistance of the grid lines is carefully designed to provide the optimal amount of heat. Each line acts as a resistor.
Diagnosis: Finding the Fault
Before attempting any repairs, a systematic diagnosis is crucial. Here's a step-by-step approach:
- Check the Fuse: This is always the first step. Locate the defroster fuse in your vehicle's fuse box (consult your owner's manual). Use a fuse tester or visually inspect the fuse to see if it's blown. Replace it with a fuse of the same amperage rating if necessary.
- Check the Relay: Locate the defroster relay (again, consult your owner's manual). You can test the relay by swapping it with a known good relay of the same type. If the defroster now works, the relay was the problem. Alternatively, you can use a multimeter to check the relay's coil resistance and continuity.
- Check Voltage at the Connectors: Use a multimeter to check for voltage at the electrical connectors on the rear window when the defroster is switched on. If you have voltage at one connector but not the other, there's likely a break in the grid lines. If you have no voltage at either connector, the problem is likely in the wiring harness or the switch.
- Inspect the Wiring Harness: Look for any obvious signs of damage to the wiring harness, such as frayed wires, loose connections, or corrosion. Pay close attention to the connectors that attach to the rear window.
- Test the Switch: You can use a multimeter to check the continuity of the defroster switch. When the switch is on, it should show continuity; when it's off, it should show no continuity.
Common Issues and Maintenance Concerns
Several common issues can plague rear window defrosters:
- Broken Grid Lines: This is the most frequent problem. Damage can occur from scraping ice, accidentally hitting the window with objects, or even from aggressive window tint removal.
- Corroded Connectors: The electrical connectors are exposed to the elements and can corrode over time, leading to poor electrical contact.
- Faulty Relay: Relays can fail due to electrical wear and tear.
- Blown Fuse: Often caused by a short circuit in the system.
- Wiring Issues: Damaged or loose wiring can interrupt the flow of electricity.
Maintenance is fairly minimal. The key is to avoid damaging the grid lines. Use a plastic scraper instead of a metal one when removing ice. Be careful when cleaning the rear window. Avoid using harsh chemicals that could damage the grid lines.
Repairing Broken Grid Lines
The good news is that broken grid lines can often be repaired using a conductive paint repair kit. These kits contain a silver-based paint that conducts electricity. The repair process involves the following steps:
- Clean the Area: Thoroughly clean the area around the break with isopropyl alcohol.
- Masking: Use masking tape to carefully mask off the area around the break, leaving only the broken section exposed. This will prevent the conductive paint from spreading to unwanted areas.
- Apply Conductive Paint: Shake the conductive paint thoroughly. Apply a thin, even coat of paint to the broken section, overlapping the intact grid lines on either side.
- Allow to Dry: Let the paint dry completely according to the manufacturer's instructions. This may take several hours.
- Remove Masking Tape: Carefully remove the masking tape.
- Test the Repair: After the paint is fully cured, test the defroster to see if the repaired grid line is now conducting electricity. You can use a multimeter to check for continuity across the repaired section.
Important Considerations:
- The success of the repair depends on the severity of the break and the quality of the conductive paint.
- Multiple coats of paint may be needed for wider breaks.
- Ensure the paint is fully dry and cured before testing the defroster.
Cleaning and Repairing Corroded Connectors
Corroded connectors can be cleaned using a wire brush or sandpaper to remove the corrosion. After cleaning, apply a small amount of dielectric grease to protect the connectors from future corrosion. If the connectors are severely corroded, they may need to be replaced.
Do's and Don'ts / Best Practices
Do's:
- Do use a multimeter to accurately diagnose electrical problems.
- Do consult your vehicle's repair manual or wiring diagram for specific information about the defroster system.
- Do use the correct amperage fuse when replacing a blown fuse.
- Do disconnect the negative battery terminal before working on the electrical system.
- Do clean surfaces thoroughly before applying conductive paint.
- Do apply dielectric grease to connectors to prevent corrosion.
Don'ts:
- Don't use a metal scraper to remove ice from the rear window.
- Don't apply excessive force to the grid lines when cleaning the window.
- Don't use harsh chemicals to clean the rear window.
- Don't attempt to repair a broken grid line if the break is too wide or complex.
- Don't use a higher amperage fuse than specified, as this could damage the electrical system.
- Don't skip steps in the diagnostic process.
Conclusion
Repairing a rear window defroster can be a rewarding DIY project. By following these steps and understanding the underlying principles, you can diagnose and repair many common issues. However, if you are uncomfortable working with electrical systems or if the problem is complex, it's always best to consult a qualified mechanic. Remember safety first and always double-check your work before reconnecting the battery and testing the system. With patience and attention to detail, you can restore your rear window defroster to its full functionality and enjoy improved visibility during those cold weather days.