How To Replace A Brake Light Bulb
Replacing a brake light bulb is a common car maintenance task that many vehicle owners can handle themselves. This article provides a comprehensive guide to help you understand the process, choose the right bulb, and safely replace your brake light bulb.
Why Replacing a Brake Light Bulb Matters
A functioning brake light is crucial for safety. It alerts drivers behind you when you're slowing down or stopping, preventing potential rear-end collisions. A burned-out brake light increases your risk of an accident, especially in low-visibility conditions like rain, fog, or at night. Furthermore, driving with a non-functioning brake light can result in a ticket in many jurisdictions. Therefore, promptly replacing a brake light bulb is not only about your safety but also about adhering to traffic laws.
Beyond safety and legality, maintaining all your vehicle's lights, including brake lights, contributes to its overall roadworthiness. A vehicle in good repair signals to other drivers that you are a responsible motorist and reduces the chances of being singled out for inspection.
How to Choose the Right Brake Light Bulb
Selecting the correct replacement bulb is essential for optimal performance and longevity. Using the wrong bulb can lead to several problems, including dim lighting, electrical issues, and premature failure. Here's a breakdown of how to choose the right one:
1. Consult Your Vehicle's Owner's Manual
The most reliable source of information is your vehicle's owner's manual. It will specify the exact bulb type required for your brake lights. Look for the section on "Bulb Replacement" or "Lighting." The manual will usually list the bulb number (e.g., 1157, 3157, 7443). Keep in mind that the same vehicle *model* in different *years* might use different bulbs. Always check your manual to be sure!
2. Check the Old Bulb
If you no longer have your owner's manual, you can examine the old bulb. Carefully remove the burned-out bulb and look for the bulb number stamped on its base. This number can then be used to find an exact replacement at an auto parts store.
3. Use Online Bulb Finders
Many auto parts retailers have online bulb finders. You simply enter your vehicle's year, make, and model, and the tool will provide a list of compatible bulbs, including the correct brake light bulb. Reputable online retailers usually ensure compatibility based on their databases.
4. Understand Bulb Types
Brake light bulbs are generally either incandescent or LED. Incandescent bulbs are the traditional type, while LEDs are a newer, more energy-efficient option. While LEDs are brighter and last longer, they may require additional modifications to your vehicle's electrical system to function correctly, especially on older vehicles. These modifications might include adding resistors to prevent hyper-flashing (rapid blinking). Always check compatibility before switching to LEDs.
5. Consider Brightness and Color
While most brake light bulbs produce a red light, variations in brightness exist. Choose a bulb that provides adequate brightness for optimal visibility. Avoid tinted or colored bulbs that may reduce visibility and violate local traffic laws.
6. Quality Matters
When buying brake light bulbs, opt for reputable brands known for their quality and reliability. While cheaper alternatives may be tempting, they often have shorter lifespans and may not provide consistent performance. Investing in a quality bulb will save you money and hassle in the long run.
How to Replace a Brake Light Bulb: A Step-by-Step Guide
Replacing a brake light bulb is a relatively straightforward process that typically takes 15-30 minutes. Here's a detailed guide:
1. Gather Your Tools and Materials
- New brake light bulb (ensure it's the correct type)
- Screwdriver (Phillips or flathead, depending on your vehicle)
- Gloves (to protect your hands)
- Clean rag
- Safety glasses (optional, but recommended)
2. Prepare the Vehicle
- Turn off the ignition.
- Engage the parking brake.
- Place wheel chocks behind the front wheels for added safety.
3. Access the Brake Light Assembly
The location of the brake light assembly varies depending on your vehicle. It's usually located inside the trunk or cargo area, behind the taillight housing. Some vehicles have access panels; others require removing the taillight housing completely.
- Inside the Trunk/Cargo Area: Look for an access panel or a plastic cover behind the taillight assembly. Remove the panel or cover by unscrewing it or releasing the clips.
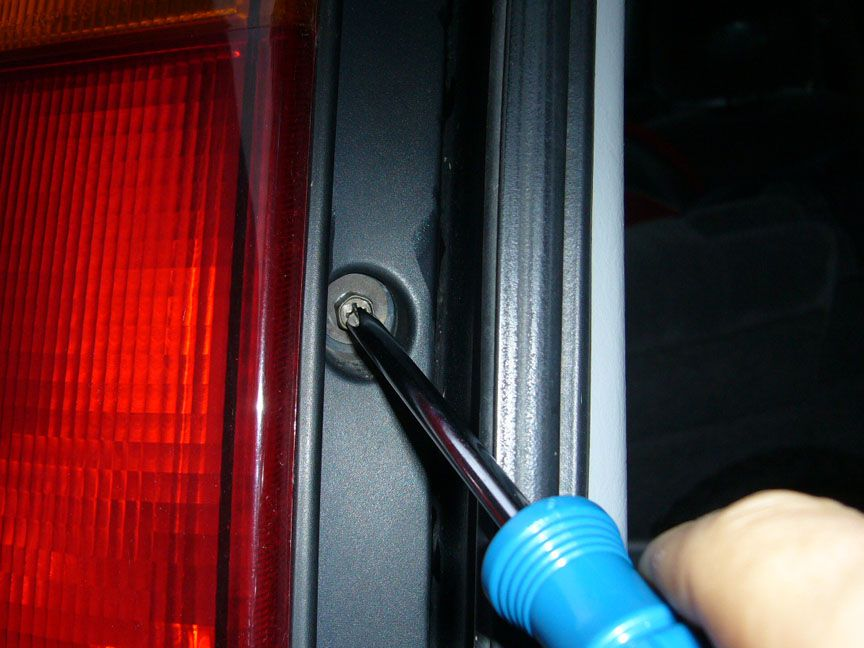
- Removing the Taillight Housing: If there's no access panel, you'll need to remove the entire taillight housing. Locate the screws or bolts holding the housing in place (usually on the exterior of the vehicle, near the taillight). Unscrew or unbolt them carefully. Once the fasteners are removed, gently pull the taillight housing away from the vehicle. Be careful not to damage any wiring.
4. Remove the Old Bulb
Once you have access to the bulb socket, carefully remove the old bulb. There are generally two types of bulb sockets:
- Twist-and-Lock Socket: Rotate the bulb socket counterclockwise (usually about a quarter turn) to release it from the taillight assembly. Gently pull the socket straight out. Then, push the old bulb into the socket and twist it counterclockwise to release it.
- Push-and-Turn Socket: Press the bulb into the socket and twist it counterclockwise to release it. Then, pull the bulb straight out.
5. Install the New Bulb
Insert the new bulb into the socket, aligning the pins or notches correctly. Ensure the bulb is securely seated. Follow the reverse of the removal procedure to secure it.
- Twist-and-Lock Socket: Align the pins or notches on the bulb with the corresponding slots in the socket. Push the bulb into the socket and twist it clockwise to lock it in place.
- Push-and-Turn Socket: Align the bulb with the socket, push it in, and twist it clockwise to lock it in place.
6. Reinstall the Bulb Socket and Taillight Assembly
Insert the bulb socket back into the taillight assembly, aligning the pins or notches correctly. Rotate the socket clockwise to lock it in place. If you removed the entire taillight housing, carefully reinstall it, making sure it's properly aligned. Secure it with the screws or bolts you removed earlier.
7. Test the New Bulb
Before closing everything up, test the new bulb to ensure it's working correctly. Turn on the ignition and have someone press the brake pedal while you observe the taillights. Make sure the new brake light illuminates brightly when the brake pedal is pressed. If it doesn't light up, double-check that the bulb is properly installed and that the correct bulb type was used. Also, check the brake light fuse in the fuse box; it might be blown.
8. Reassemble and Clean Up
If the new brake light is working properly, replace the access panel or cover, or reinstall the taillight housing completely. Double-check that everything is securely fastened. Dispose of the old bulb properly. Clean up any tools or materials you used.
Real-World Owner Experiences
Many vehicle owners have successfully replaced their own brake light bulbs. Some have shared their experiences, highlighting the importance of double-checking the bulb type and taking extra care when removing the taillight housing. One owner noted that using a small amount of dielectric grease on the bulb contacts can help prevent corrosion and ensure a good connection. Another suggested taking pictures of the disassembly process to aid in reassembly.
However, some owners have encountered challenges, such as difficulty accessing the bulb socket or dealing with corroded fasteners. In such cases, it may be necessary to seek professional assistance from a mechanic or auto electrician. But the overwhelming majority find the process simple and save a significant amount of money by doing it themselves.
Frequently Asked Questions (FAQs)
Here are some frequently asked questions about replacing brake light bulbs:
Q: How often should I replace my brake light bulbs?
A: Brake light bulbs should be replaced as soon as they burn out. Regularly checking your brake lights is essential to ensure they are functioning correctly.
Q: Can I use an LED bulb instead of an incandescent bulb?
A: Yes, you can use an LED bulb, but you may need to add resistors to prevent hyper-flashing, especially on older vehicles. Ensure the LED bulb is compatible with your vehicle's electrical system.
Q: What if my new brake light bulb doesn't work?
A: First, double-check that the bulb is properly installed and that you're using the correct bulb type. Then, check the brake light fuse in the fuse box. If the fuse is blown, replace it with a new fuse of the same amperage.
Q: Is it safe to drive with a burned-out brake light?
A: It is not safe to drive with a burned-out brake light. It increases your risk of an accident and can result in a ticket. Replace the bulb as soon as possible.
Q: How much does it cost to have a mechanic replace a brake light bulb?
A: The cost can vary depending on the mechanic and your vehicle, but it typically ranges from $20 to $50 for the bulb and labor. Doing it yourself can save you money.
Q: What if both of my brake lights are out?
A: If both brake lights are out, check the brake light fuse immediately. It's likely that the fuse has blown. If the fuse is fine, there may be a more serious electrical problem that requires professional attention.