How To Replace A Bumper On A Car
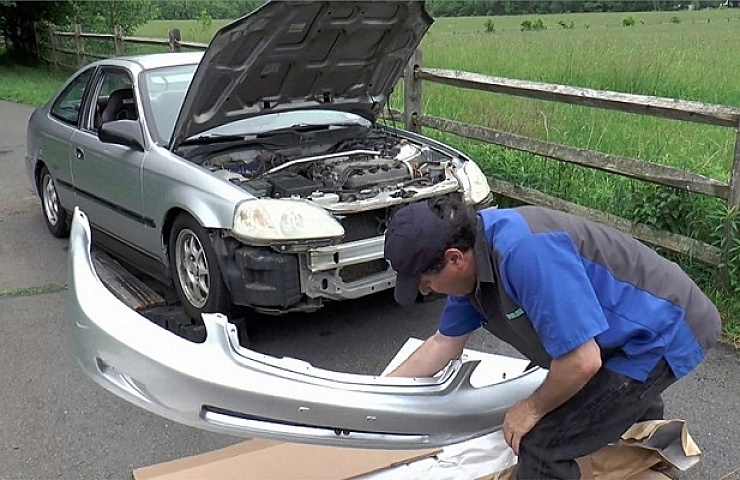
Welcome, fellow gearheads! Today, we're diving into a common yet crucial automotive task: replacing a bumper. Whether your original bumper is damaged from a minor fender-bender, succumbed to rust, or you're simply upgrading to a more aggressive aftermarket style, this guide will provide you with the knowledge and confidence to tackle the job yourself. We'll cover the essentials, from understanding the bumper's anatomy to the practical steps involved in a successful replacement.
Purpose of Understanding Bumper Replacement
Understanding how to replace a bumper goes beyond simple repairs. It empowers you to save money on labor costs, allows for personalized modifications, and deepens your understanding of vehicle construction. Knowing the components and processes involved can also be invaluable when assessing collision damage or preparing your car for sale. Think of it as a rite of passage for any serious DIY enthusiast. A diagram showing the exploded view of the bumper and its associated hardware (which we have available for download later in this article) is essential for successfully completing this job. It helps you visualize the location of each component and understand how they fit together.
Key Specs and Main Parts of a Bumper Assembly
Before we start wrenching, let's familiarize ourselves with the key components of a typical bumper assembly. Note that configurations can vary significantly between vehicle makes and models, but the core elements remain similar.
- Bumper Cover: This is the outermost, usually painted, cosmetic component. It's often made of plastic, fiberglass, or urethane for flexibility and impact absorption.
- Bumper Reinforcement Bar: Located behind the cover, this is a crucial structural element, typically made of steel or aluminum. Its primary purpose is to absorb and distribute impact energy during a collision.
- Bumper Brackets: These brackets connect the bumper assembly to the vehicle's frame. They are usually bolted or welded in place.
- Impact Absorbers: These are energy-absorbing elements, often made of foam or hydraulic cylinders, designed to further cushion impacts.
- Fasteners: This includes bolts, screws, clips, and retainers that hold all the components together. These can vary greatly in size, type, and material.
- Fog Lights/Turn Signals: Many bumpers incorporate integrated lighting components that need to be disconnected and reconnected during removal and installation.
- Parking Sensors: Modern vehicles often have parking sensors integrated into the bumper. These sensors and their wiring require careful handling.
Key specifications to consider when ordering a replacement bumper include the vehicle's make, model, and year. Also, know the specific trim level, as bumper designs can vary. If you're opting for an aftermarket bumper, ensure it's compatible with your vehicle and meets safety standards.
Understanding a Bumper Diagram: Symbols and Conventions
A detailed diagram of the bumper assembly uses standard symbols to represent different components and their relationships. Here's a breakdown of common conventions:
- Solid Lines: Indicate visible edges and outlines of components.
- Dashed Lines: Represent hidden edges or internal features.
- Arrows: Show the direction of assembly or disassembly.
- Numbers/Labels: Correspond to a parts list, identifying each component.
- Cross-hatching: Often indicates a cutaway view, revealing internal structures.
- Different Colors: May be used to distinguish between different materials or component types. For example, blue might indicate plastic, while gray indicates metal. However, color-coding is not standardized and can vary between diagrams.
- Icons: Small icons may represent specific types of fasteners, such as bolts, screws, or clips. The diagram legend should explain these icons.
Pay close attention to the diagram's key or legend, which provides crucial information about the symbols and conventions used. The diagram should show the order of assembly, the type of fasteners used, and the torque specifications for bolts and screws.
How a Bumper Works: Impact Absorption
A bumper is not just a cosmetic piece; it's a critical safety feature designed to absorb impact energy and protect the vehicle's occupants in low-speed collisions. The bumper reinforcement bar is the primary load-bearing element. During an impact, it deforms to absorb energy. Impact absorbers provide additional cushioning and energy dissipation. The bumper cover helps to distribute the force of the impact and protects the underlying components. Modern bumpers are engineered to crumple in a controlled manner, absorbing energy while minimizing damage to the vehicle's frame and passenger compartment.
Real-World Bumper Replacement: Basic Troubleshooting Tips
Even with a detailed diagram and clear instructions, you might encounter challenges during the bumper replacement process. Here are a few common issues and how to address them:
- Stuck Fasteners: Rusted or corroded bolts and screws can be difficult to remove. Penetrating oil (like PB Blaster) can help loosen them. If necessary, use a bolt extractor or a torch (with extreme caution) to remove stubborn fasteners.
- Broken Clips: Plastic clips can become brittle with age and break easily. Have a supply of replacement clips on hand. A trim removal tool is essential for safely removing clips without damaging the surrounding panels.
- Misaligned Mounting Holes: If the replacement bumper doesn't align perfectly with the mounting holes, check the bumper brackets for damage or distortion. You may need to gently adjust the brackets or the bumper itself. Don't force anything, as this could damage the bumper or the vehicle's frame.
- Sensor Issues: If your vehicle has parking sensors, ensure they are properly connected and calibrated after the bumper replacement. Use a scan tool to check for any error codes and perform the necessary recalibration procedures.
- Paint Matching: Getting an exact paint match can be challenging. Provide the paint code from your vehicle (usually found on a sticker in the door jamb or glove box) to the paint supplier. Consider having the bumper professionally painted for the best results.
Safety First: Risky Components and Precautions
Working on a vehicle involves inherent risks. Here are some safety precautions to keep in mind when replacing a bumper:
- Disconnect the Battery: Before working on any electrical components, disconnect the negative battery cable to prevent electrical shocks or damage to the vehicle's electronics.
- Support the Vehicle Properly: Use jack stands to securely support the vehicle if you need to lift it. Never work under a vehicle supported only by a jack.
- Wear Safety Glasses: Protect your eyes from flying debris.
- Use Gloves: Protect your hands from sharp edges and chemicals.
- Be Mindful of Airbags: Some vehicles have airbag sensors located in the bumper area. Exercise extreme caution when working near these sensors. Consult the vehicle's service manual for specific precautions.
- Working with a Torch: If you need to use a torch to remove rusted fasteners, take extreme precautions. Wear appropriate safety gear, have a fire extinguisher on hand, and work in a well-ventilated area. Be aware of flammable materials in the vicinity.
Additionally, be aware of any potentially sharp edges on the bumper or its mounting brackets. Use caution when handling these components to avoid cuts or scrapes.
Replacing a bumper can be a satisfying and cost-effective DIY project. By understanding the components, following safety precautions, and using a detailed diagram, you can successfully complete the job and enhance your vehicle's appearance and safety. We have a detailed exploded-view diagram showing all the components and fasteners for a generic bumper assembly. You can download the diagram [LINK TO DIAGRAM HERE] to assist you with your project.
Disclaimer: This guide provides general information and should not be considered a substitute for professional advice. Always consult the vehicle's service manual for specific instructions and safety precautions.