How To Replace A Cabin Filter
Maintaining good air quality inside your vehicle is crucial for both your comfort and health. One key component in achieving this is the cabin air filter. While often overlooked, replacing it regularly is a simple yet impactful maintenance task. This article will guide you through the process of replacing your cabin air filter, covering the technical aspects and best practices to ensure a successful DIY job.
Background: Your Vehicle's HVAC System and the Cabin Air Filter
Your car's HVAC (Heating, Ventilation, and Air Conditioning) system is designed to regulate the temperature and airflow inside the cabin. The system draws in air from the outside (or recirculates air from within), passes it through a series of components, and then distributes it through the vents. Before reaching the cabin, this incoming air encounters the cabin air filter.
The cabin air filter's primary function is to remove pollutants from the incoming air stream. These pollutants can include dust, pollen, mold spores, exhaust fumes, and other airborne particles. Without a functioning cabin air filter, these contaminants would circulate within the cabin, potentially causing allergic reactions, respiratory problems, and unpleasant odors. Some newer vehicles are equipped with cabin air filters that include activated carbon, further enhancing their filtration capabilities by adsorbing odors and volatile organic compounds (VOCs).
Technical Breakdown: How the Cabin Air Filter Works
Cabin air filters are typically constructed from a pleated, porous material, such as paper, cotton, or synthetic fibers. The pleated design increases the surface area available for filtration, maximizing the filter's efficiency. The air passes through the microscopic pores in the filter media, trapping particles larger than a certain size. This size, often measured in microns (µm), determines the filter's MERV (Minimum Efficiency Reporting Value) rating. A higher MERV rating indicates that the filter can capture smaller particles.
Different types of cabin air filters exist, each with its own advantages:
- Particulate Filters: These are the most common type and primarily filter out dust, pollen, and other solid particles.
- Combination Filters: These filters include an activated carbon layer in addition to the particulate filtration media. The activated carbon adsorbs odors, smoke, and gaseous pollutants, providing enhanced air quality.
- Electrostatic Filters: These filters use an electrostatic charge to attract and trap particles. They are generally more efficient at capturing smaller particles than traditional particulate filters.
Regardless of the type, the filter's effectiveness diminishes over time as it becomes clogged with contaminants. A severely clogged filter restricts airflow, reducing the efficiency of the HVAC system and potentially straining the blower motor. Furthermore, a dirty filter can become a breeding ground for bacteria and mold, which can further degrade air quality.
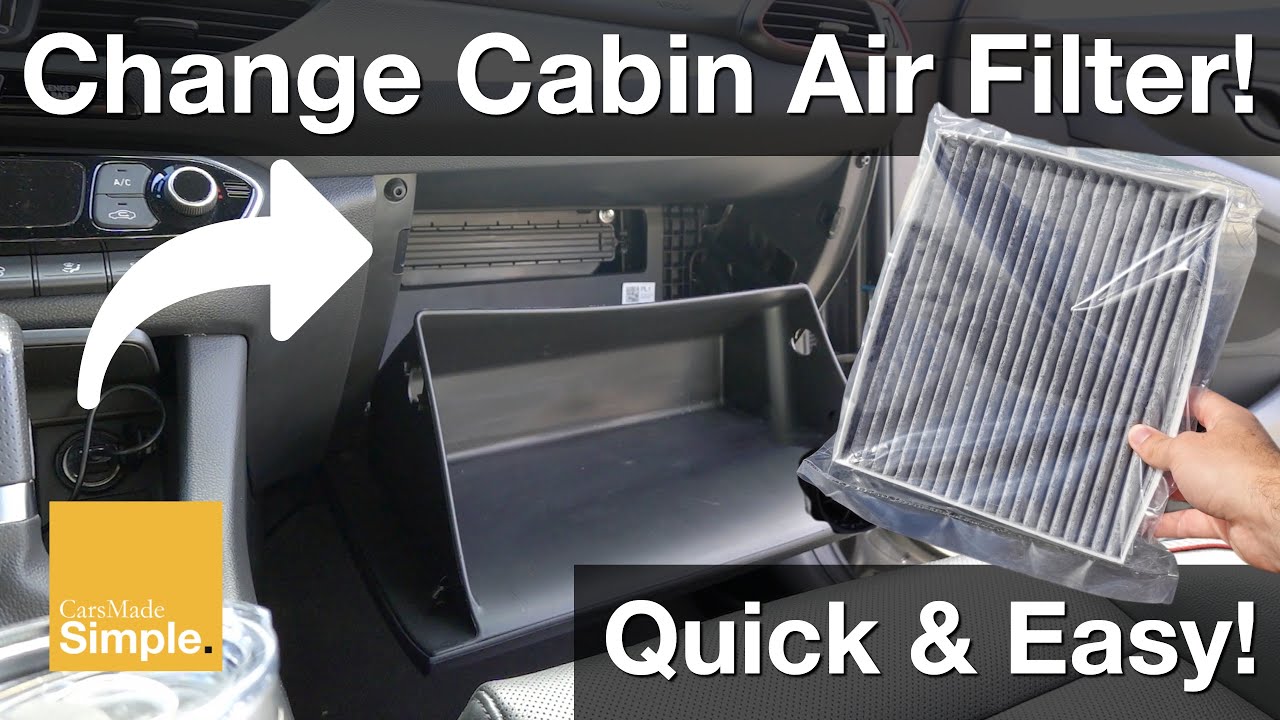
Locating and Replacing the Cabin Air Filter: A Step-by-Step Guide
The location of the cabin air filter varies depending on the vehicle make and model. However, it's most commonly found in one of the following locations:
- Behind the Glove Compartment: This is the most frequent location. You'll typically need to empty the glove compartment and then detach it from its hinges or supports to access the filter housing.
- Under the Dashboard: In some vehicles, the filter is located under the dashboard on the passenger side. You may need to remove a trim panel or access panel to reach it.
- Under the Hood: Less commonly, the filter is located under the hood, usually near the base of the windshield.
Tools Required:
- New cabin air filter (check your vehicle's owner's manual for the correct part number)
- Screwdriver (Phillips or flathead, depending on the fasteners used)
- Shop vacuum (optional, for cleaning the filter housing)
- Gloves (optional, to keep your hands clean)
Step-by-Step Instructions:
- Locate the Cabin Air Filter Housing: Consult your vehicle's owner's manual or a reliable online resource (like YouTube) to find the specific location of the cabin air filter housing for your vehicle.
- Access the Filter Housing: Depending on the location, you may need to remove the glove compartment, a trim panel, or an access panel. Use the appropriate screwdriver to remove any screws or fasteners. Be gentle and avoid forcing anything to prevent damage.
- Remove the Old Filter: Once you have access to the filter housing, you'll typically find a plastic cover or door that secures the filter in place. Release the clips or screws holding the cover and carefully remove it. Note the orientation of the old filter before removing it. This will ensure that you install the new filter in the correct direction. Usually, an arrow on the filter indicates the direction of airflow.
- Inspect the Filter Housing: Before installing the new filter, take a moment to inspect the filter housing for any debris or leaves. Use a shop vacuum to clean out the housing if necessary.
- Install the New Filter: Insert the new cabin air filter into the housing, ensuring that it's oriented correctly (matching the orientation of the old filter). Make sure it fits snugly and securely.
- Reassemble the Housing: Replace the plastic cover or door that secures the filter and fasten any clips or screws.
- Reinstall Removed Components: Reinstall the glove compartment, trim panel, or access panel that you removed in step 2. Secure them with the appropriate screws or fasteners.
Common Issues and Maintenance Concerns
One of the most common issues is installing the filter backward. This can restrict airflow and reduce the filter's effectiveness. Always double-check the orientation of the filter before installing it. Another potential problem is forcing components during removal or reinstallation. This can damage plastic parts or strip screw threads. If you encounter resistance, double-check that you've removed all necessary fasteners and that you're using the correct tools.
Maintenance Schedule:
The recommended replacement interval for cabin air filters varies depending on the vehicle and driving conditions. However, a general guideline is to replace the filter every 12,000 to 15,000 miles or once a year, whichever comes first. If you drive in dusty or polluted environments, you may need to replace the filter more frequently. A visual inspection of the filter can help you determine if it needs to be replaced sooner. If the filter is visibly dirty or clogged, it's time for a replacement.
Do's and Don'ts / Best Practices
Do's:
- Consult your vehicle's owner's manual: This is the best source of information for the specific location of the cabin air filter and the recommended replacement interval.
- Use the correct filter: Make sure you purchase a cabin air filter that is specifically designed for your vehicle make and model. Using the wrong filter can compromise its effectiveness.
- Clean the filter housing: Before installing the new filter, clean the filter housing to remove any debris or leaves.
- Note the filter's orientation: Before removing the old filter, note its orientation so you can install the new filter correctly.
- Wear gloves: This will help keep your hands clean.
Don'ts:
- Force anything: If you encounter resistance, double-check that you've removed all necessary fasteners and that you're using the correct tools.
- Install the filter backward: This can restrict airflow and reduce the filter's effectiveness.
- Ignore the maintenance schedule: Replace the cabin air filter regularly to maintain good air quality inside your vehicle.
- Use compressed air to clean a dirty filter: This can damage the filter media and reduce its effectiveness. It's always better to replace the filter.
Conclusion
Replacing your cabin air filter is a relatively simple and inexpensive maintenance task that can significantly improve the air quality inside your vehicle. By following the steps outlined in this article and adhering to the best practices, you can easily perform this task yourself and save money on labor costs. Remember to consult your vehicle's owner's manual for specific instructions and the recommended replacement interval. Regularly replacing your cabin air filter will ensure a healthier and more comfortable driving experience. So go ahead, grab a new filter and give your HVAC system a breath of fresh air!