How To Replace A Piece Of Carpet
So, you've got a stain. A burn. Maybe even a spot where Fido decided your carpet was a chew toy. Replacing a section of carpet, rather than the whole room, is a totally achievable DIY project. Think of it like patching a tire – it takes some care, the right tools, and a little bit of patience, but you can save a ton of money and keep things looking good. This guide will walk you through the process, from assessing the damage to making that patch disappear.
Purpose: Spot Repair and Cost Savings
This guide is all about spot repair. Instead of shelling out for new carpeting for an entire room, we're focusing on replacing only the damaged section. This approach has several key advantages:
- Cost-Effective: Obviously, buying a small piece of carpet is much cheaper than replacing the whole floor.
- Minimizes Disruption: No need to move all your furniture out of the room! You're only working on a small area.
- Preserves Existing Carpet: If the rest of your carpet is in good condition, why replace it? This extends the lifespan of your flooring.
- Skill Enhancement: This is a great project to build your DIY skills. It involves precise cutting, measuring, and adhesive application.
Knowing how to handle this repair also makes you a more savvy homeowner. You'll be able to address future minor damages without resorting to expensive professional services. Think of it as adding another tool to your DIY toolbox!
Key Specs and Main Parts
Before you even think about picking up a utility knife, let's talk about the key elements of this project:
- Replacement Carpet: This is crucial. Ideally, you'll have a remnant from the original installation. If not, you'll need to find a close match in color, texture, and pile height. Pile height refers to the length of the carpet fibers. Getting this right is essential for a seamless blend. You might be able to salvage carpet from an unseen area like inside a closet, as well.
- Utility Knife (with sharp blades): A dull blade is your enemy. Sharp blades are essential for clean, precise cuts.
- Seam Tape (Carpet Tape): This double-sided adhesive tape holds the patch securely in place. Make sure you get carpet tape specifically, as other types might not hold up to foot traffic.
- Tack Strip (if needed): This is the thin strip with tacks that grips the carpet around the perimeter of the room. If the damaged area is near a wall, you might need to replace a small section of tack strip.
- Knee Kicker (Optional): For larger repairs, a knee kicker helps stretch the carpet tightly and secure it to the tack strip.
- Seam Roller (Optional): A seam roller helps to press the carpet firmly into the adhesive tape, creating a strong bond.
- Measuring Tape: Precise measurements are vital for a seamless patch.
- Straight Edge (Ruler or Metal Yardstick): This helps you make straight, clean cuts.
- Vacuum Cleaner: Essential for cleaning up debris before and after the repair.
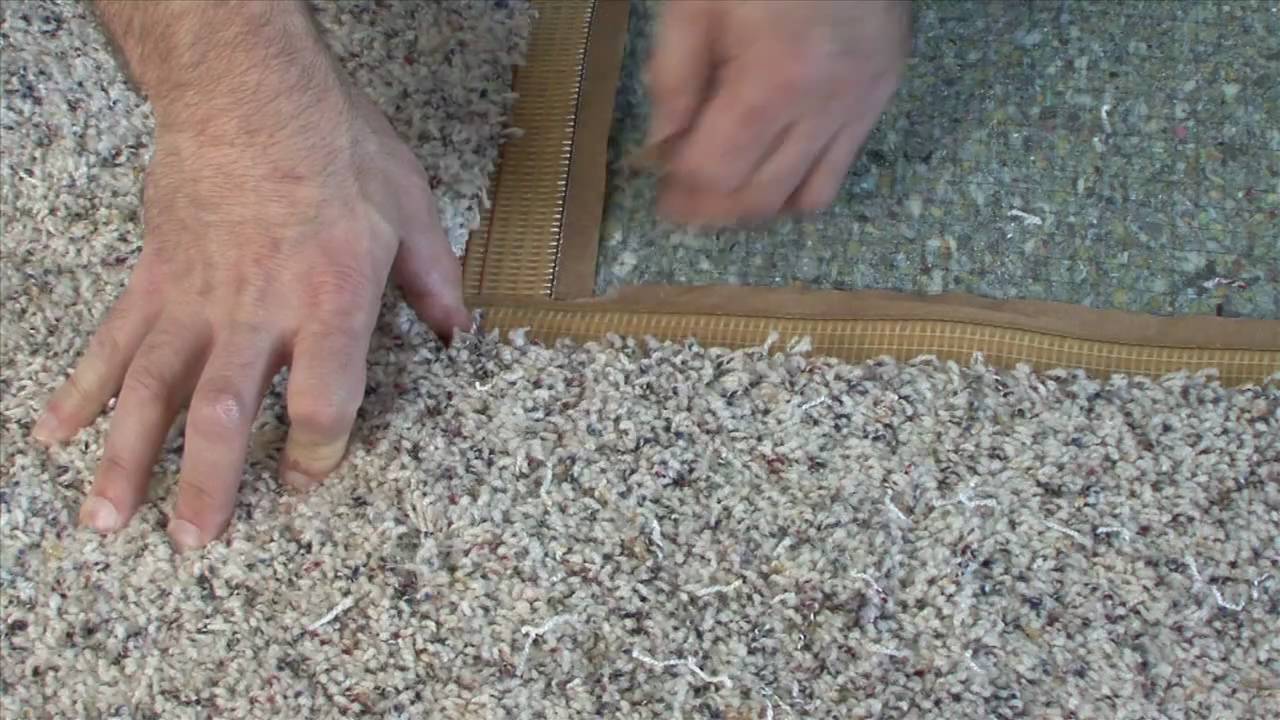
The Anatomy of a Carpet Patch: Understanding the Layers
While not exactly a diagram, understanding the layers involved helps visualize the repair process:
- Carpet Fibers (Pile): The visible, textured surface of the carpet.
- Backing: The woven or non-woven material that holds the carpet fibers in place. This is what you'll be cutting and adhering to the subfloor.
- Carpet Pad (Underlayment): The cushioning layer underneath the carpet. This provides comfort and extends the life of the carpet.
- Subfloor: The structural floor beneath the carpet and pad (typically plywood or concrete).
How It Works: The Carpet Patching Process
Here's the step-by-step process for replacing a section of carpet:
- Assess the Damage: Determine the size and shape of the damaged area. Try to cut a square or rectangle for easier patching.
- Cut Out the Damaged Section: Using your utility knife and a straight edge, carefully cut out the damaged section of carpet. Cut all the way through the backing, but avoid cutting into the carpet pad.
- Prepare the Opening: Remove any loose fibers or debris from the opening. If the carpet pad is damaged, patch it as well.
- Create the Patch Template: Place the piece you cut out over the replacement carpet. Carefully cut around it to create a perfectly sized patch. Double-check the fit before proceeding! It's better to err on the side of slightly larger, as you can always trim it down.
- Apply Seam Tape: Apply double-sided carpet tape around the perimeter of the opening in the subfloor. Also, apply tape in a grid pattern across the entire area. This ensures the patch is securely held in place.
- Install the Patch: Carefully align the replacement patch with the opening. Press it firmly onto the carpet tape, working from the center outwards to avoid wrinkles or bubbles.
- Secure the Edges: Use a seam roller (if you have one) to press the edges of the patch firmly into the tape. This creates a strong, seamless bond.
- Trim Excess Fibers: If there are any loose or uneven fibers around the edges of the patch, carefully trim them with your utility knife.
- Vacuum Thoroughly: Vacuum the area to remove any loose fibers or debris.
Real-World Use: Basic Troubleshooting Tips
Even with careful planning, things can go wrong. Here are some common problems and how to fix them:
- Patch Doesn't Match: If the color or texture is noticeably different, consider dyeing the patch or blending the edges with a carpet brush. A carpet brush can help blend the fibers and disguise the seam.
- Patch is Loose: If the patch isn't sticking properly, apply more carpet tape and press it firmly into place. You might also need to use a heavier-duty adhesive.
- Gap Around the Edges: If there's a gap between the patch and the surrounding carpet, you may have cut the patch too small. Consider adding a small sliver of carpet to fill the gap, or starting over with a slightly larger patch.
- Visible Seam: Ensure the pile direction of the replacement carpet matches the existing carpet. This makes a HUGE difference. Also, use a seam roller and a carpet brush to blend the fibers together.
- Tack Strip Issues: If the damaged area involved tack strip, make sure the new tack strip is securely nailed or glued to the subfloor, and that the tacks are facing the correct direction (towards the carpet).
Safety Considerations: Handling Sharp Objects
The biggest safety concern in this project is the utility knife. These blades are incredibly sharp, and a slip can cause a serious injury. Always follow these safety precautions:
- Use a Sharp Blade: Counterintuitively, a dull blade is *more* dangerous because it requires more force to cut.
- Cut Away from Yourself: Always direct the blade away from your body when cutting.
- Use a Straight Edge: This helps prevent the blade from slipping.
- Wear Cut-Resistant Gloves: These gloves provide an extra layer of protection for your hands.
- Dispose of Blades Properly: Wrap used blades in tape or cardboard before discarding them to prevent accidental cuts.
Additionally, be careful when working with tack strip. Those tacks are sharp! Wear gloves and use pliers to remove and install tack strip.
Conclusion
Replacing a section of carpet is a manageable DIY project that can save you money and extend the life of your flooring. With the right tools, a little patience, and attention to detail, you can achieve a seamless repair that blends seamlessly with the surrounding carpet. By following this guide, you'll be well-equipped to tackle those unsightly stains and damages like a pro.